መስከ . 09, 2024 21:50 Back to list
how to install submersible well pump
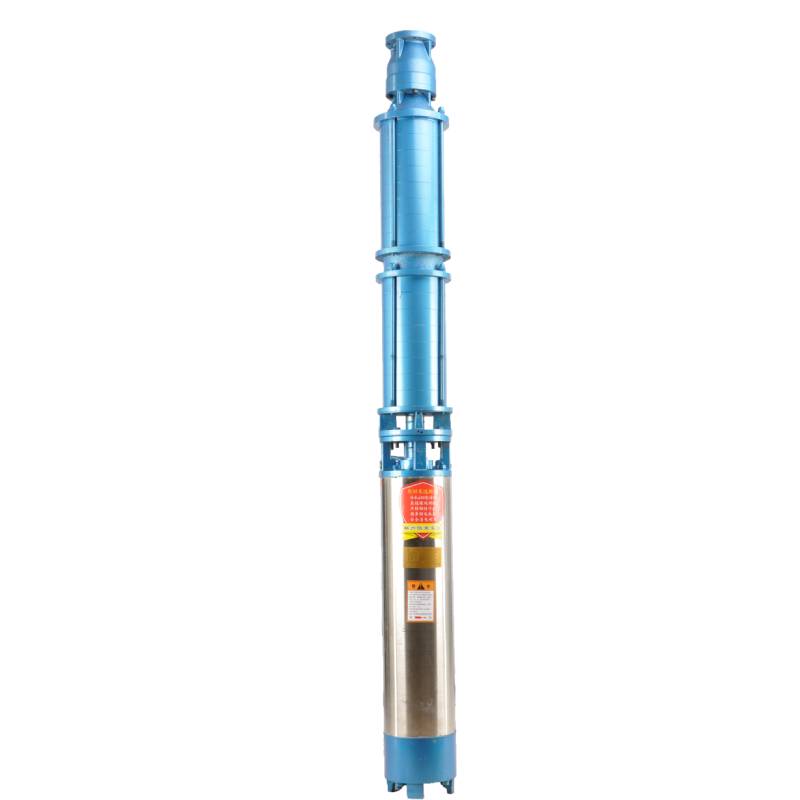
How to Install a Submersible Well Pump
Installing a submersible well pump can be a rewarding DIY project that ensures access to reliable water supply. However, it's important to approach this task with careful preparation and the proper tools. Here’s a step-by-step guide to help you through the installation process.
Step 1 Gather Necessary Tools and Materials
Before you begin, gather all the required tools. You will need a wrench set, screwdrivers, a pipe cutter, pliers, a tape measure, and a PVC pipe. Additionally, ensure you have a submersible well pump kit, which typically includes the pump, a control box, and required electrical components. Always refer to the manufacturer’s instructions for specific parts.
Step 2 Prepare the Well
Ensure that the well is clean and free from debris. Lower the casing of the well should be checked for any damages or cracks. If needed, clean the well casing and the area surrounding it to prevent contamination.
Step 3 Measure the Depth
Using a measuring tape, determine the depth of the water from the well’s surface to ensure that you purchase an appropriate-sized pump
. Most submersible well pumps are marked with the maximum depth they can operate efficiently.Step 4 Assemble the Pump
how to install submersible well pump

Follow the manufacturer’s guidance to assemble the pump. Typically, this involves attaching the intake screen and making sure all seals are tight to prevent leaks. Connect the discharge pipe, ensuring it is secure and appropriately positioned for water flow.
Step 5 Lower the Pump into the Well
Carefully lower the submersible pump into the well, guiding the electrical pump cable and discharge pipe simultaneously to prevent any tangling. Ensure that the pump is positioned at the recommended depth, usually about 10 feet above the bottom of the well.
Step 6 Connect the Electrical Components
Once the pump is securely in place, connect the electrical components. It’s crucial to follow all local electrical codes and safety guidelines. Therefore, it may be wise to consult with a qualified electrician. Use waterproof connectors to ensure that connections are secure and protected from moisture.
Step 7 Test the Installation
After everything is connected, turn on the power to the pump. Monitor the operation to ensure that the pump starts and functions properly. Check for any leaks in the piping and ensure the water is flowing freely.
Conclusion
Installing a submersible well pump requires careful planning and execution. By following these steps, you can successfully set up your pump and ensure a reliable water supply. Always refer to manufacturer specifications and guidelines for the best results, and don’t hesitate to seek professional assistance when needed. With the right approach, you can enjoy the benefits of your well for years to come.
-
Submersible Water Pump: The Efficient 'Power Pioneer' of the Underwater World
NewsJul.01,2025
-
Submersible Pond Pump: The Hidden Guardian of Water Landscape Ecology
NewsJul.01,2025
-
Stainless Well Pump: A Reliable and Durable Pumping Main Force
NewsJul.01,2025
-
Stainless Steel Submersible Pump: An Efficient and Versatile Tool for Underwater Operations
NewsJul.01,2025
-
Deep Well Submersible Pump: An Efficient 'Sucker' of Groundwater Sources
NewsJul.01,2025
-
Deep Water Well Pump: An Efficient 'Sucker' of Groundwater Sources
NewsJul.01,2025
-
 Submersible Water Pump: The Efficient 'Power Pioneer' of the Underwater WorldIn the field of hydraulic equipment, the Submersible Water Pump has become the core equipment for underwater operations and water resource transportation due to its unique design and excellent performance.Detail
 -
 Submersible Pond Pump: The Hidden Guardian of Water Landscape EcologyIn courtyard landscapes, ecological ponds, and even small-scale water conservancy projects, there is a silent yet indispensable equipment - the Submersible Pond Pump.Detail
 -
 Stainless Well Pump: A Reliable and Durable Pumping Main ForceIn the field of water resource transportation, Stainless Well Pump has become the core equipment for various pumping scenarios with its excellent performance and reliable quality.Detail
