
Feb . 16, 2025 00:16 Back to list
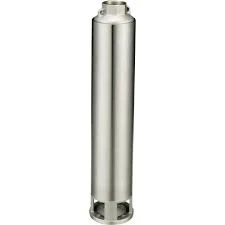
3in submersible well pump
Installing a submersible sump pump can feel like a daunting task, but with the right knowledge and tools, anyone can take on this crucial home project confidently. A sump pump system is essential for preventing basement flooding and protecting your home's foundation from water damage. The following guide will walk you through the essential steps, ensuring a successful installation that enhances your home's safety and your peace of mind.
Installing the Check Valve Installing a check valve is crucial for preventing backflow, which can cause the pump to cycle inefficiently. Cut the PVC pipe above the pump discharge and fit the valve ensuring it is oriented correctly to allow water to flow out but not back in. Use plumber's tape on the threads to ensure a watertight seal. Testing Your Installation Once installed, it’s vital to test the sump pump system. Pour water into the sump pit and observe the pump’s response. It should activate quickly and discharge water efficiently through the piping, with no leaks or backflow. If the pump does not activate, double-check the electrical connections and the float switch operation. Ongoing Maintenance Finally, maintaining your sump pump system ensures its longevity and reliability. Periodically inspect the pump for debris, test the float switch, and clean the sump pit. It’s advisable to check the manufacturer’s recommendations for specific maintenance tasks. Professional Guidance and Assurance Engaging a licensed plumber to review your installation can provide assurance and peace of mind. Their expertise can verify the installation’s integrity, ensuring the system adheres to local building codes and regulations. By following these steps, you create a robust defense against basement flooding, safeguard your home’s structural integrity, and enhance your property value. Embrace the role of a knowledgeable homeowner, taking proactive measures to protect your investment against the unpredictable elements.
Installing the Check Valve Installing a check valve is crucial for preventing backflow, which can cause the pump to cycle inefficiently. Cut the PVC pipe above the pump discharge and fit the valve ensuring it is oriented correctly to allow water to flow out but not back in. Use plumber's tape on the threads to ensure a watertight seal. Testing Your Installation Once installed, it’s vital to test the sump pump system. Pour water into the sump pit and observe the pump’s response. It should activate quickly and discharge water efficiently through the piping, with no leaks or backflow. If the pump does not activate, double-check the electrical connections and the float switch operation. Ongoing Maintenance Finally, maintaining your sump pump system ensures its longevity and reliability. Periodically inspect the pump for debris, test the float switch, and clean the sump pit. It’s advisable to check the manufacturer’s recommendations for specific maintenance tasks. Professional Guidance and Assurance Engaging a licensed plumber to review your installation can provide assurance and peace of mind. Their expertise can verify the installation’s integrity, ensuring the system adheres to local building codes and regulations. By following these steps, you create a robust defense against basement flooding, safeguard your home’s structural integrity, and enhance your property value. Embrace the role of a knowledgeable homeowner, taking proactive measures to protect your investment against the unpredictable elements.
Latest news
-
Understanding the Price Submersible Pump and Buyer Guide
NewsApr.16,2026
-
Factors Affecting the Price for Submersible Pump a Buyers Guide
NewsApr.09,2026
-
Choosing the Right Mini Submersible Fountain Pump for Optimal Water Feature Performance
NewsApr.07,2026
-
A Detailed Guide to Installing a Submersible Pump for Optimal Performance
NewsApr.04,2026
-
Comprehensive Guide on How to Test a Submersible Water Well Pump Effectively
NewsMar.31,2026
-
Learn How to Replace a Submersible Well Pump Safely and Effectively
NewsMar.28,2026
-
 Understanding the Price Submersible Pump and Buyer GuideWhen searching for the ideal water management solution, understanding the price submersible pump options is crucial for balancing budget with performance. Whether you are dealing with a flooded basement, managing agricultural irrigation, or extracting water from a deep well, the cost of a submersible pump can vary significantly based on its build quality and capacity. Investing in a high-quality pump ensures long-term reliability and reduces the frequency of expensive replacements. In this guide, we will break down the factors that influence pricing and help you make an informed decision for your specific needs.Detail
 -
 Factors Affecting the Price for Submersible Pump a Buyers GuideWhen investing in water management systems, understanding the price for submersible pump options is essential for balancing performance with budget. Whether you are managing a residential well, an industrial drainage project, or agricultural irrigation, the cost of a pump is rarely a flat fee; it is a reflection of the engineering, materials, and capacity required for your specific environment. In this guide, we will break down the factors that influence pricing and help you determine the best value for your investment to ensure long-term reliability and efficiency.Detail
 -
 Choosing the Right Mini Submersible Fountain Pump for Optimal Water Feature PerformanceCreating a beautiful and relaxing water feature doesn't have to be complicated. A mini submersible fountain pump is the heart of any indoor or outdoor fountain, and selecting the right one is crucial for optimal performance and longevity. This article will guide you through the key considerations when choosing a mini submersible fountain pump, covering types, features, applications, and how to ensure you get the perfect pump for your project. We’ll also explore how Wellpumpact can provide you with the ideal solution.Detail