Jul . 31, 2024 14:40 Back to list
A Step-by-Step Guide to Installing a Deep Well Submersible Pump for Efficient Water Access
How to Install a Deep Well Submersible Pump
Installing a deep well submersible pump can be a daunting task, but with the right guidance and preparation, it can be accomplished successfully. Deep well submersible pumps are designed to work underwater, efficiently drawing water from deep sources to where it is needed. This article outlines the key steps to install a deep well submersible pump.
1. Gather Necessary Equipment and Tools
Before starting the installation, ensure you have all the required tools and equipment. You will need - A submersible pump suitable for your well depth and water demand - PVC pipe or other appropriate piping materials - A watertight electrical cable - A heavy-duty cable splice kit - A well cap - A pressure tank (if needed) - A wrench, pliers, and other hand tools - A bucket or a rope to lower the pump.
2. Prepare the Site
Choose a suitable location for your pump. This area should be easily accessible for maintenance and inspections. Clear any debris around the well casing to ensure there is enough space for installation. Verify the depth of your well and ensure the pump you select is suitable for that depth.
3. Assemble the Pump and Accessories
Follow the manufacturer's instructions to assemble your pump. This usually involves attaching the discharge head to the pump itself. Ensure all connections are secure and watertight. If your pump requires it, install the necessary check valve to prevent backflow.
4. Attach the Electrical Cable
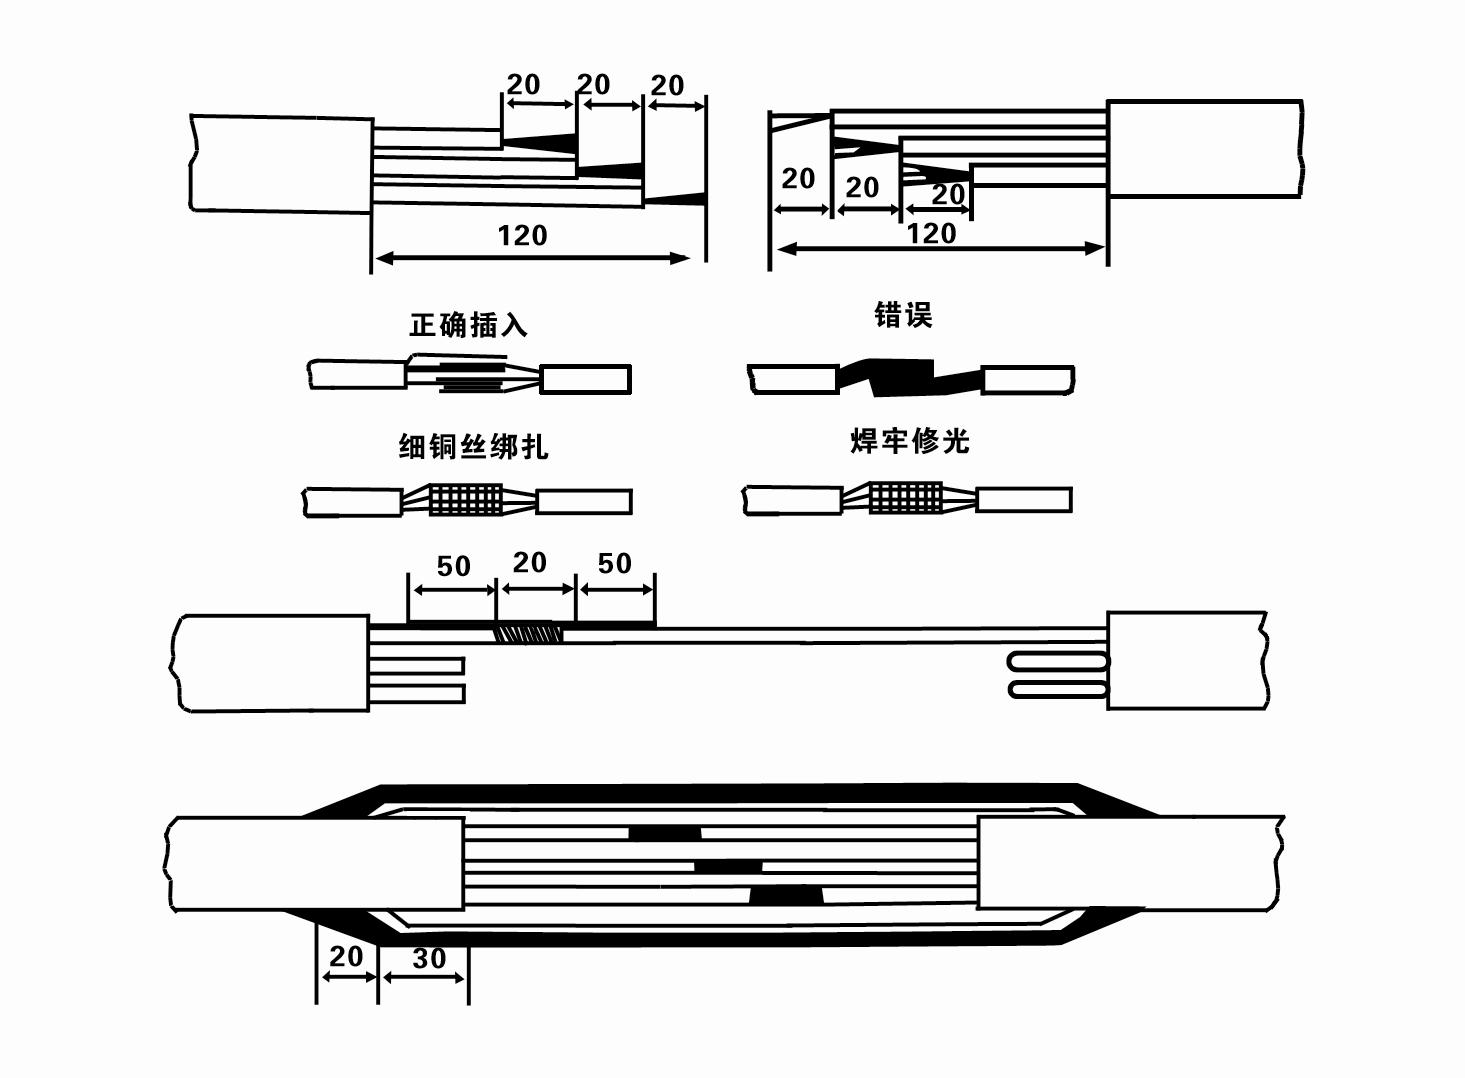
Before lowering the pump into the well, securely attach the electrical cable. This cable will provide power to the pump once submerged. Use a heavy-duty watertight splice kit to connect the electrical cable to the pump. Make sure the connection is completely waterproof to avoid electrical failures.
5. Lower the Pump into the Well
Once the pump is assembled and the electrical cable is attached, it’s time to lower it into the well. Use a sturdy rope or chain, ensuring it can support the weight of the pump. Lower the pump slowly and steadily, making sure it remains vertical to avoid damaging any components. If possible, have someone assist you during this step to guide the pump and keep it straight.
how to install a deep well submersible pump

6. Secure the Pump
After lowering the pump to the required depth, it needs to be secured. Use clamps or brackets to hold the pump in place against the well casing. This will prevent movement and reduce the risk of wear and tear on the electrical connections.
7. Connect the Discharge Pipe
Once the pump is secured, attach the discharge pipe from the pump to the surface. Ensure the pipe is properly fitted and sealed to prevent leaks. If necessary, add a section of piping to reach up to the surface. It’s essential to make sure that any fittings are tight and watertight.
8. Connect the Power Supply
With everything in place, connect the electrical cable to your power supply. Ensure the power is off while making the connection. Check the local codes and guidelines for safe installation, as improper connections can lead to hazardous situations.
9. Test the Pump
Before sealing everything off, it’s crucial to test the pump. Turn the power on and check for any leaks in the piping and electrical connections. Ensure the pump is drawing water properly and that the water is flowing as expected.
10. Finalize the Installation
Once you confirm the pump is working correctly, finalize your installation by sealing the top of the well with a well cap. This will protect your system from contaminants and ensure safety.
Conclusion
Installing a deep well submersible pump requires careful planning, attention to detail, and thorough testing. By following these steps, you can ensure a successful installation that provides reliable access to groundwater for your needs. Always remember to adhere to local regulations and consider hiring a professional if you feel uncertain about any part of the installation process.
-
Submersible Water Pump: The Efficient 'Power Pioneer' of the Underwater World
NewsJul.01,2025
-
Submersible Pond Pump: The Hidden Guardian of Water Landscape Ecology
NewsJul.01,2025
-
Stainless Well Pump: A Reliable and Durable Pumping Main Force
NewsJul.01,2025
-
Stainless Steel Submersible Pump: An Efficient and Versatile Tool for Underwater Operations
NewsJul.01,2025
-
Deep Well Submersible Pump: An Efficient 'Sucker' of Groundwater Sources
NewsJul.01,2025
-
Deep Water Well Pump: An Efficient 'Sucker' of Groundwater Sources
NewsJul.01,2025
-
 Submersible Water Pump: The Efficient 'Power Pioneer' of the Underwater WorldIn the field of hydraulic equipment, the Submersible Water Pump has become the core equipment for underwater operations and water resource transportation due to its unique design and excellent performance.Detail
 -
 Submersible Pond Pump: The Hidden Guardian of Water Landscape EcologyIn courtyard landscapes, ecological ponds, and even small-scale water conservancy projects, there is a silent yet indispensable equipment - the Submersible Pond Pump.Detail
 -
 Stainless Well Pump: A Reliable and Durable Pumping Main ForceIn the field of water resource transportation, Stainless Well Pump has become the core equipment for various pumping scenarios with its excellent performance and reliable quality.Detail
