Aug . 31, 2024 11:26 Back to list
changing a submersible well pump
Changing a Submersible Well Pump A Step-by-Step Guide
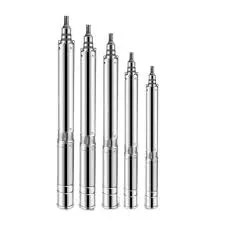
Changing a submersible well pump can seem daunting, but with the right tools and knowledge, it can be a manageable task. A submersible well pump is designed to be submerged in water, pushing it to the surface for household or agricultural use. Over time, these pumps can wear out or fail due to various reasons, including mineral buildup, corrosion, or mechanical failure. Here’s a step-by-step guide to help you change your submersible well pump effectively.
Step 1 Gather Your Tools and Materials
Before starting the replacement, ensure you have all the necessary tools. You will need a wrench set, pliers, a screwdriver, a bucket for water, a pipe wrench, safety glasses, and gloves. Additionally, have your new pump ready for installation, along with any needed fittings or connectors.
Step 2 Turn Off the Power Supply
Safety should always be your first priority. Begin by turning off the power supply to the well pump at the circuit breaker. This will prevent any accidental activation during the replacement process.
Step 3 Remove the Well Cap
Next, access the well by removing the well cap. This usually involves unscrewing a few bolts. Be cautious of any debris that may fall into the well during this time.
Step 4 Disconnect the Pump Wiring
Carefully disconnect the electrical wires connected to the old pump. It’s essential to label the wires to ensure you know where they go when connecting the new pump. Use wire nuts to secure the ends temporarily.
changing a submersible well pump

Step 5 Pull Out the Old Pump
Using a pipe wrench, loosen the fittings connecting the pump to the discharge pipe. Once loosened, you can attach a lifting system or a cable to the pump and pull it out of the well gently. Make sure to do this slowly to avoid damaging the pump or the well casing.
Step 6 Install the New Pump
Once the old pump is out, it’s time to install the new one. Lower the new submersible pump into the well while ensuring it hangs straight. Reattach the discharge pipe and tighten the fittings securely.
Step 7 Reconnect the Wiring
Follow the labels you made earlier to reconnect the electrical wires to the new pump. Ensure that all connections are tight and secure to prevent any electrical issues.
Step 8 Test the New Pump
Finally, replace the well cap and restore power to the pump at the circuit breaker. Turn on the water supply and check for leaks at the fittings. Observe the pump in action to confirm that it’s operating correctly.
Changing a submersible well pump can be a straightforward process when you follow these steps. Regular maintenance and timely replacement will ensure you enjoy a reliable water supply for years to come.
-
Submersible Water Pump: The Efficient 'Power Pioneer' of the Underwater World
NewsJul.01,2025
-
Submersible Pond Pump: The Hidden Guardian of Water Landscape Ecology
NewsJul.01,2025
-
Stainless Well Pump: A Reliable and Durable Pumping Main Force
NewsJul.01,2025
-
Stainless Steel Submersible Pump: An Efficient and Versatile Tool for Underwater Operations
NewsJul.01,2025
-
Deep Well Submersible Pump: An Efficient 'Sucker' of Groundwater Sources
NewsJul.01,2025
-
Deep Water Well Pump: An Efficient 'Sucker' of Groundwater Sources
NewsJul.01,2025
-
 Submersible Water Pump: The Efficient 'Power Pioneer' of the Underwater WorldIn the field of hydraulic equipment, the Submersible Water Pump has become the core equipment for underwater operations and water resource transportation due to its unique design and excellent performance.Detail
 -
 Submersible Pond Pump: The Hidden Guardian of Water Landscape EcologyIn courtyard landscapes, ecological ponds, and even small-scale water conservancy projects, there is a silent yet indispensable equipment - the Submersible Pond Pump.Detail
 -
 Stainless Well Pump: A Reliable and Durable Pumping Main ForceIn the field of water resource transportation, Stainless Well Pump has become the core equipment for various pumping scenarios with its excellent performance and reliable quality.Detail
