Dec . 11, 2024 04:29 Back to list
Method for Safely Extracting Deep Well Submersible Pumps from Water Sources
Deep Well Submersible Pump Removal A Comprehensive Guide
Deep well submersible pumps are an essential component in many water supply and irrigation systems. Designed to lift water from deep underground, these pumps operate submerged in the well, which maximizes efficiency and minimizes the risk of cavitation. However, there are times when a deep well submersible pump may need to be removed for maintenance, replacement, or repairs. This article will outline the essential steps and considerations for safely and effectively removing a deep well submersible pump.
Understanding the Pump System
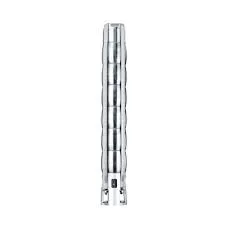
Before initiating the removal process, it is crucial to understand the pump system and its components. A submersible pump is typically comprised of the pump itself, a motor, and several other parts, including a check valve and discharge pipe. Knowing how these components function and are connected will facilitate a smoother removal process.
Safety First Preparing for Removal
Safety is paramount when dealing with any electrical or mechanical systems. Start by disconnecting the power supply to the pump. This not only prevents electrical hazards but also ensures that the pump will not accidentally restart during the removal process. It is advisable to notify any personnel affected by the water supply disruption to prevent any undue inconvenience.
Next, gather the necessary tools and equipment. Common tools required for this task may include a pipe wrench, a hoist or winch, sockets, a screwdriver set, and safety gear such as gloves and safety glasses. Depending on the pump's depth and weight, additional equipment may be needed to lift the pump from the well.
Step-by-Step Removal Process
2. Remove the Discharge Head The discharge head is the top part of the well casing that connects the pump to the surface piping system. Unscrew and detach it using a wrench. Take care to keep track of all nuts and bolts for reassembly if necessary.
deep well submersible pump removal

3. Detach the Pump from the Discharge Pipe After removing the discharge head, you will need to detach the pump from the discharge pipe. Loosen the bolts or connectors holding these components together.
4. Prepare for Lifting If the pump is significantly deep, rigging a hoist or winch system may be necessary. Ensure that the equipment is securely attached to the pump and positioned to allow for a vertical lift.
5. Lift the Pump Carefully begin to lift the pump out of the well. Maintain an even and steady pace—jerky movements can damage the pump or cause it to fall back into the well. If the pump is heavy, enlist the assistance of additional personnel for safety.
6. Inspect and Maintain Once the pump is out of the well, conduct a thorough inspection. Look for signs of wear and tear, corrosion, or any other issues that may have prompted the removal. This is also an opportune moment to perform necessary maintenance, such as cleaning or replacing worn components.
7. Store or Replace the Pump Depending on your findings from the inspection, you might decide to replace the pump or store it for repairs. If replacing, ensure the new pump matches the specifications required for your water system.
Final Considerations
After the pump has been removed and either serviced or replaced, the reinstallation process follows similar steps in reverse. For those unaccustomed to working with submersible pumps, consulting the manufacturer’s guidelines can provide specific instructions tailored to your pump model.
Conclusion
Removing a deep well submersible pump requires careful planning, an understanding of the pump system, and strict adherence to safety protocols. Following the outlined steps can help ensure the process proceeds smoothly, thereby minimizing downtime in water supply and maintaining system efficiency. Whether for routine maintenance or unexpected repairs, knowing how to handle the removal process is an invaluable skill for those involved in water resource management and maintenance.
-
Submersible Water Pump: The Efficient 'Power Pioneer' of the Underwater World
NewsJul.01,2025
-
Submersible Pond Pump: The Hidden Guardian of Water Landscape Ecology
NewsJul.01,2025
-
Stainless Well Pump: A Reliable and Durable Pumping Main Force
NewsJul.01,2025
-
Stainless Steel Submersible Pump: An Efficient and Versatile Tool for Underwater Operations
NewsJul.01,2025
-
Deep Well Submersible Pump: An Efficient 'Sucker' of Groundwater Sources
NewsJul.01,2025
-
Deep Water Well Pump: An Efficient 'Sucker' of Groundwater Sources
NewsJul.01,2025
-
 Submersible Water Pump: The Efficient 'Power Pioneer' of the Underwater WorldIn the field of hydraulic equipment, the Submersible Water Pump has become the core equipment for underwater operations and water resource transportation due to its unique design and excellent performance.Detail
 -
 Submersible Pond Pump: The Hidden Guardian of Water Landscape EcologyIn courtyard landscapes, ecological ponds, and even small-scale water conservancy projects, there is a silent yet indispensable equipment - the Submersible Pond Pump.Detail
 -
 Stainless Well Pump: A Reliable and Durable Pumping Main ForceIn the field of water resource transportation, Stainless Well Pump has become the core equipment for various pumping scenarios with its excellent performance and reliable quality.Detail
