Nov . 30, 2024 11:09 Back to list
Wiring Techniques for Deep Well Submersible Pump Systems and Installation Guidelines
Understanding Deep Well Submersible Pump Wiring
Deep well submersible pumps are essential devices that facilitate the extraction of water from underground aquifers. Used in a variety of applications—ranging from residential water supply to agricultural irrigation—these pumps operate submerged in water, relying on specialized wiring to function efficiently and effectively. Understanding the wiring of deep well submersible pumps is crucial for proper installation, maintenance, and troubleshooting.
Components of Deep Well Submersible Pumps
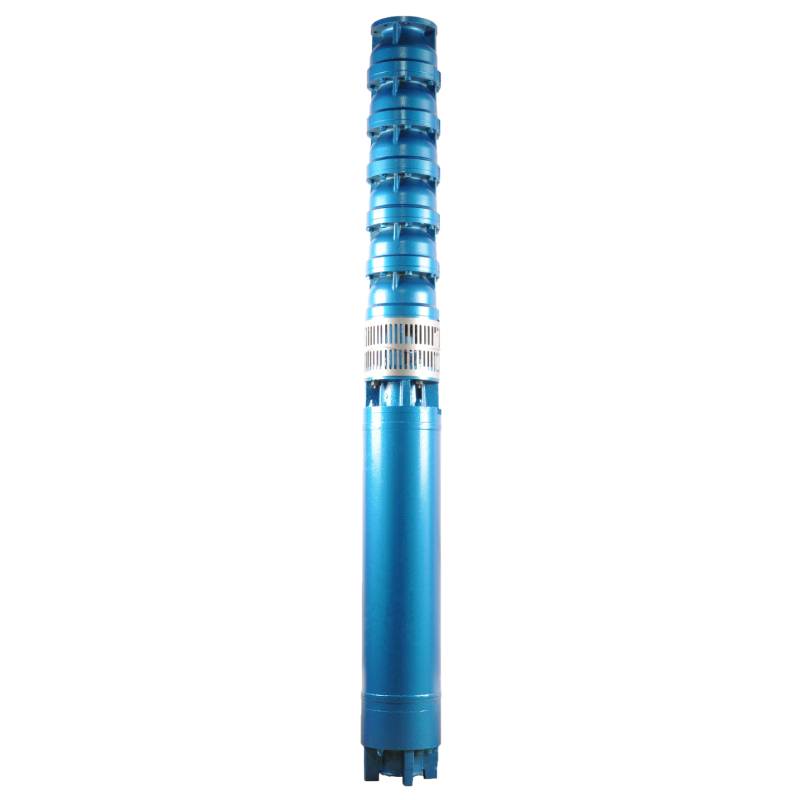
Before delving into the wiring, it’s important to recognize the main components of a deep well submersible pump. At its core, the system consists of the pump itself, a motor, a discharge head, and power supply lines. The submersible motor is located at the bottom of the well and drives the impellers that push water to the surface. The discharge head is positioned at the top, allowing water to be directed into a storage tank or directly to the point of use.
Wiring Configuration
The wiring of a deep well submersible pump primarily involves connecting the motor to a power supply, typically a 3-phase electrical source. The motor is usually equipped with wires that are color-coded according to standard electrical practices; common colors include black, red, and blue for the three phases, as well as a green or bare wire for the ground.
It is crucial to use properly rated cables that can withstand submersion in water. Submersible pump cables are often constructed with high-quality materials, such as thermoplastic rubber or polyethylene insulation, to provide durability and resistance against corrosive elements present in well water.
Installation Procedure
When installing the wiring for a deep well submersible pump, the following steps should be followed
1. Select the Appropriate Cable Choose a cable that suits the depth of the well and the voltage required for your pump. Make sure it is submersible-rated.
2. Assemble Tools Equip yourself with essential tools, including wire strippers, connectors, electrical tape, and a multimeter to test connections.
deep well submersible pump wiring

3. Standard Wiring Practices Connect the motor wires to your power supply correctly. Follow the manufacturer’s wiring diagram closely. Each phase should be connected to corresponding wires—black to black, red to red, and so on.
4. Grounding Ensure that the ground wire is securely connected to prevent any electrical faults. A good grounding system is critical for safety.
5. Waterproofing Connections Use heat-shrink tubing, electrical tape, or waterproof junction boxes to protect electrical connections from moisture.
6. Testing After installation, test the connections with a multimeter. Check for continuity and proper voltage before activating the pump.
Troubleshooting
In case of pump malfunctions, understanding the wiring setup can aid in troubleshooting. Common issues may include
- Pump Not Starting Check for loose connections, tripped breakers, or failed circuits. - Overheating This could indicate a problem with the motor or inadequate voltage supply. Inspect cables for wear and ensure they are rated for the pump's current.
- Intermittent Operation Fluctuating power supplies or problematic connections may cause the pump to operate erratically. Examine wiring for fraying or damage.
Maintenance Tips
Regular maintenance of both the pump and its wiring can extend the lifespan of the system. Periodically check the integrity of the electrical connections, inspect the cable for signs of wear, and replace any damaged components immediately. Additionally, consider installing a control panel equipped with overload protection to prevent electrical damage.
By understanding the implications of deep well submersible pump wiring and following best practices for installation, testing, and maintenance, users can ensure reliability and safety in their water extraction needs. Whether you are a homeowner, farmer, or contractor, mastering the intricacies of these systems will contribute to effective water management for years to come.
-
Submersible Water Pump: The Efficient 'Power Pioneer' of the Underwater World
NewsJul.01,2025
-
Submersible Pond Pump: The Hidden Guardian of Water Landscape Ecology
NewsJul.01,2025
-
Stainless Well Pump: A Reliable and Durable Pumping Main Force
NewsJul.01,2025
-
Stainless Steel Submersible Pump: An Efficient and Versatile Tool for Underwater Operations
NewsJul.01,2025
-
Deep Well Submersible Pump: An Efficient 'Sucker' of Groundwater Sources
NewsJul.01,2025
-
Deep Water Well Pump: An Efficient 'Sucker' of Groundwater Sources
NewsJul.01,2025
-
 Submersible Water Pump: The Efficient 'Power Pioneer' of the Underwater WorldIn the field of hydraulic equipment, the Submersible Water Pump has become the core equipment for underwater operations and water resource transportation due to its unique design and excellent performance.Detail
 -
 Submersible Pond Pump: The Hidden Guardian of Water Landscape EcologyIn courtyard landscapes, ecological ponds, and even small-scale water conservancy projects, there is a silent yet indispensable equipment - the Submersible Pond Pump.Detail
 -
 Stainless Well Pump: A Reliable and Durable Pumping Main ForceIn the field of water resource transportation, Stainless Well Pump has become the core equipment for various pumping scenarios with its excellent performance and reliable quality.Detail
