Nov . 09, 2024 22:01 Back to list
Guidelines for Installing a Submersible Sump Pump Properly and Efficiently
How to Install a Submersible Sump Pump
Installing a submersible sump pump can significantly help protect your basement or crawl space from flooding. These pumps are designed to sit in a sump pit, where they automatically detect rising water levels and pump excess water outside your home. If you're considering taking on this project yourself, here's a comprehensive guide to help you with the installation process.
Tools and Materials Needed
Before you begin, gather all the necessary tools and materials - Submersible sump pump - Sump pit (if not already installed) - PVC pipe and fittings for drainage - Hose clamp - Check valve (to prevent backflow) - Waterproof sealant - Bucket - Drill with drill bits - Tape measure - Level - Safety goggles and gloves
Step 1 Choose the Right Location
Select a suitable location for your sump pit. Ideally, this should be in the lowest point of your basement or crawl space, allowing for efficient water drainage. Make sure the site is easily accessible for maintenance and inspection.
Step 2 Install the Sump Pit
If there is no existing sump pit, you will need to dig one. The pit should be large enough to accommodate the pump and allow for water to gather. A depth of around 24 to 30 inches and a diameter of 18 to 24 inches is typically adequate. Once dug, line the pit with gravel to promote proper drainage.
Step 3 Prepare the Pump
Follow the manufacturer's instructions for preparing your submersible pump. Most submersible pumps come with an instructional manual detailing how to install it correctly. Ensure that the pump is clean and free from debris before installation.
Step 4 Place the Pump in the Pit
Carefully lower the pump into the pit. It should rest on a solid base of gravel to allow for proper drainage. Make sure the pump’s inlet is positioned above the bottom of the pit to avoid clogging with debris.
Step 5 Install the Check Valve
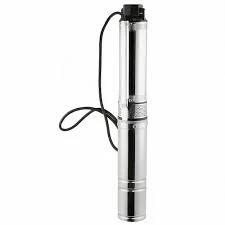
how to install a submersible sump pump

Attach a check valve to the discharge pipe of the pump. This valve is essential as it prevents water from flowing back into the sump pit after the pump has done its job. Use hose clamps to secure the check valve and make sure that it’s oriented correctly — the arrow on the valve should point away from the pump.
Step 6 Connect the Discharge Pipe
Cut the PVC pipe to the required length to connect the pump to your home's drainage system. Use PVC cement to join the pipe fittings securely. Ensure that the discharge pipe has a slight incline to facilitate water flow and help prevent clogs. If the water needs to travel a considerable distance from your home, consider using a larger diameter pipe to reduce friction loss.
Step 7 Seal the Pit
To prevent groundwater from seeping into the sump pit, apply a waterproof sealant around the edge of the sump pit. This will help create a barrier against moisture entering your basement or crawl space.
Step 8 Power the Pump
Connect the pump to a power source. It's advisable to use a dedicated circuit to power the sump pump, ideally one that is connected to a Ground Fault Circuit Interrupter (GFCI) for safety. Ensure all electrical connections are secure and protected from moisture.
Step 9 Test the System
Once everything is connected, it’s crucial to test the pump. Pour water into the sump pit until the float switch engages and the pump activates. Observe the discharge to ensure water is being expelled correctly and that there are no leaks in the system.
Step 10 Maintain the Pump
Regular maintenance is important to keep your sump pump functioning optimally. Check the pump for any signs of wear, clean the sump pit to prevent clogs, and test the pump periodically, especially before the rainy season.
By following these steps, you can effectively install a submersible sump pump in your home, providing you with peace of mind against potential flooding. Taking the time to do it right ensures your basement remains dry and protected.
-
Submersible Water Pump: The Efficient 'Power Pioneer' of the Underwater World
NewsJul.01,2025
-
Submersible Pond Pump: The Hidden Guardian of Water Landscape Ecology
NewsJul.01,2025
-
Stainless Well Pump: A Reliable and Durable Pumping Main Force
NewsJul.01,2025
-
Stainless Steel Submersible Pump: An Efficient and Versatile Tool for Underwater Operations
NewsJul.01,2025
-
Deep Well Submersible Pump: An Efficient 'Sucker' of Groundwater Sources
NewsJul.01,2025
-
Deep Water Well Pump: An Efficient 'Sucker' of Groundwater Sources
NewsJul.01,2025
-
 Submersible Water Pump: The Efficient 'Power Pioneer' of the Underwater WorldIn the field of hydraulic equipment, the Submersible Water Pump has become the core equipment for underwater operations and water resource transportation due to its unique design and excellent performance.Detail
 -
 Submersible Pond Pump: The Hidden Guardian of Water Landscape EcologyIn courtyard landscapes, ecological ponds, and even small-scale water conservancy projects, there is a silent yet indispensable equipment - the Submersible Pond Pump.Detail
 -
 Stainless Well Pump: A Reliable and Durable Pumping Main ForceIn the field of water resource transportation, Stainless Well Pump has become the core equipment for various pumping scenarios with its excellent performance and reliable quality.Detail
