Oct . 07, 2024 16:47 Back to list
how to install a submersible well pump
How to Install a Submersible Well Pump
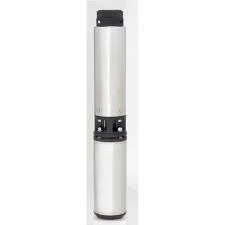
Installing a submersible well pump can seem like a daunting task, but with the right tools and knowledge, it can be a straightforward project. A submersible well pump is designed to be placed underwater, typically in a well, to draw water from deep underground sources. This article provides a step-by-step guide on how to install a submersible well pump, ensuring efficiency and safety throughout the process.
Materials and Tools Required
Before you begin the installation, gather the following materials and tools
1. Submersible Pump – Ensure it is appropriately sized for your well depth and water needs. 2. Pump Cable – A waterproof electric cable suitable for submersible use. 3. PVC or Steel Pipe – For the pump discharge line, which will carry water to the surface. 4. Safety Equipment – Gloves, goggles, and hard hats for safety. 5. Wrench and Pliers – For tightening fittings. 6. Wire Strippers – To strip the pump cable. 7. Electrical Tape – For securing wire connections. 8. Sling or Rope – To assist with lowering the pump into the well.
Step-by-Step Installation Process
Step 1 Preparation
Start by preparing the well site. Ensure that there is easy access to the well and that all necessary permits for installation have been acquired. Turn off the power supply to the well and make sure the well casing is clean.
Step 2 Select the Right Pump
Choose the right pump based on your well's depth and the water flow rate needed. You can refer to the pump's specifications; the required horsepower and flow rate should match the needs of your household or farm.
Step 3 Assemble the Pump and Discharge Pipe
Assemble the submersible pump by attaching the discharge head to the pump’s body. If you’re using plastic PVC pipes, ensure you use proper joints and glue them to prevent leaks. If using steel, make sure the fittings are secured tightly to avoid rust and maintain efficiency.
Step 4 Install the Pump Cable
how to install a submersible well pump

Feed the pump cable through the discharge head. Make sure to leave enough length to reach the surface and that it is securely connected. Each cable should be of sufficient gauge to handle the pump's electrical requirements too.
Step 5 Lower the Pump into the Well
Using the sling or rope, carefully lower the pump into the well. Be cautious not to damage the pump or the cable during this process. Make sure the pump remains upright and steady as it descends.
Step 6 Connect the Discharge Pipe
Once the pump is positioned on the well bottom, securely attach the discharge pipe to the well casing. Use appropriate fittings to create a watertight seal. Ensure that the discharge pipe rises vertically and follows the flow path towards where the water will be used.
Step 7 Wire the Pump
At the wellhead, connect the pump's electrical wire to the power source. It is essential to follow local electrical codes and safety standards during this procedure. Strip the wire ends and connect them securely, enclosing them with electrical tape to prevent water intrusion.
Step 8 Test the System
Before covering the well, it’s vital to test the system. Turn on the power supply and check that the water flows correctly from the discharge pipe. Listen for unusual noises that may indicate improper installation or a malfunction.
Step 9 Secure All Connections
Once satisfied with the test, make sure that all connections, fittings, and the well cover are securely fastened. This is important for both safety and system performance.
Conclusion
Installing a submersible well pump involves careful planning and execution. Following these steps will help ensure a successful installation. However, if at any point you feel unsure about the process, it might be prudent to consult with or hire a professional plumber or pump installer. Proper installation not only guarantees the safety of the equipment but also enhances the longevity and effectiveness of your water supply system. Enjoy the convenience of reliable water access with your new submersible well pump!
-
Submersible Water Pump: The Efficient 'Power Pioneer' of the Underwater World
NewsJul.01,2025
-
Submersible Pond Pump: The Hidden Guardian of Water Landscape Ecology
NewsJul.01,2025
-
Stainless Well Pump: A Reliable and Durable Pumping Main Force
NewsJul.01,2025
-
Stainless Steel Submersible Pump: An Efficient and Versatile Tool for Underwater Operations
NewsJul.01,2025
-
Deep Well Submersible Pump: An Efficient 'Sucker' of Groundwater Sources
NewsJul.01,2025
-
Deep Water Well Pump: An Efficient 'Sucker' of Groundwater Sources
NewsJul.01,2025
-
 Submersible Water Pump: The Efficient 'Power Pioneer' of the Underwater WorldIn the field of hydraulic equipment, the Submersible Water Pump has become the core equipment for underwater operations and water resource transportation due to its unique design and excellent performance.Detail
 -
 Submersible Pond Pump: The Hidden Guardian of Water Landscape EcologyIn courtyard landscapes, ecological ponds, and even small-scale water conservancy projects, there is a silent yet indispensable equipment - the Submersible Pond Pump.Detail
 -
 Stainless Well Pump: A Reliable and Durable Pumping Main ForceIn the field of water resource transportation, Stainless Well Pump has become the core equipment for various pumping scenarios with its excellent performance and reliable quality.Detail
