Sep . 25, 2024 22:08 Back to list
how to replace a deep well submersible pump
How to Replace a Deep Well Submersible Pump
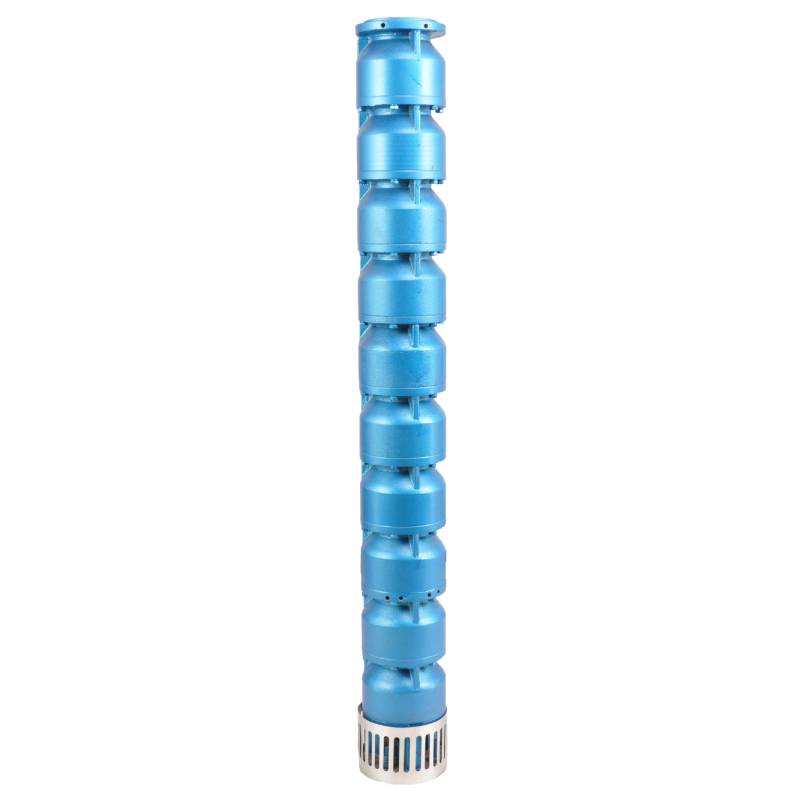
Replacing a deep well submersible pump can seem daunting, but with proper preparation and knowledge, it can be a manageable task. A submersible pump is an essential component in many water systems, providing a reliable method for pulling water from deep underground. When faced with the need for replacement, either due to wear and tear or performance issues, follow these guidelines to ensure a successful replacement.
Understanding Your Pump System
Before you begin replacing your submersible pump, it is important to understand the components of your system. A submersible pump typically consists of the pump itself, a motor, a discharge pipe, electrical wiring, and often a control box. Familiarize yourself with your existing setup, noting the depth of the well, the pump’s specifications (size, horsepower, flow rate), and the type of power supply.
Gather Necessary Tools and Materials
To facilitate a smooth replacement process, gather the necessary tools and materials beforehand. You will need
- A replacement pump that matches the specifications of the old one - Wrenches - A pipe cutter - A hoisting system or a rope and pulley - Electrical tape - A multimeter to check electrical connections - Safety gear (gloves and goggles)
Step 1 Power Off and Prepare
Before beginning any work, ensure you have turned off the power supply to the pump. This step is crucial for safety. Locate the circuit breaker or disconnect switch and turn it off. Next, remove any obstructions around the wellhead to give yourself enough working space.
Step 2 Remove the Existing Pump
Using a hoisting system, carefully lift the pump from the well. Attach a sturdy rope to the pump and pull it out slowly but steadily to prevent any sudden movements that could damage the pipes or wiring. As you lift the pump, pay attention to the electrical connections and discharge pipe, ensuring they don’t snag. Once the pump is out, inspect it for any visible damage which can help identify issues that may have led to its failure.
how to replace a deep well submersible pump

Step 3 Disconnect the Electrical and Water Lines
Once the pump is above ground, you will need to disconnect the electrical wiring and the discharge pipe. For electrical connections, take a moment to document the wiring setup, either with photographs or detailed notes. This documentation will be invaluable when connecting the new pump. Carefully cut the wires using a wire cutter, ensuring to leave enough length for reconnection.
Next, unscrew the discharge pipe from the pump. You may need to use a wrench or pipe cutter, depending on how the pipe is attached. Be prepared for some residual water to pour out as you disconnect the pump.
Step 4 Install the New Pump
With the old pump removed, it’s time to install the new one. Begin by connecting the discharge pipe to the new pump, ensuring a tight seal to prevent leaks. Next, reconnect the electrical wires, matching the colors as per your documentation. Use electrical tape to secure the connections and protect them from moisture.
Step 5 Lower the New Pump Into the Well
Using the hoisting system, carefully lower the new pump into the well. Take your time with this step to avoid damaging the pump or the well casing. Ensure that the pump is positioned properly and that all connections are secure.
Step 6 Turn on Power and Test
Once the new pump is in place, switch the power back on at the circuit breaker. Monitor the pump’s operation closely for the first few minutes. Check for leaks at the discharge pipe and listen for any strange noises that might indicate a problem.
Conclusion
Replacing a deep well submersible pump can be a straightforward task if you approach it methodically. By understanding your system, using the right tools, and following these steps, you can successfully replace your pump, ensuring a reliable water supply for your needs. If at any point you feel uncertain about the process, do not hesitate to seek professional assistance to ensure the safety and efficiency of your water system.
-
Submersible Water Pump: The Efficient 'Power Pioneer' of the Underwater World
NewsJul.01,2025
-
Submersible Pond Pump: The Hidden Guardian of Water Landscape Ecology
NewsJul.01,2025
-
Stainless Well Pump: A Reliable and Durable Pumping Main Force
NewsJul.01,2025
-
Stainless Steel Submersible Pump: An Efficient and Versatile Tool for Underwater Operations
NewsJul.01,2025
-
Deep Well Submersible Pump: An Efficient 'Sucker' of Groundwater Sources
NewsJul.01,2025
-
Deep Water Well Pump: An Efficient 'Sucker' of Groundwater Sources
NewsJul.01,2025
-
 Submersible Water Pump: The Efficient 'Power Pioneer' of the Underwater WorldIn the field of hydraulic equipment, the Submersible Water Pump has become the core equipment for underwater operations and water resource transportation due to its unique design and excellent performance.Detail
 -
 Submersible Pond Pump: The Hidden Guardian of Water Landscape EcologyIn courtyard landscapes, ecological ponds, and even small-scale water conservancy projects, there is a silent yet indispensable equipment - the Submersible Pond Pump.Detail
 -
 Stainless Well Pump: A Reliable and Durable Pumping Main ForceIn the field of water resource transportation, Stainless Well Pump has become the core equipment for various pumping scenarios with its excellent performance and reliable quality.Detail
