Nov . 07, 2024 08:57 Back to list
Steps for Replacing a Submersible Well Pump Efficiently and Safely
How to Replace a Submersible Well Pump
Replacing a submersible well pump can be a daunting task for any homeowner. However, with proper preparation and the right tools, it can be a manageable project. This article will guide you through the steps necessary to replace your submersible well pump safely and efficiently.
Understanding Your Well System
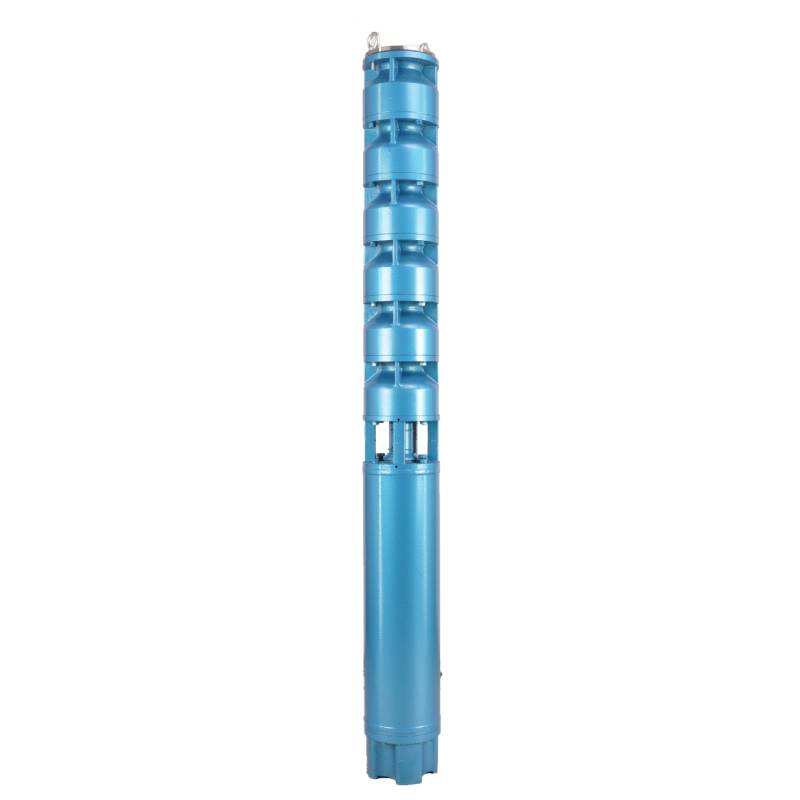
Before you begin, it’s essential to understand the components of your well system. A submersible pump is typically located deep within the well and is responsible for drawing water to the surface. The pump is located below the water level, which helps to push water up through a discharge pipe into your home.
When considering replacement, ensure that your well is adequately functioning and that the primary issue lies with the pump itself. Signs that your well pump may need replacement include a lack of water supply, unusual noises, or fluctuating water pressure.
Safety First
Before you begin any work, ensure that you prioritize safety. Disconnect the power supply to the pump at the breaker box to prevent any accidents. It is also advisable to wear gloves and protective eyewear throughout the process.
Tools and Materials Needed
Gather the necessary tools and materials before starting the replacement. You will need the following
- A new submersible well pump - A wrench set - A pipe wrench - A water level measuring tape - Teflon tape or pipe thread sealant - Safety gloves - A sturdy ladder (if needed) - A bucket or container to collect water
Steps to Replace the Submersible Well Pump
Step 1 Remove the Existing Pump
1. Access the Well Begin by locating the well casing or cover. Remove it carefully. 2. Disconnect the Pipe Use a pipe wrench to disconnect the discharge pipe from the pump. Be cautious as water may pour out when disconnecting. Do this slowly to minimize water spillage.
3. Lift the Pump Using a sturdy rope or a well pump removal tool, carefully pull the pump straight out of the well casing. Be mindful of the electrical wires and any attached piping.
how to replace a submersible well pump

Step 2 Prepare for the New Pump
1. Inspect the Well Before installing the new pump, inspect the well condition. Check the well casing and ensure there are no obstructions.
2. Measure Water Level Use the water-level measuring tape to determine the depth of the water in your well. This information is crucial for selecting an appropriately sized pump.
Step 3 Install the New Pump
1. Attach the Discharge Pipe Before lowering the new pump, attach the discharge pipe using Teflon tape or pipe thread sealant. Ensure it is securely tightened to prevent leaks.
2. Lower the Pump Carefully lower the new submersible pump into the well, ensuring the electrical wires are clear of any obstructions.
3. Reconnect the Power Make any necessary electrical connections following the pump manufacturer’s instructions. Ensure that the electrical connections are secure and insulated.
Step 4 Testing the New Installation
1. Reconnect the Power Supply Once everything is securely in place, turn the power back on at the breaker box.
2. Check for Functionality Allow the pump to run and monitor for any unusual noises or issues. Test the water pressure at faucets or other points of use to confirm proper function.
3. Finalize the Setup Replace the well cover, and ensure that there are no leaks in the discharge pipe.
Conclusion
Replacing a submersible well pump might seem overwhelming, but by following these steps and being diligent in your approach, you can successfully complete the task. Should you encounter any complications, do not hesitate to contact a professional for assistance. Proper maintenance of your well system will ensure a reliable water supply for years to come.
-
Submersible Water Pump: The Efficient 'Power Pioneer' of the Underwater World
NewsJul.01,2025
-
Submersible Pond Pump: The Hidden Guardian of Water Landscape Ecology
NewsJul.01,2025
-
Stainless Well Pump: A Reliable and Durable Pumping Main Force
NewsJul.01,2025
-
Stainless Steel Submersible Pump: An Efficient and Versatile Tool for Underwater Operations
NewsJul.01,2025
-
Deep Well Submersible Pump: An Efficient 'Sucker' of Groundwater Sources
NewsJul.01,2025
-
Deep Water Well Pump: An Efficient 'Sucker' of Groundwater Sources
NewsJul.01,2025
-
 Submersible Water Pump: The Efficient 'Power Pioneer' of the Underwater WorldIn the field of hydraulic equipment, the Submersible Water Pump has become the core equipment for underwater operations and water resource transportation due to its unique design and excellent performance.Detail
 -
 Submersible Pond Pump: The Hidden Guardian of Water Landscape EcologyIn courtyard landscapes, ecological ponds, and even small-scale water conservancy projects, there is a silent yet indispensable equipment - the Submersible Pond Pump.Detail
 -
 Stainless Well Pump: A Reliable and Durable Pumping Main ForceIn the field of water resource transportation, Stainless Well Pump has become the core equipment for various pumping scenarios with its excellent performance and reliable quality.Detail
