Nov . 18, 2024 19:47 Back to list
how to replace deep well submersible pump
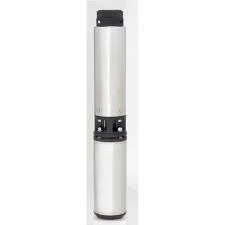
How to Replace a Deep Well Submersible Pump
A deep well submersible pump is an essential component in many residential and agricultural water systems. Over time, like any other mechanical device, these pumps can wear out or fail, necessitating replacement. Understanding the proper steps can help ensure a smooth replacement process. Below is a detailed guide on how to replace a deep well submersible pump safely and effectively.
Step 1 Assess the Situation
Before you start the replacement process, determine whether the pump actually needs to be replaced. Signs of pump failure may include inadequate water pressure, strange noises, or no water supply at all. It may be helpful to check the electrical connections and circuit breakers first. If everything appears in order and the pump is still not functioning, it’s likely time for a replacement.
Step 2 Gather Tools and Materials
Before beginning the replacement, gather the necessary tools and materials. You will typically need - New submersible pump - Well casing wrench - Pipe wrenches - Teflon tape - PVC pipe and fittings (if needed) - Electrical wiring supplies - Safety gear, including gloves and goggles
Step 3 Disconnect Power Supply
Safety is paramount when working with electrical equipment. Start by disconnecting the power supply to the pump at the circuit breaker. It is crucial to ensure that no electricity is flowing to the pump during the replacement process to prevent accidents.
Step 4 Remove the Old Pump
Next, locate the wellhead and identify how the pump is connected to the well. Most submersible pumps are attached to a pipe that extends to the surface. Use the well casing wrench to secure the casing and start disconnecting the pipe fittings. If the pump is deeper than usual or stuck, you may need a hoisting system or a pipe retrieval tool to free it.
Once you’ve disconnected the piping, carefully pull the pump upwards. Ensure all the attached electrical wiring is disengaged as you extract the pump from the well. Be cautious not to damage the well casing during this process.
Step 5 Prepare the New Pump
how to replace deep well submersible pump

Once the old pump is removed, set up your new submersible pump. Check the specifications and ensure it is suitable for your well's depth and the required GPM (gallons per minute) flow rate. Attach any necessary fittings using Teflon tape to ensure a watertight seal and prevent leaks.
Step 6 Install the New Pump
With the new pump prepared, carefully lower it into the well. Make sure that the pump is oriented correctly, and align the discharge pipe with the well casing. Reconnect the piping to secure the new pump in place.
Step 7 Reconnect Electrical Wiring
After securing the pump, it’s time to reconnect the electrical wiring. Ensure you match wires correctly according to the manufacturer's instructions. It’s recommended to use waterproof connectors to prevent moisture ingress, which can shorten the life of the electrical connections.
Step 8 Test the System
Once the pump is installed and the wiring is connected, turn the circuit breaker back on to restore power to the pump. Check for any unusual noises or leaks during operation. It may take a few moments for the system to prime, so allow it to run for a short time and monitor the performance.
Step 9 Final Check
After the pump has been tested and is running smoothly, make a final check of the system. Ensure that all connections are tight and that there are no leaks. Replace any access panels or coverings on the wellhead.
Conclusion
Replacing a deep well submersible pump can seem daunting, but understanding the process makes it manageable. Always prioritize safety, and if you feel uncomfortable with any part of the procedure, consider hiring a professional to perform the replacement. With a new, efficient pump in place, you can ensure a reliable water supply for your needs.
-
Submersible Water Pump: The Efficient 'Power Pioneer' of the Underwater World
NewsJul.01,2025
-
Submersible Pond Pump: The Hidden Guardian of Water Landscape Ecology
NewsJul.01,2025
-
Stainless Well Pump: A Reliable and Durable Pumping Main Force
NewsJul.01,2025
-
Stainless Steel Submersible Pump: An Efficient and Versatile Tool for Underwater Operations
NewsJul.01,2025
-
Deep Well Submersible Pump: An Efficient 'Sucker' of Groundwater Sources
NewsJul.01,2025
-
Deep Water Well Pump: An Efficient 'Sucker' of Groundwater Sources
NewsJul.01,2025
-
 Submersible Water Pump: The Efficient 'Power Pioneer' of the Underwater WorldIn the field of hydraulic equipment, the Submersible Water Pump has become the core equipment for underwater operations and water resource transportation due to its unique design and excellent performance.Detail
 -
 Submersible Pond Pump: The Hidden Guardian of Water Landscape EcologyIn courtyard landscapes, ecological ponds, and even small-scale water conservancy projects, there is a silent yet indispensable equipment - the Submersible Pond Pump.Detail
 -
 Stainless Well Pump: A Reliable and Durable Pumping Main ForceIn the field of water resource transportation, Stainless Well Pump has become the core equipment for various pumping scenarios with its excellent performance and reliable quality.Detail
