Nov . 08, 2024 21:03 Back to list
installing a submersible well pump
Installing a Submersible Well Pump A Step-by-Step Guide
Submersible well pumps are essential for providing water from deep underground sources. Whether for irrigation, household use, or industrial applications, these pumps are remarkably efficient and durable when installed correctly. This guide will walk you through the fundamental steps to install a submersible well pump safely and effectively.
What is a Submersible Well Pump?
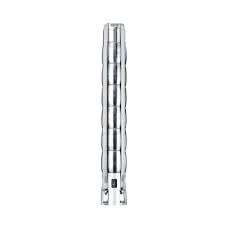
A submersible well pump is a type of pump designed to be submerged underwater, usually within a well. It works by pushing water to the surface, making it particularly effective for deep-water sources. Submersible pumps are typically used for municipal water systems, irrigation, and household water systems.
Tools and Materials Needed
Before you begin the installation process, ensure you have the following tools and materials
- Submersible well pump - PVC or polyethylene piping - Electrical wiring - Well casing pipe - Teflon tape - Pipe wrench - Electrical connectors - Safety equipment (gloves, hard hat, safety glasses) - Water pressure gauge
Step-by-Step Installation Process
1. Safety First Before starting any installation work, make sure to wear appropriate safety gear. This includes gloves, safety glasses, and a hard hat. Additionally, check that no power lines or underground utilities are nearby.
2. Locate the Well Identify the location of the well. Ensure that you have an access point that allows room for equipment and tools.
installing a submersible well pump

3. Prepare the Site Clear the area around the well. Remove any debris or obstacles that may hinder the installation process.
4. Gather Pump Specifications Refer to the pump’s manual for specific installation instructions and specifications. Ensure the pump is appropriate for your well's depth and diameter, and check the required horsepower.
5. Install the Pump - Lower the Pump Attach the pump to the well casing pipe using a submersible drop cable. Ensure it’s securely fastened, as this will ensure stability during installation. - Connect the Piping Use Teflon tape to seal the threads on the pipe fittings to prevent leaks. Connect the discharge pipe to the pump and secure it with a pipe wrench.
6. Connect Electrical Wiring - Wiring the Pump Run electrical wiring from the control box to the pump. Follow the manufacturer’s wiring diagram to make accurate connections. It’s crucial to use waterproof connections to protect against moisture. - Grounding the System Make sure to ground the pump properly to prevent electrical shocks.
7. Testing the System Once everything is connected, it’s time to test the system. Turn on the power and check for any leakage around the connections. Monitor the pump’s operation to confirm it is functioning correctly.
8. Adjust Pressure Settings Use a water pressure gauge to determine the system’s water pressure. Adjust the settings as necessary to ensure optimal water flow.
9. Seal the Well After testing, secure the well casing with a well cap to keep contaminants out and ensure the safety of your water source.
10. Regular Maintenance After installation, schedule regular maintenance checks. This includes inspecting electrical connections, ensuring the pump is working efficiently, and replacing any worn components.
Conclusion
Installing a submersible well pump is a task that can be successfully accomplished by following these steps. With the right tools, preparation, and attention to detail, you can ensure that your water supply system operates efficiently. Always remember to consult the pump’s manual for specific instructions and hire a professional if you encounter difficulties or are unsure about any step in the process. Proper installation and maintenance will lead to a reliable water source for years to come.
-
Submersible Water Pump: The Efficient 'Power Pioneer' of the Underwater World
NewsJul.01,2025
-
Submersible Pond Pump: The Hidden Guardian of Water Landscape Ecology
NewsJul.01,2025
-
Stainless Well Pump: A Reliable and Durable Pumping Main Force
NewsJul.01,2025
-
Stainless Steel Submersible Pump: An Efficient and Versatile Tool for Underwater Operations
NewsJul.01,2025
-
Deep Well Submersible Pump: An Efficient 'Sucker' of Groundwater Sources
NewsJul.01,2025
-
Deep Water Well Pump: An Efficient 'Sucker' of Groundwater Sources
NewsJul.01,2025
-
 Submersible Water Pump: The Efficient 'Power Pioneer' of the Underwater WorldIn the field of hydraulic equipment, the Submersible Water Pump has become the core equipment for underwater operations and water resource transportation due to its unique design and excellent performance.Detail
 -
 Submersible Pond Pump: The Hidden Guardian of Water Landscape EcologyIn courtyard landscapes, ecological ponds, and even small-scale water conservancy projects, there is a silent yet indispensable equipment - the Submersible Pond Pump.Detail
 -
 Stainless Well Pump: A Reliable and Durable Pumping Main ForceIn the field of water resource transportation, Stainless Well Pump has become the core equipment for various pumping scenarios with its excellent performance and reliable quality.Detail
