Oct . 06, 2024 12:27 Back to list
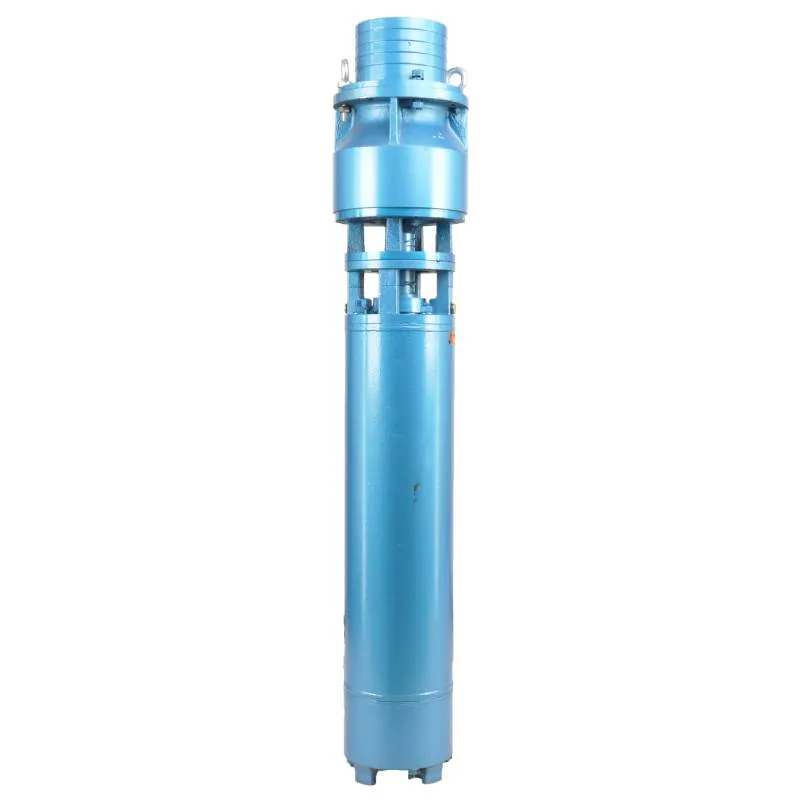
pulling submersible well pump
Pulling Submersible Well Pumps A Comprehensive Overview
Submersible well pumps are widely used in various applications, from agricultural irrigation to municipal water supply systems. These pumps are designed to function underwater, which offers a unique set of advantages compared to traditional pumps. The process of pulling a submersible well pump is an essential procedure in maintenance, repair, or replacement of these systems. This article will delve into the intricacies of pulling submersible well pumps, the necessary precautions, and the best practices for a successful operation.
Understanding Submersible Pumps
Submersible pumps are sealed units placed below the water surface in a well. They are designed to push water to the surface rather than pulling it, which allows for efficient operation at greater depths. Their design includes a hermetically sealed motor that is lubricated and cooled by the water in which it is submerged. This makes them ideal for deep wells, as they can overcome the challenges of suction lift that surface pumps face.
The Need for Pulling
Despite their robust design, submersible pumps may require maintenance or replacement for various reasons, such as
1. Wear and Tear Over time, the components of the pump may degrade due to continuous operation. 2. Clogging Debris or mineral build-up can clog the pump, reducing its efficiency. 3. Electrical Failures Issues with wiring or the motor can necessitate pulling the pump for repairs. 4. Upgrades As technology advances, older models may be replaced with more energy-efficient pumps.
Preparation for Pulling
Before embarking on the process of pulling a submersible well pump, it is crucial to prepare properly to ensure safety and efficiency
1. Gathering Tools and Equipment Prepare necessary tools such as a pipe wrenches, a hoist or well-pulling machine, slings, safety gear, and possibly a backup generator. 2. Assessing the Site Make sure the site is accessible and clear of any obstructions. 3. Shutting Off Power Ensure the power supply to the pump is turned off to avoid electrical accidents. 4. Checking the Wellhead Inspect the wellhead and ensure that it is secure before beginning the lifting process.
pulling submersible well pump

The Pulling Process
1. Disconnecting the Pump Remove any electrical connections and secure the discharge pipe. Carefully document the setup for reassembly later. 2. Attaching the Hoist Securely attach the hoist or pulling apparatus to the pump. If using a crane, make sure it is rated for the load you are about to lift.
3. Lifting the Pump Gradually and steadily lift the pump out of the well. This may require coordination if additional personnel are involved. Be mindful of the weight and balance of the pump as it comes out of the water.
4. Inspecting the Pump Once the pump is out, conduct a thorough inspection for signs of damage or wear. Checking the motor, impellers, and discharge components will help determine the necessary repairs or upgrades.
Post-Pulling Considerations
After successfully pulling the submersible pump, there are several important steps to follow
1. Repairs and Maintenance Based on the inspection results, perform any necessary repairs or consider replacements. 2. Testing Once issues are resolved or upgrades are made, test the pump before reinstalling it to ensure it operates at optimal efficiency.
3. Reinstallation Carefully lower the pump back into the well, making sure all connections are secure and the pump is aligned properly.
Conclusion
Pulling a submersible well pump is an operation that requires careful planning and execution. Understanding the components and function of submersible pumps, coupled with adhering to safety protocols and best practices, ensures a smooth and effective process. Whether for maintenance, repair, or replacement, knowing how to manage this operation can save both time and resources, ultimately improving the sustainability and efficiency of your water system.
-
Submersible Water Pump: The Efficient 'Power Pioneer' of the Underwater World
NewsJul.01,2025
-
Submersible Pond Pump: The Hidden Guardian of Water Landscape Ecology
NewsJul.01,2025
-
Stainless Well Pump: A Reliable and Durable Pumping Main Force
NewsJul.01,2025
-
Stainless Steel Submersible Pump: An Efficient and Versatile Tool for Underwater Operations
NewsJul.01,2025
-
Deep Well Submersible Pump: An Efficient 'Sucker' of Groundwater Sources
NewsJul.01,2025
-
Deep Water Well Pump: An Efficient 'Sucker' of Groundwater Sources
NewsJul.01,2025
-
 Submersible Water Pump: The Efficient 'Power Pioneer' of the Underwater WorldIn the field of hydraulic equipment, the Submersible Water Pump has become the core equipment for underwater operations and water resource transportation due to its unique design and excellent performance.Detail
 -
 Submersible Pond Pump: The Hidden Guardian of Water Landscape EcologyIn courtyard landscapes, ecological ponds, and even small-scale water conservancy projects, there is a silent yet indispensable equipment - the Submersible Pond Pump.Detail
 -
 Stainless Well Pump: A Reliable and Durable Pumping Main ForceIn the field of water resource transportation, Stainless Well Pump has become the core equipment for various pumping scenarios with its excellent performance and reliable quality.Detail
