Jul . 31, 2024 03:58 Back to list
Steps to Effectively Replace a Deep Well Submersible Pump for Optimal Performance and Longevity
How to Replace a Deep Well Submersible Pump
Replacing a deep well submersible pump can seem like a daunting task, but with the right knowledge and tools, it can be done effectively and safely. This guide will provide a step-by-step process for replacing your deep well submersible pump.
Understanding the Deep Well Submersible Pump
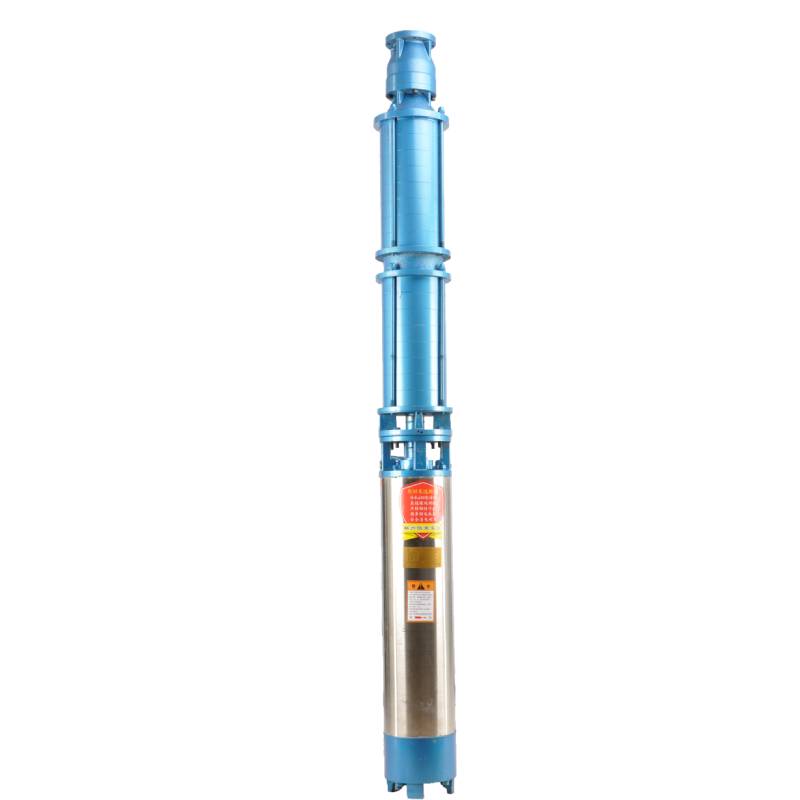
Before diving into the replacement process, it's essential to understand what a deep well submersible pump is. These pumps are designed to be submerged in water, typically deep underground, to lift water to the surface. They are commonly used in rural areas and for agricultural purposes, relying on electric power to function. Over time, these pumps can wear out or fail due to various reasons, including mineral buildup, electrical failures, or mechanical breakdown.
Step-by-Step Replacement Process
1. Safety First Before starting any replacement work, ensure you are wearing safety gear such as gloves, safety goggles, and sturdy clothing. Disconnect the power supply to the pump to prevent any electrical hazards.
2. Locate the Pump Identify the wellhead location where your submersible pump is installed. This is typically a pipe protruding from the ground with a cover.
3. Remove the Well Cap Carefully remove the well cap, which may be secured by bolts or screws. This will provide access to the drop pipe connected to the pump.
4. Disconnect the Pump Using a pipe wrench, disconnect the drop pipe from the pump. If your pump is connected to a control box, you may need to disconnect the wires as well. Note the wiring configuration for reassembly later.
how to replace deep well submersible pump

5. Pull Up the Pump You will need a well puller or a winch to lift the pump out of the well. Make sure you have a clear path to avoid any obstructions when pulling the pump straight up. It’s crucial to be cautious during this step to avoid damaging the pump or the well casing.
6. Inspect the Old Pump Once the pump is pulled out, inspect it for any visible signs of wear or damage. This inspection can provide insight into what might have gone wrong, which can be helpful for future prevention.
7. Prepare the New Pump Before installing the new pump, ensure it is compatible with your existing system in terms of size, capacity, and electrical requirements. Follow the manufacturer's instructions closely.
8. Install the New Pump Lower the new pump into the well, ensuring that it is straight and not at an angle. Reconnect the drop pipe and any electrical connections exactly as noted during the disconnection phase. Secure all fittings tightly to prevent leaks.
9. Test the System After installation, it’s essential to restore power and test the pump. Check for any leaks and ensure that the pump is functioning at the desired capacity. Allow the pump to run for a few minutes, observing its operation and listening for any unusual noises.
10. Replace the Well Cap Once you’ve confirmed that the new pump is working correctly, replace the well cap securely to protect the system from debris and wildlife.
Conclusion
Replacing a deep well submersible pump requires careful planning and execution. By following these steps and prioritizing safety, you can successfully replace your pump and restore your water supply system. If at any point you feel uncertain, consider hiring a professional to ensure the job is done correctly and safely. Regular maintenance and timely replacements will prolong the life of your well system, ensuring consistent access to water.
-
Submersible Water Pump: The Efficient 'Power Pioneer' of the Underwater World
NewsJul.01,2025
-
Submersible Pond Pump: The Hidden Guardian of Water Landscape Ecology
NewsJul.01,2025
-
Stainless Well Pump: A Reliable and Durable Pumping Main Force
NewsJul.01,2025
-
Stainless Steel Submersible Pump: An Efficient and Versatile Tool for Underwater Operations
NewsJul.01,2025
-
Deep Well Submersible Pump: An Efficient 'Sucker' of Groundwater Sources
NewsJul.01,2025
-
Deep Water Well Pump: An Efficient 'Sucker' of Groundwater Sources
NewsJul.01,2025
-
 Submersible Water Pump: The Efficient 'Power Pioneer' of the Underwater WorldIn the field of hydraulic equipment, the Submersible Water Pump has become the core equipment for underwater operations and water resource transportation due to its unique design and excellent performance.Detail
 -
 Submersible Pond Pump: The Hidden Guardian of Water Landscape EcologyIn courtyard landscapes, ecological ponds, and even small-scale water conservancy projects, there is a silent yet indispensable equipment - the Submersible Pond Pump.Detail
 -
 Stainless Well Pump: A Reliable and Durable Pumping Main ForceIn the field of water resource transportation, Stainless Well Pump has become the core equipment for various pumping scenarios with its excellent performance and reliable quality.Detail
