Dec . 11, 2024 11:28 Back to list
water well submersible pump installation
Installation of Submersible Water Well Pumps
When it comes to sourcing water from wells, submersible water well pumps are among the most effective solutions available. These pumps are designed to function underwater, making them ideal for drawing water from deep wells. They are efficient, durable, and require minimal maintenance. In this article, we’ll explore the installation process of submersible water well pumps, providing essential tips for a successful and safe installation.
Understanding Submersible Pumps
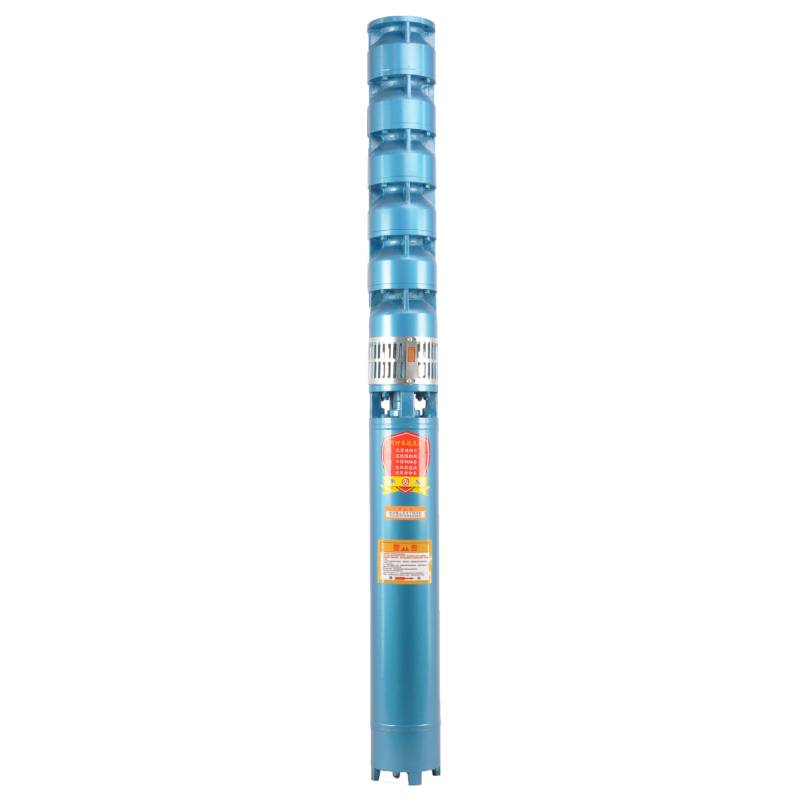
A submersible pump consists of a sealed motor and a pump unit that work together to lift groundwater. Unlike traditional pumps that draw water up, submersible pumps operate underwater, pushing water to the surface via electrical power. This design minimizes the risk of cavitation and reduces energy consumption, making them suitable for both residential and agricultural applications.
Preparing for Installation
Before you start the installation, it's important to gather all necessary tools and materials. The essential items include the submersible pump, a power cable, discharge pipe, fittings, a protective casing, and a control panel. Additionally, depending on the depth of the well, a hoist or a winch may be required for safely lowering the pump into the water.
Make sure to conduct a thorough assessment of the well site, including the depth of the water table, the diameter of the well, and the required flow rate. Knowing these parameters will help you select the right pump for your needs.
Installation Steps
1. Safety First Before beginning the installation process, turn off all electrical power to the well. Wear appropriate safety gear, including gloves and safety glasses, to protect yourself during the installation.
2. Assemble the Components Assemble the pump according to the manufacturer’s instructions. Attach the discharge head, ensuring that it fits securely. Connect the power cable to the pump and seal the connection to prevent water entry.
water well submersible pump installation

3. Lower the Pump Use a hoisting mechanism to lower the pump into the well. Ensure that the pump is vertical and that the power cable is adequately secured to prevent any twisting or tangling. It’s important to lower the pump gently to avoid damaging any components.
4. Secure the Pump Once the pump is at the desired depth, secure it to the well casing using brackets or clamps. This step ensures stability and prevents movement during operation.
5. Connect the Discharge Pipe Attach the discharge pipe to the pump outlet. This pipe will carry water from the pump to the surface. Ensure that all connections are tight to avoid leaks.
6. Electrical Connections Properly connect the electrical cable from the pump to the control panel. Follow local electrical codes and regulations to ensure safety and compliance. If you’re not comfortable with electrical work, it’s advisable to hire a licensed electrician.
7. Testing the System After completing the installation, restore power and run the pump for a few minutes to check its performance. Look for any unusual noises or vibrations, as these can indicate underlying issues.
8. Final Inspection Check all connections, fittings, and the discharge pipe for leaks. Ensure the well cover is secure to prevent contamination and accidents.
Maintenance and Care
Once installed, regular maintenance is crucial for the longevity of your submersible pump. Periodically inspect the system for any wear and tear, and consider conducting annual check-ups of electrical components and the pump itself. Proper care will ensure efficient operation and extend the lifespan of the pump.
In conclusion, installing a submersible water well pump can be a straightforward process if you take the necessary precautions and follow proper installation techniques. Whether for residential use or agricultural purposes, ensuring a correct installation will lead to an efficient and reliable water supply.
-
Submersible Water Pump: The Efficient 'Power Pioneer' of the Underwater World
NewsJul.01,2025
-
Submersible Pond Pump: The Hidden Guardian of Water Landscape Ecology
NewsJul.01,2025
-
Stainless Well Pump: A Reliable and Durable Pumping Main Force
NewsJul.01,2025
-
Stainless Steel Submersible Pump: An Efficient and Versatile Tool for Underwater Operations
NewsJul.01,2025
-
Deep Well Submersible Pump: An Efficient 'Sucker' of Groundwater Sources
NewsJul.01,2025
-
Deep Water Well Pump: An Efficient 'Sucker' of Groundwater Sources
NewsJul.01,2025
-
 Submersible Water Pump: The Efficient 'Power Pioneer' of the Underwater WorldIn the field of hydraulic equipment, the Submersible Water Pump has become the core equipment for underwater operations and water resource transportation due to its unique design and excellent performance.Detail
 -
 Submersible Pond Pump: The Hidden Guardian of Water Landscape EcologyIn courtyard landscapes, ecological ponds, and even small-scale water conservancy projects, there is a silent yet indispensable equipment - the Submersible Pond Pump.Detail
 -
 Stainless Well Pump: A Reliable and Durable Pumping Main ForceIn the field of water resource transportation, Stainless Well Pump has become the core equipment for various pumping scenarios with its excellent performance and reliable quality.Detail
