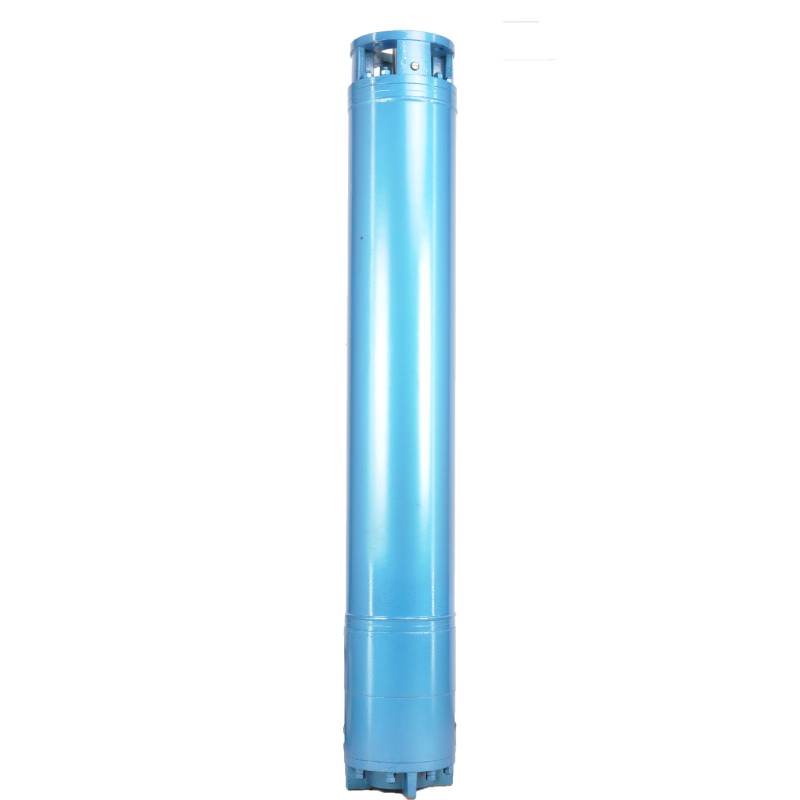
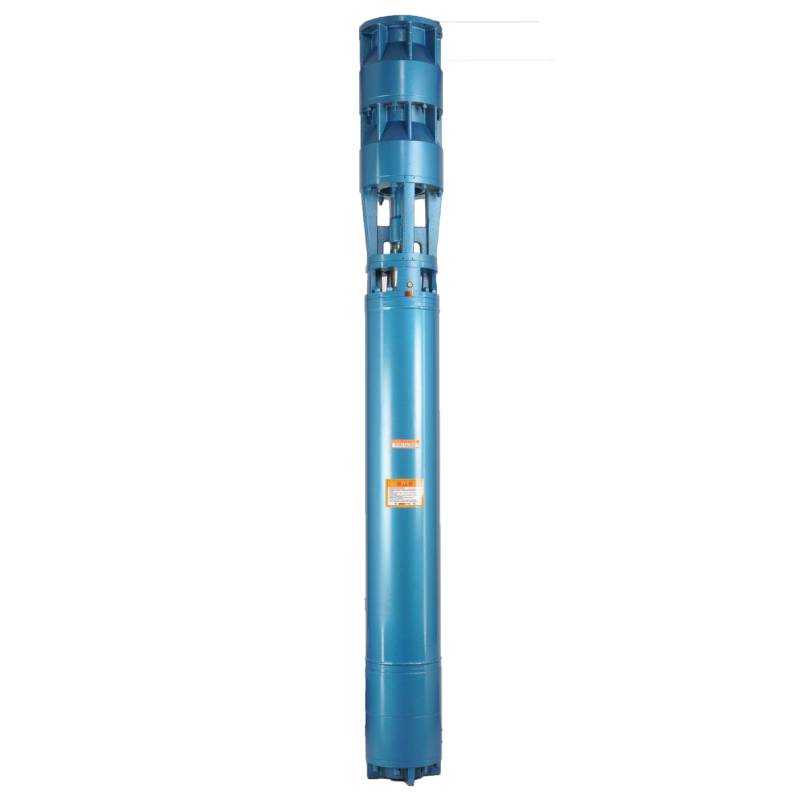
This hot water pump adopts the motor made of 50W400 grade high quality cold rolled silicon steel, which is stamped by high speed punch press. It has the advantages of low stator iron loss and low self-heating. The motor winding is designed for hot water pump, high temperature resistance and anti-aging. The winding has water resistance, and adopts 3CR13 stainless steel blade shaft, high temperature resistant bushing and other high quality accessories to enable it to operate for a long time at high temperature, and can be used with frequency converter, so as to automatically adjust according to the amount of water used. This hot water pump is the ideal choice for your hot water equipment, which can operate stably and efficiently, providing you with a lasting hot water supply.
The product is a three-phase AC 380V (tolerance + / - 5%), 50HZ (tolerance + / - 1%) power supply submersible pump. With water quality requirements: water temperature is not higher than 20 °C; solid impurities content (mass ratio) is not more than 0.01%; PH value (pH) is 6.5-8.5; hydrogen sulfide content is not more than 1.5mg/L; chloride ion content is not more than 400mg/L. The electric pump adopts closed or water sealed wet structure, before use must be submersible motor inner cavity filled with clean water to prevent empty, and then tighten the water and air bolts, otherwise not to use. Its work should be completely immersed in water, immersion depth is not more than 70 meters, the distance between the bottom of the pump and the bottom of the well is not less than 3 meters. Well water inflow quantity should be able to meet the electric pump water output and continuous operation, the output water quantity should be controlled at 0.7-1.2 times of the rated flow. The well should be vertical, the electric pump can not be used horizontally or inclined, only vertically placed. The electric pump must be equipped with cables and external overload protection device as required. It is strictly prohibited to conduct no-load test under no water condition.

| Մոդել | Հոսք (մ3/ժ) | Գլուխ (մ) |
Պտտվող արագություն (փոփոխություն/կետ) |
Ջրի պոմպ(%) | Ելք տրամագիծը (մմ) |
Լավ կիրառելի տրամագիծը (մմ) |
Գնահատված power(KW) |
Գնահատված լարում (V) |
Գնահատված ընթացիկ (A) |
Շարժիչային արդյունավետություն (%) | power factorcosφ | Միավոր Ճառագայթային առավելագույն չափը (մմ) |
Դիտողություն | |||||||||
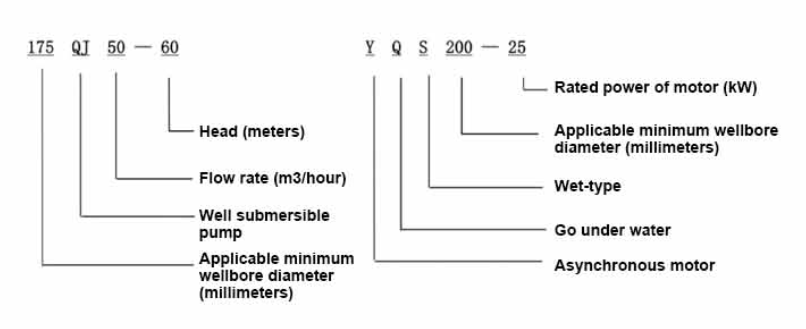
| 300QJ200-40 | 200 | 40 | 2900 | 76 | 150 | 300վերևում | 37 | 380 | 77.8 | 85.0 | 0.85 | 281 | ||||||||||
| 300QJ200-60 | 60 | 55 | 115 | 85.5 | 0.85 | |||||||||||||||||
| 300QJ200-80 | 80 | 75 | 154.1 | 86.0 | 0.86 | |||||||||||||||||
| 300QJ200-100 | 100 | 90 | 183.8 | 86.5 | 0.86 | |||||||||||||||||
| 300QJ200-120 | 120 | 100 | 204.3 | 86.5 | 0.86 | |||||||||||||||||
| 300QJ200-140 | 140 | 125 | 249.5 | 87.5 | 0.87 | |||||||||||||||||
| 300QJ200-160 | 160 | 140 | 277.8 | 88.0 | 0.87 | |||||||||||||||||
| 300QJ200-180 | 180 | 160 | 317.5 | 88.0 | 0.87 | |||||||||||||||||
| 300QJ200-200 | 200 | 185 | 367.2 | 88.0 | 0.87 | |||||||||||||||||
| 300QJ200-240 | 240 | 220 | 436.6 | 88.0 | 0.87 | |||||||||||||||||
| 300QJ320-30 | 320 | 30 | 2900 | 77 | 200 | 300վերևում | 45 | 380 | 94.6 | 85.0 | 0.85 | 281 | ||||||||||
| 300QJ320-60 | 60 | 90 | 183.8 | 86.5 | 0.86 | |||||||||||||||||
| 300QJ320-90 | 90 | 125 | 249.5 | 87.5 | 0.87 | |||||||||||||||||
| 300QJ320-120 | 120 | 160 | 317.5 | 88.0 | 0.87 | |||||||||||||||||
1, well submersible pump for clean water pump, prohibit the new well, pumping sediment and muddy water,
2, well water pump voltage grade of 380/50HZ, the use of other voltage grades of submersible motors need to be customized. The underground cable must use waterproof cable, must be equipped with starting equipment, such as distribution box, start not ready should have commonly used motor comprehensive protection function, such as short circuit overload protection, phase protection, undervoltage protection, grounding protection, idling protection, in case of abnormal conditions, the protection device should be timely action trip.
3, the installation and use of the pump must be reliably grounded, prohibit the push and pull switch when the hands and feet are wet, the installation and maintenance of the pump must be cut off the power supply, the use of the pump place to set up "to prevent electric shock" obvious signs:
4, down the well or before installation, the motor cavity must be filled with distilled water or non-corrosive clean cold boiling water, tighten the / water bolt, the pump on the ground test run, must be to the pump chamber water lubrication rubber bearings, instant start not more than a second, see whether the steering is the same as the steering instructions. When the pump is upright, pay attention to safety, prevent overturning injury.
5, խստորեն համաձայն պոմպի վերելակի դրույթների, օգտագործման հոսքի տիրույթի, ցածր հոսքի կամ բարձր վերելակի պոմպային ուժը կանխելու համար, մղիչ կրող և մաշվածության այլ մասեր, շարժիչի գերբեռնվածությունը այրվել է
6, ջրհորի պոմպից հետո շարժիչի չափումը հողի մեկուսացման դիմադրության նկատմամբ չպետք է լինի 100 մ-ից պակաս, լարումը և հոսանքը դիտարկելու մեկնարկից հետո ստուգեք շարժիչի ոլորուն մեկուսացումը, արդյոք համապատասխանի պահանջներին. պոմպի պահեստավորման վայրի ջերմաստիճանը, եթե սառեցման կետից պակաս է, պետք է ջուրը չորացնել շարժիչի խոռոչում, կանխել շարժիչի խոռոչի ջրի սառույցի վնասը, որն առաջացել է ցածր ջերմաստիճանից:
The pump part is mainly composed of pump shaft, impeller, shunt shell, rubber bearing, check valve body (optional) and other components. The motor part is mainly composed of base, pressure regulating diaphragm, thrust bearing, thrust plate, lower guide bearing seat, stator, rotor, upper guide bearing seat, sand discharging ring, water inlet section, lead cable and other components. The main characteristic of this product is that the motor is a water-cooled submersible three-phase asynchronous motor, and the motor cavity is filled with water to cool the motor and lubricate the bearing. The pressure regulating diaphragm at the bottom is used to adjust the expansion-contraction pressure difference in the body caused by the change of the temperature rise of the motor. In order to prevent the sand particles in the well water from entering the motor, two oil seals are installed at the upper end of the motor shaft extension, and a sand discharging ring is installed to form a sand discharging structure. In order to prevent the pump shaft from jumping when starting, the pump shaft and the motor shaft are connected together through a coupling, and a thrust bearing is installed at the bottom of the motor. The lubrication of the motor and the pump bearing is realized through water lubrication. The stator winding of the motor is made of high-quality well motor winding wire, with high insulation performance. The pump is designed by computer CAD, with simple structure and good technical performance.

(1) Նախապատրաստում նախքան տեղադրումը.
1. Ստուգեք՝ արդյոք սուզվող պոմպը համապատասխանում է ձեռնարկում նշված օգտագործման պայմաններին և շրջանակին:
2. Օգտագործելով ծանր օբյեկտ, որի տրամագիծը հավասար է սուզվող պոմպի առավելագույն արտաքին տրամագծին, չափեք՝ արդյոք հորատանցքի ներքին տրամագիծը կարող է տեղավորվել սուզվող պոմպի վրա, և չափեք՝ արդյոք ջրհորի խորությունը համապատասխանում է տեղադրման պահանջներին:
3. Ստուգեք՝ արդյոք հորատանցքը մաքուր է և արդյոք ջրհորի ջուրը պղտոր է: Երբեք մի օգտագործեք սուզվող էլեկտրական պոմպ՝ սուզվող էլեկտրական պոմպի ցեխը և ավազի ջուրը լվանալու համար, որպեսզի խուսափեք սուզվող էլեկտրական պոմպի վաղաժամ վնասից:
4. Ստուգեք, թե արդյոք հարմար է գլխի տեղադրման սեղմակի դիրքը և արդյոք այն կարող է դիմակայել ամբողջ միավորի որակին:
5. Ստուգեք՝ արդյոք սուզվող պոմպի բաղադրամասերը ամբողջական են և պատշաճ կերպով տեղադրված՝ համաձայն ձեռնարկի հավաքման սխեմայի։ Հեռացրեք ֆիլտրի էկրանը և պտտեք կցորդիչը՝ տեսնելու, թե արդյոք այն ճկուն է պտտվում։
6. Անջատեք ջրի պտուտակը և շարժիչի խոռոչը լցրեք մաքուր, ոչ քայքայիչ ջրով (նկատի ունեցեք, որ այն լցրեք վերև), այնուհետև ամրացրեք ջրատարը: Ջրի ներարկումից 12 ժամ հետո շարժիչի մեկուսացման դիմադրությունը չպետք է պակաս լինի 150 Մ Q-ից, երբ չափվում է 500 Վ ցնցող սեղանով:
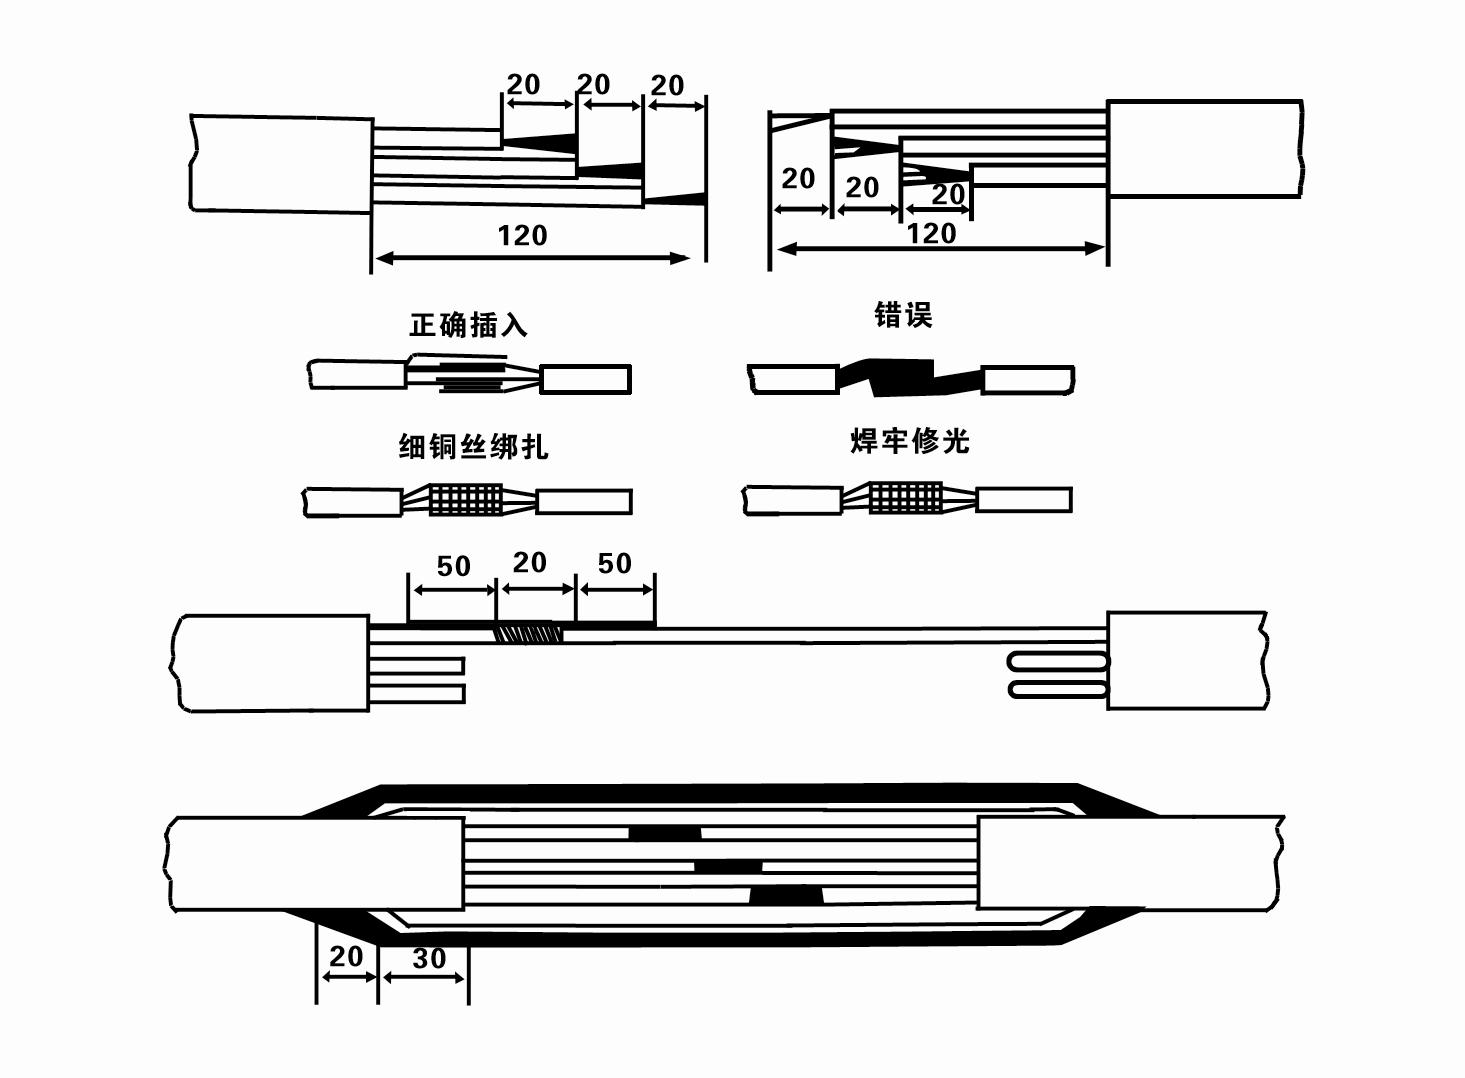
7. Cable joint, cut off a 120mm rubber sleeve from one end of the outgoing cable and the matching cable with an electrician's knifethen stagger the length of the three core wires in a stepped shape, peel off a 20mm copper core, scrape of the oxide layer on theoutside of the copper wire with a knife or sand cloth, and insert the two connected wire ends in palirs.After tying the layer tightly with fine copper wire, solder it thoroughly and firmly, and sand of any. burrs on the surface. Then, forthe three joints, use polyvester insulation tape to wrap them in a semi stacked manner for three lavers. Wrap the two ends of thewrapping layer tightywith nyion thread,and then use a semi stacked method to wrap the tape for three layers. Wrap the outellayer with high-pressure insulation tape for three layers. Finally, fold the threestrands together and repeatedly wrap them for fivelayers with high-pressure tape. Each layer must be tightly tied, and the interlayer joints must be tight and fimm to prevent water frompenetrating and damaging the insulation, After wrapping, soak in water at room temperature of 20 ’c for 12 hours, and measurethe insulation resistance with a shaking table, which should not be less than 100M Ω
Կցված մալուխի միացման գործընթացի դիագրամը հետևյալն է.
8. Օգտագործեք մուլտիմետր՝ ստուգելու համար, թե արդյոք եռաֆազ լարերը միացված են և արդյոք DC դիմադրությունը մոտավորապես հավասարակշռված է:
9. Ստուգեք՝ արդյոք շղթայի և տրանսֆորմատորի հզորությունը գերբեռնված են, այնուհետև միացրեք ծանրաբեռնվածության պաշտպանության անջատիչը կամ մեկնարկային սարքավորումը: Տե՛ս Աղյուսակ 2-ը հատուկ մոդելների համար, այնուհետև մի դույլ ջուր լցրեք ջրի պոմպի մեջ ջրի պոմպի ելքից՝ պոմպի ռետինե առանցքակալները յուղելու համար, այնուհետև տեղադրեք սուզվող էլեկտրական պոմպը ուղիղ և կայուն: Սկսեք (ոչ ավելի, քան մեկ վայրկյան): և ստուգեք, թե արդյոք ղեկի ուղղությունը համապատասխանում է ղեկի նշանին: Եթե ոչ, փոխեք եռաֆազ մալուխի երկու միակցիչները: Այնուհետև տեղադրեք ֆիլտրը և պատրաստվեք ջրհորն իջնելուն: Եթե օգտագործվում է հատուկ դեպքերում (օրինակ՝ խրամատներ, խրամատներ, գետեր, լճակներ, լճակներ և այլն), էլեկտրական պոմպը պետք է հուսալիորեն հիմնավորված լինի:
(2) Տեղադրման սարքավորումներ և գործիքներ.
1. Երկու տոննայից ավելի բարձրացնող մեկ զույգ շղթա:
2. Չորս մետրից ոչ պակաս ուղղահայաց բարձրությամբ եռոտանի։
3. Երկու կախովի պարան (մետաղալար), որոնք կարող են կրել մեկ տոննայից ավելի քաշ (կարող են տանել ջրի պոմպերի ամբողջական փաթեթի քաշը):
4. Տեղադրեք երկու զույգ սեղմակներ (սպլինտներ):
5. Բանալիններ, մուրճեր, պտուտակահաններ, էլեկտրական գործիքներ և գործիքներ և այլն:
(3) Էլեկտրական պոմպի տեղադրում.
1. Սուզվող էլեկտրական պոմպի տեղադրման դիագրամը ներկայացված է Նկար 2-ում: Տեղադրման հատուկ չափերը ներկայացված են Աղյուսակ 3-ում «Սուզվող էլեկտրական պոմպի տեղադրման չափերի ցանկը»:
2. 30 մետրից պակաս գլխով սուզվող էլեկտրական պոմպերը կարող են ուղղակիորեն բարձրանալ ջրհորի մեջ՝ օգտագործելով գուլպաներ և մետաղալարեր կամ կանեփի այլ պարաններ, որոնք կարող են կրել ամբողջ մեքենայի, ջրի խողովակների և խողովակների մեջ եղած ջրի ամբողջ քաշը:
3. 30 մետրից ավելի գլխիկ ունեցող պոմպերում օգտագործվում են պողպատե խողովակներ, իսկ տեղադրման հաջորդականությունը հետևյալն է.
① Օգտագործեք սեղմակ՝ ջրի պոմպի մասի վերին ծայրը սեղմելու համար (շարժիչը և ջրի պոմպը այս պահին միացված են), բարձրացրեք այն կախովի շղթայով և դանդաղ կապեք ջրհորի մեջ, մինչև դրեք սեղմակը ջրհորի գլխին և հանեք կախովի շղթա.
② Օգտագործեք ևս մեկ զույգ սեղմիչներ՝ խողովակը սեղմելու համար, կախովի շղթայով բարձրացրեք այն եզրից 15 սմ հեռավորության վրա և դանդաղ իջեցրեք այն: Խողովակի եզրի և պոմպի եզրի միջև Տեղադրեք ռետինե բարձիկը տեղում և ամրացրեք խողովակը և հավասարապես մղեք պտուտակներով, ընկույզներով և զսպանակներով:
③ Մի փոքր բարձրացրեք սուզվող պոմպը, հանեք ջրի պոմպի վերին ծայրի սեղմիչը, մալուխը պլաստմասե ժապավենով ամուր կապեք ջրի խողովակին և դանդաղ կապեք, մինչև սեղմիչը տեղադրվի ջրհորի գլխին:
④Օգտագործեք նույն մեթոդը՝ բոլոր ջրատար խողովակները ջրհորի մեջ կապելու համար:
⑤Հսկիչ անջատիչին կապող մալուխը միացնելուց հետո այն միացված է եռաֆազ սնուցման աղբյուրին:
(4) Տեղադրման ժամանակ պետք է ուշադրություն դարձնել.
1. Եթե պոմպային գործընթացի ընթացքում հայտնաբերվում է խցանման երևույթ, շրջեք կամ քաշեք ջրի խողովակը՝ խցանման կետը հաղթահարելու համար: Եթե տարբեր միջոցները դեռ չեն աշխատում, խնդրում ենք մի ստիպեք պոմպն իջեցնել՝ սուզվող էլեկտրական պոմպի և ջրհորի վնասից խուսափելու համար:
2. Տեղադրման ժամանակ յուրաքանչյուր խողովակի եզրին պետք է տեղադրել ռետինե բարձիկ և հավասարաչափ ամրացնել:
3. Երբ ջրի պոմպն իջեցնում են ջրհորը, այն պետք է տեղադրվի ջրհորի խողովակի մեջտեղում, որպեսզի պոմպը երկար ժամանակ չաշխատի ջրհորի պատին, ինչի հետևանքով պոմպը թրթռում է, իսկ շարժիչը ավլում և այրվում է: .
4. Որոշեք ջրի պոմպի խորությունը ջրհորի հատակին` ըստ հորի հոսող ավազի և տիղմի պայմանների: Մի թաղեք պոմպը ցեխի մեջ: Ջրի պոմպից մինչև ջրհորի հատակը ընդհանուր առմամբ 3 մետրից ոչ պակաս հեռավորություն է (տես նկար 2):
5. Ջրի պոմպի ջրի մուտքի խորությունը պետք է լինի ոչ պակաս, քան 1-1,5 մետր ջրի դինամիկ մակարդակից մինչև ջրի մուտքի հանգույց (տես նկար 2): Հակառակ դեպքում ջրի պոմպի առանցքակալները կարող են հեշտությամբ վնասվել:
6. Ջրի պոմպի վերելակը չի կարող շատ ցածր լինել: Հակառակ դեպքում, ջրհորի գլխամասային ջրատարի վրա պետք է տեղադրվի դարպասի փական, որը վերահսկում է պոմպի հոսքը գնահատված հոսքի կետում, որպեսզի շարժիչը չծանրաբեռնվի և այրվի մեծ հոսքի պատճառով:
7. Երբ ջրի պոմպը աշխատում է, ջրի ելքը պետք է լինի շարունակական և հավասար, հոսանքը պետք է լինի կայուն (գնահատված աշխատանքային պայմաններում, ընդհանուր առմամբ, ոչ ավելի, քան անվանական հոսանքի 10%-ը), և չպետք է լինի թրթռում կամ աղմուկ: Եթե կա որևէ աննորմալություն, մեքենան պետք է կանգնեցնել՝ պատճառը պարզելու և այն վերացնելու համար:
8. Տեղադրելիս ուշադրություն դարձրեք շարժիչի հողակցման լարերի տեղադրմանը (տես նկար 2): Երբ ջրի խողովակը պողպատե խողովակ է, այն անցեք ջրհորի գլխիկի սեղմիչից; երբ ջրի խողովակը պլաստմասե խողովակ է, այն տանեք էլեկտրական պոմպի հողակցման նշանից:
After installation of the underwater pump, it is necessary to recheck the insulation resistance and three-phase continuity of the switch, and check whether the connection between the instrument and the starting equipment is wrong. If there is no problem, you can start the test machine. After starting, observe whether the indication reading of each instrument is correct. If the rated voltage and current specified on the nameplate are exceeded, observe whether the pump has any noise or vibration. If everything is normal, it can be put into operation. Four hours after the first operation of the pump, it should be turned off and the thermal insulation resistance of the motor should be quickly tested, and its value should not be less than 0.5 megaohm. After stopping the pump, it should be restarted after an interval of five minutes to prevent the water column in the pipeline from completely reversing, resulting in the motor burning due to excessive current. After the pump is put into normal operation, in order to prolong its service life, it is necessary to check regularly whether the supply voltage, working current and insulation resistance are normal. If the following conditions are found, the machine should be stopped immediately to eliminate the fault:
1 the current exceeds 20% under the rated working condition.
2 the dynamic water level drops to the inlet section, resulting in intermittent drainage.
3 the underwater pump vibrates violently or emits huge noise.
4 the supply voltage is lower than 340 volts.
5 a fuse is burned.
6 the water pipe is damaged.
7 the thermal insulation resistance of the motor to the ground is less than 0.5 megaohm.
When disassembling the device, it is necessary to untie the cable bundle and remove the pipeline part and the line protection plate. Remove the drain bolt and exclude all water in the motor chamber. Remove the filter element and loosen the screw on the coupling fixed to the motor shaft. Unscrew the bolt connecting the water inlet section and the motor, and separate the pump and the motor (pay attention to placing the device horizontally when separating to prevent the bending of the pump shaft). The sequence of disassembling the pump is as follows: (see Figure 1) water inlet section, impeller, water inlet shell, impeller. Check the valve body, and use a special tool to loosen the cone sleeve fixed to the impeller when removing the impeller. In the process of disassembly, avoid bending the pump shaft and damaging various components. The disassembly process of the motor is as follows: (see Figure 1) put the motor on the platform, and remove the nuts on the screw (pull rod bolt), base, shaft head lock nut, thrust plate, key and lower guide rail - bearing seat, bolt, and then remove the rotor (be careful not to damage the wiring harness), and finally remove the connecting parts and upper guide bearing seat. Unit assembly: before assembly, the rust and dirt of each component should be cleaned, and the sealant should be coated on each mating surface and fastener, and then assembled in the opposite order of disassembly (the movement of the motor shaft after assembly is about one millimeter), after the assembly is completed, the coupling should be flexibly rotated, and then the filter element should be placed for testing. Each time the underwater electric pump has been used for one year, or less than one year but has been immersed for two years, it must be disassembled and inspected in accordance with Article 5 and replace the worn parts.
1, անջատեք ջուրը շարժիչի խոռոչում (հատկապես ձմռանը, որպեսզի շարժիչը չսառչի) և լավ կապեք մալուխը։
2, store in an indoor room without corrosive substances and gases, with a temperature below 40 °C.
3, երկարաժամկետ օգտագործման համար պետք է ուշադրություն դարձնել սուզվող պոմպերի ժանգի կանխարգելմանը:
- Շարժիչ
- Լիսեռ թեւ
- Ռետինե լիսեռ թեւ
-
Կնքման օղակ
01 Խորը ջրհորի ջրառ
02 Բարձրահարկ ջրամատակարարում
03 լեռնային ջրամատակարարում
04 աշտարակի ջուր
05 Գյուղատնտեսական ոռոգում
06 այգու ոռոգում
07 գետի ջրառ
08 կենցաղային ջուր


