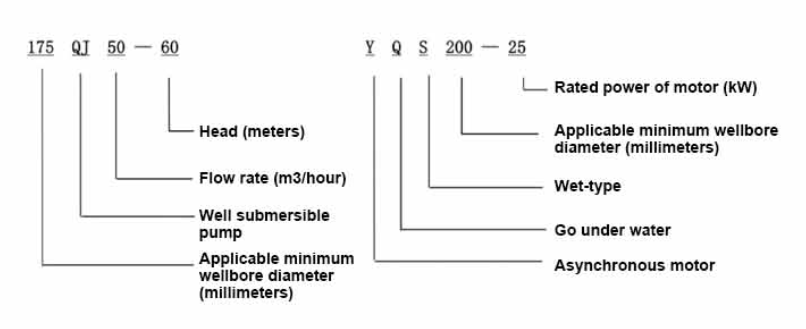
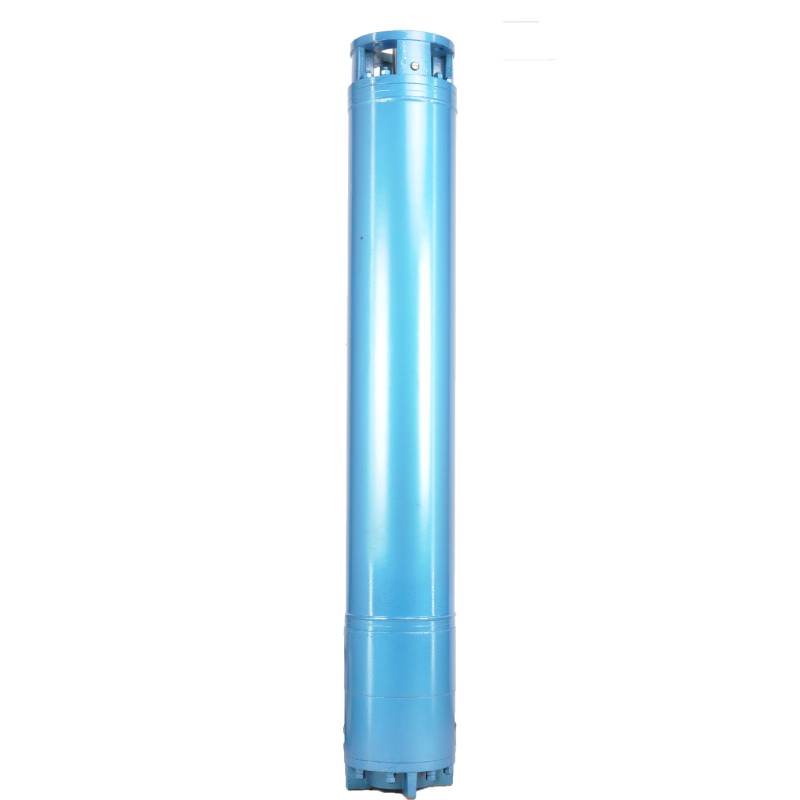
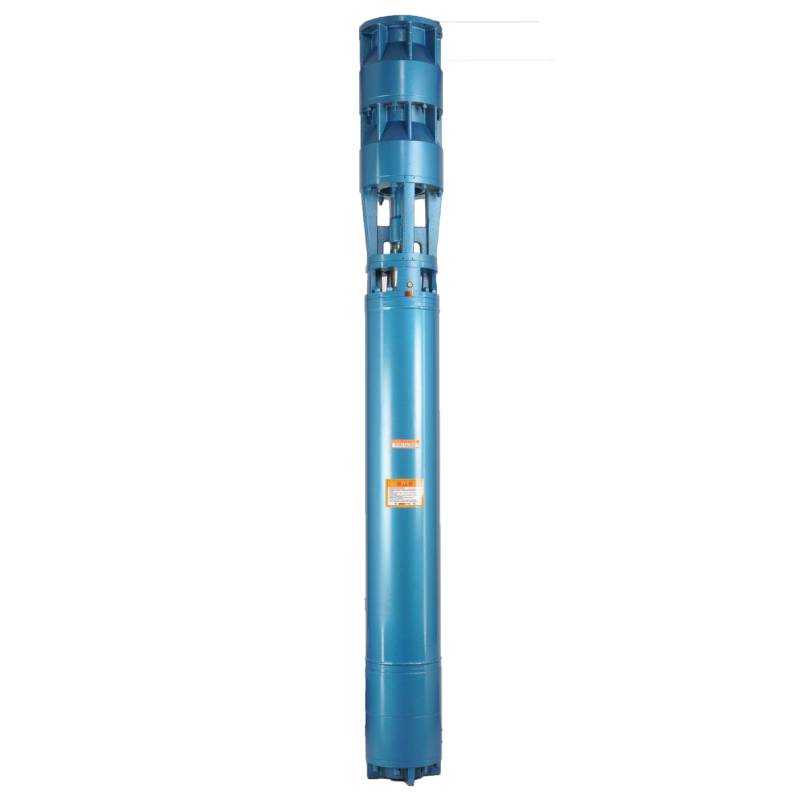
This hot water pump adopts the motor made of 50W400 grade high quality cold rolled silicon steel, which is stamped by high speed punch press. It has the advantages of low stator iron loss and low self-heating. The motor winding is designed for hot water pump, high temperature resistance and anti-aging. The winding has water resistance, and adopts 3CR13 stainless steel blade shaft, high temperature resistant bushing and other high quality accessories to enable it to operate for a long time at high temperature, and can be used with frequency converter, so as to automatically adjust according to the amount of water used. This hot water pump is the ideal choice for your hot water equipment, which can operate stably and efficiently, providing you with a lasting hot water supply.
The product is a three-phase AC 380V (tolerance + / - 5%), 50HZ (tolerance + / - 1%) power supply submersible pump. With water quality requirements: water temperature is not higher than 20 °C; solid impurities content (mass ratio) is not more than 0.01%; PH value (pH) is 6.5-8.5; hydrogen sulfide content is not more than 1.5mg/L; chloride ion content is not more than 400mg/L. The electric pump adopts closed or water sealed wet structure, before use must be submersible motor inner cavity filled with clean water to prevent empty, and then tighten the water and air bolts, otherwise not to use. Its work should be completely immersed in water, immersion depth is not more than 70 meters, the distance between the bottom of the pump and the bottom of the well is not less than 3 meters. Well water inflow quantity should be able to meet the electric pump water output and continuous operation, the output water quantity should be controlled at 0.7-1.2 times of the rated flow. The well should be vertical, the electric pump can not be used horizontally or inclined, only vertically placed. The electric pump must be equipped with cables and external overload protection device as required. It is strictly prohibited to conduct no-load test under no water condition.

| മോഡൽ | ഒഴുക്ക് (m3/h) | തല (എം) |
കറങ്ങുന്ന വേഗത (മാറ്റം/പോയിൻ്റ്) |
വാട്ടർപമ്പ്(%) | ഔട്ട്ലെറ്റ് വ്യാസം (എംഎം) |
നന്നായി ബാധകമാണ് വ്യാസം(മില്ലീമീറ്റർ) |
റേറ്റുചെയ്തത് power(KW) |
റേറ്റുചെയ്തത് വോൾട്ടേജ്(V) |
റേറ്റുചെയ്തത് നിലവിലെ (എ) |
മോട്ടോർ കാര്യക്ഷമത (%) | power factorcosφ | യൂണിറ്റ് റേഡിയൽ മാക്സിമ വലുപ്പം(മില്ലീമീറ്റർ) |
പരാമർശം | |||||||||
| 300QJ200-40 | 200 | 40 | 2900 | 76 | 150 | 300മുകളിൽ | 37 | 380 | 77.8 | 85.0 | 0.85 | 281 | ||||||||||
| 300QJ200-60 | 60 | 55 | 115 | 85.5 | 0.85 | |||||||||||||||||
| 300QJ200-80 | 80 | 75 | 154.1 | 86.0 | 0.86 | |||||||||||||||||
| 300QJ200-100 | 100 | 90 | 183.8 | 86.5 | 0.86 | |||||||||||||||||
| 300QJ200-120 | 120 | 100 | 204.3 | 86.5 | 0.86 | |||||||||||||||||
| 300QJ200-140 | 140 | 125 | 249.5 | 87.5 | 0.87 | |||||||||||||||||
| 300QJ200-160 | 160 | 140 | 277.8 | 88.0 | 0.87 | |||||||||||||||||
| 300QJ200-180 | 180 | 160 | 317.5 | 88.0 | 0.87 | |||||||||||||||||
| 300QJ200-200 | 200 | 185 | 367.2 | 88.0 | 0.87 | |||||||||||||||||
| 300QJ200-240 | 240 | 220 | 436.6 | 88.0 | 0.87 | |||||||||||||||||
| 300QJ320-30 | 320 | 30 | 2900 | 77 | 200 | 300മുകളിൽ | 45 | 380 | 94.6 | 85.0 | 0.85 | 281 | ||||||||||
| 300QJ320-60 | 60 | 90 | 183.8 | 86.5 | 0.86 | |||||||||||||||||
| 300QJ320-90 | 90 | 125 | 249.5 | 87.5 | 0.87 | |||||||||||||||||
| 300QJ320-120 | 120 | 160 | 317.5 | 88.0 | 0.87 | |||||||||||||||||
1, well submersible pump for clean water pump, prohibit the new well, pumping sediment and muddy water,
2, well water pump voltage grade of 380/50HZ, the use of other voltage grades of submersible motors need to be customized. The underground cable must use waterproof cable, must be equipped with starting equipment, such as distribution box, start not ready should have commonly used motor comprehensive protection function, such as short circuit overload protection, phase protection, undervoltage protection, grounding protection, idling protection, in case of abnormal conditions, the protection device should be timely action trip.
3, the installation and use of the pump must be reliably grounded, prohibit the push and pull switch when the hands and feet are wet, the installation and maintenance of the pump must be cut off the power supply, the use of the pump place to set up "to prevent electric shock" obvious signs:
4, down the well or before installation, the motor cavity must be filled with distilled water or non-corrosive clean cold boiling water, tighten the / water bolt, the pump on the ground test run, must be to the pump chamber water lubrication rubber bearings, instant start not more than a second, see whether the steering is the same as the steering instructions. When the pump is upright, pay attention to safety, prevent overturning injury.
5, പമ്പ് ലിഫ്റ്റിൻ്റെ വ്യവസ്ഥകൾ അനുസരിച്ച്, ഉപയോഗത്തിൻ്റെ ഫ്ലോ റേഞ്ച്, കുറഞ്ഞ ഫ്ലോ അല്ലെങ്കിൽ ഉയർന്ന ലിഫ്റ്റ് പമ്പിംഗ് ഫോഴ്സ് തടയുന്നതിന്, ത്രസ്റ്റ് ബെയറിംഗ്, വസ്ത്രത്തിൻ്റെ മറ്റ് ഭാഗങ്ങൾ, മോട്ടോർ ഓവർലോഡ് കത്തിച്ചു
6, കിണർ ഇറങ്ങി പമ്പ് ശേഷം, ഗ്രൗണ്ട് ഇൻസുലേഷൻ പ്രതിരോധം ലേക്കുള്ള മോട്ടോർ അളക്കുന്നത് 100M കുറവ് പാടില്ല, വോൾട്ടേജ് നിലവിലെ നിരീക്ഷിക്കാൻ തുടക്കം ശേഷം, മോട്ടോർ വൈൻഡിംഗ് ഇൻസുലേഷൻ പരിശോധിക്കുക, ആവശ്യകതകൾ അനുസരിച്ച്; പമ്പ് സ്റ്റോറേജ് ലൊക്കേഷൻ താപനില മരവിപ്പിക്കുന്ന സ്ഥലത്തേക്കാൾ കുറവാണെങ്കിൽ, മോട്ടോർ അറയിലെ വെള്ളം വരണ്ടതാക്കണം, കുറഞ്ഞ താപനില മൂലമുണ്ടാകുന്ന മോട്ടോർ അറയിലെ ജല ഐസ് കേടുപാടുകൾ തടയണം.
The pump part is mainly composed of pump shaft, impeller, shunt shell, rubber bearing, check valve body (optional) and other components. The motor part is mainly composed of base, pressure regulating diaphragm, thrust bearing, thrust plate, lower guide bearing seat, stator, rotor, upper guide bearing seat, sand discharging ring, water inlet section, lead cable and other components. The main characteristic of this product is that the motor is a water-cooled submersible three-phase asynchronous motor, and the motor cavity is filled with water to cool the motor and lubricate the bearing. The pressure regulating diaphragm at the bottom is used to adjust the expansion-contraction pressure difference in the body caused by the change of the temperature rise of the motor. In order to prevent the sand particles in the well water from entering the motor, two oil seals are installed at the upper end of the motor shaft extension, and a sand discharging ring is installed to form a sand discharging structure. In order to prevent the pump shaft from jumping when starting, the pump shaft and the motor shaft are connected together through a coupling, and a thrust bearing is installed at the bottom of the motor. The lubrication of the motor and the pump bearing is realized through water lubrication. The stator winding of the motor is made of high-quality well motor winding wire, with high insulation performance. The pump is designed by computer CAD, with simple structure and good technical performance.

(1) ഇൻസ്റ്റാളേഷന് മുമ്പുള്ള തയ്യാറെടുപ്പ്:
1. സബ്മെർസിബിൾ പമ്പ് മാനുവലിൽ വ്യക്തമാക്കിയ ഉപയോഗ വ്യവസ്ഥകളും വ്യാപ്തിയും പാലിക്കുന്നുണ്ടോയെന്ന് പരിശോധിക്കുക.
2. സബ്മേഴ്സിബിൾ പമ്പിൻ്റെ പരമാവധി പുറം വ്യാസത്തിന് തുല്യമായ വ്യാസമുള്ള ഒരു കനത്ത ഒബിക്റ്റ് ഉപയോഗിച്ച്, വെൽബോറിൻ്റെ ഇൻനെൽഡിയമീറ്റർ സബ്മെർസിബിൾ പമ്പിന് അനുയോജ്യമാണോ എന്ന് അളക്കുക, കൂടാതെ കിണറിൻ്റെ ആഴം ഇൻസ്റ്റാളേഷൻ ആവശ്യകതകൾ നിറവേറ്റുന്നുണ്ടോ എന്ന് അളക്കുക.
3. കിണർ ശുദ്ധമാണോ എന്നും കിണർ വെള്ളം കലങ്ങിയതാണോ എന്നും പരിശോധിക്കുക. വെലോർ പമ്പ് ചെളിയും മണൽ വെള്ളവും കഴുകാൻ ഒരിക്കലും സബ്മെർസിബിൾ ഇലക്ട്രിക് പമ്പ് ഉപയോഗിക്കരുത്.
4. വെൽഹെഡ് ഇൻസ്റ്റലേഷൻ ക്ലാമ്പിൻ്റെ സ്ഥാനം അനുയോജ്യമാണോ എന്നും അത് മുഴുവൻ യൂണിറ്റിൻ്റെയും ഗുണനിലവാരം താങ്ങാൻ കഴിയുമോ എന്നും പരിശോധിക്കുക
5. മാന്വലിലെ അസംബ്ലി ഡയഗ്രം അനുസരിച്ച് സബ്മേഴ്സിബിൾ പമ്പ് ഘടകങ്ങൾ പൂർത്തിയാകുകയും ശരിയായി ഇൻസ്റ്റാൾ ചെയ്യുകയും ചെയ്തിട്ടുണ്ടോയെന്ന് പരിശോധിക്കുക, ഫിൽട്ടർ സ്ക്രീൻ നീക്കം ചെയ്ത് കപ്ലിംഗ് അയവായി കറങ്ങുന്നുണ്ടോ എന്ന് നോക്കുക.
6. വാട്ടർ സ്ക്രൂ അഴിച്ച് വൃത്തിയുള്ളതും നശിപ്പിക്കാത്തതുമായ വെള്ളം കൊണ്ട് മോട്ടോർ അറയിൽ നിറയ്ക്കുക (ശ്രദ്ധിക്കുക. അത് പൂരിപ്പിക്കുന്നത് ഉറപ്പാക്കുക), തുടർന്ന് വാട്ടർസ്ക്രൂ മുറുക്കുക. 12 മണിക്കൂർ വെള്ളം കുത്തിവച്ച ശേഷം, 500V ഷേക്കിംഗ് ടേബിൾ ഉപയോഗിച്ച് അളക്കുമ്പോൾ മോട്ടറിൻ്റെ ഇൻസുലേഷൻ പ്രതിരോധം 150M Q-ൽ കുറവായിരിക്കരുത്.
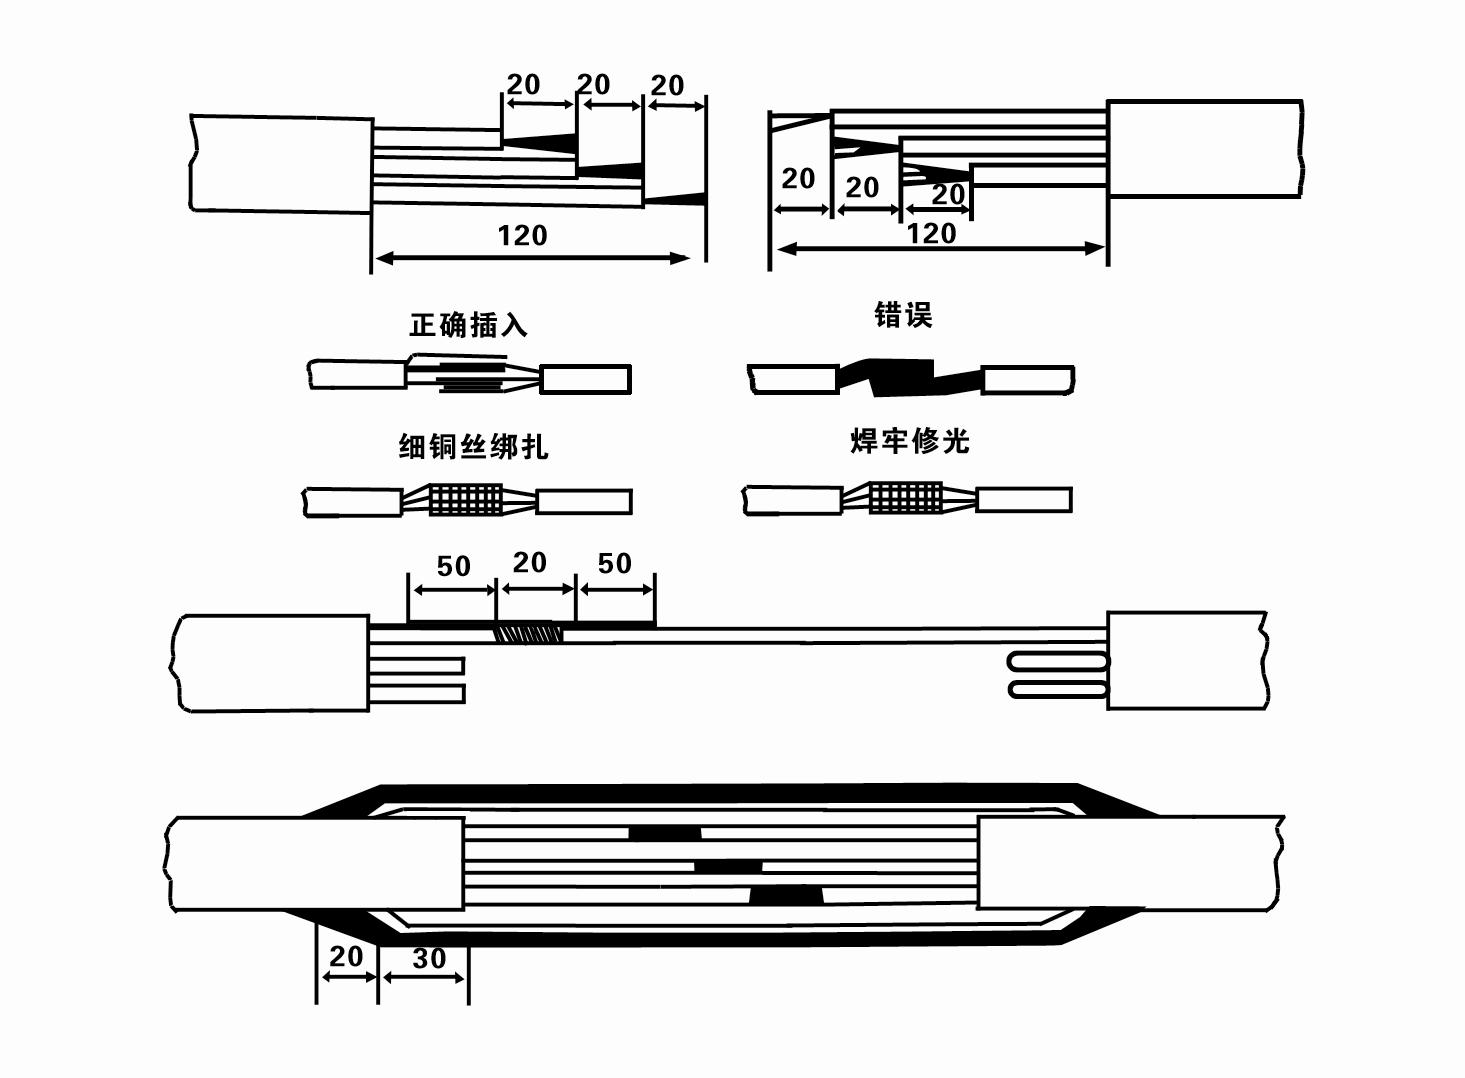
7. Cable joint, cut off a 120mm rubber sleeve from one end of the outgoing cable and the matching cable with an electrician's knifethen stagger the length of the three core wires in a stepped shape, peel off a 20mm copper core, scrape of the oxide layer on theoutside of the copper wire with a knife or sand cloth, and insert the two connected wire ends in palirs.After tying the layer tightly with fine copper wire, solder it thoroughly and firmly, and sand of any. burrs on the surface. Then, forthe three joints, use polyvester insulation tape to wrap them in a semi stacked manner for three lavers. Wrap the two ends of thewrapping layer tightywith nyion thread,and then use a semi stacked method to wrap the tape for three layers. Wrap the outellayer with high-pressure insulation tape for three layers. Finally, fold the threestrands together and repeatedly wrap them for fivelayers with high-pressure tape. Each layer must be tightly tied, and the interlayer joints must be tight and fimm to prevent water frompenetrating and damaging the insulation, After wrapping, soak in water at room temperature of 20 ’c for 12 hours, and measurethe insulation resistance with a shaking table, which should not be less than 100M Ω
ഘടിപ്പിച്ചിരിക്കുന്ന കേബിൾ വയറിംഗ് പ്രക്രിയ ഡയഗ്രം ഇപ്രകാരമാണ്:
8. ത്രീ-ഫേസ് വയറുകൾ ബന്ധിപ്പിച്ചിട്ടുണ്ടോ എന്നും ഡിസി പ്രതിരോധം ഏകദേശം സന്തുലിതമാണോ എന്നും പരിശോധിക്കാൻ ഒരു മൾട്ടിമീറ്റർ ഉപയോഗിക്കുക.
9. സർക്യൂട്ട്, ട്രാൻസ്ഫോർമർ കപ്പാസിറ്റി ഓവർലോഡ് ചെയ്തിട്ടുണ്ടോ എന്ന് പരിശോധിക്കുക, തുടർന്ന് ഓവർലോഡ് പ്രൊട്ടക്ഷൻ സ്വിച്ച് അല്ലെങ്കിൽ സ്റ്റാർട്ടിംഗ് ഉപകരണങ്ങൾ ബന്ധിപ്പിക്കുക. നിർദ്ദിഷ്ട മോഡലുകൾക്കായി പട്ടിക 2 കാണുക, തുടർന്ന് പമ്പിലെ റബ്ബർ ബെയറിംഗുകൾ ലൂബ്രിക്കേറ്റ് ചെയ്യുന്നതിന് വാട്ടർ പമ്പ് ഔട്ട്ലെറ്റിൽ നിന്നുള്ള വാട്ടർ പമ്പിലേക്ക് ഒരു ബക്കറ്റ് വെള്ളം ഒഴിക്കുക, തുടർന്ന് സബ്മെർസിബിൾ ഇലക്ട്രിക് പമ്പ് നിവർന്നും സ്ഥിരമായും സ്ഥാപിക്കുക. ആരംഭിക്കുക (ഒരു സെക്കൻഡിൽ കൂടരുത്) സ്റ്റിയറിംഗ് ദിശ സ്റ്റിയറിംഗ് ചിഹ്നവുമായി പൊരുത്തപ്പെടുന്നുണ്ടോയെന്ന് പരിശോധിക്കുക. ഇല്ലെങ്കിൽ, ത്രീ-ഫേസ് കേബിളിൻ്റെ ഏതെങ്കിലും രണ്ട് കണക്ടറുകൾ സ്വാപ്പ് ചെയ്യുക. തുടർന്ന് ഫിൽട്ടർ ഇൻസ്റ്റാൾ ചെയ്ത് കിണറ്റിലേക്ക് ഇറങ്ങാൻ തയ്യാറാകുക. പ്രത്യേക അവസരങ്ങളിൽ (ചാലുകൾ, ചാലുകൾ, നദികൾ, കുളങ്ങൾ, കുളങ്ങൾ മുതലായവ) ഉപയോഗിക്കുകയാണെങ്കിൽ, വൈദ്യുത പമ്പ് വിശ്വസനീയമായ നിലയിലായിരിക്കണം.
(2) ഇൻസ്റ്റലേഷൻ ഉപകരണങ്ങളും ഉപകരണങ്ങളും:
1. രണ്ട് ടണ്ണിൽ കൂടുതൽ ഒരു ജോഡി ലിഫ്റ്റിംഗ് ചെയിൻ.
2. നാല് മീറ്ററിൽ കുറയാത്ത ലംബമായ ഉയരമുള്ള ഒരു ട്രൈപോഡ്.
3. ഒരു ടണ്ണിൽ കൂടുതൽ ഭാരം താങ്ങാൻ കഴിയുന്ന രണ്ട് തൂങ്ങിക്കിടക്കുന്ന കയറുകൾ (വയർ റോപ്പുകൾ) (ഒരു പൂർണ്ണമായ വാട്ടർ പമ്പുകളുടെ ഭാരം താങ്ങാൻ കഴിയും).
4. രണ്ട് ജോഡി ക്ലാമ്പുകൾ (സ്പ്ലിൻ്റ്സ്) ഇൻസ്റ്റാൾ ചെയ്യുക.
5. റെഞ്ചുകൾ, ചുറ്റികകൾ, സ്ക്രൂഡ്രൈവറുകൾ, ഇലക്ട്രിക്കൽ ഉപകരണങ്ങളും ഉപകരണങ്ങളും മുതലായവ.
(3) വൈദ്യുത പമ്പ് സ്ഥാപിക്കൽ:
1. സബ്മെർസിബിൾ ഇലക്ട്രിക് പമ്പിൻ്റെ ഇൻസ്റ്റാളേഷൻ ഡയഗ്രം ചിത്രം 2 ൽ കാണിച്ചിരിക്കുന്നു. നിർദ്ദിഷ്ട ഇൻസ്റ്റാളേഷൻ അളവുകൾ പട്ടിക 3 ൽ കാണിച്ചിരിക്കുന്നു "സബ്മെർസിബിൾ ഇലക്ട്രിക് പമ്പിൻ്റെ ഇൻസ്റ്റാളേഷൻ അളവുകളുടെ പട്ടിക".
2. 30 മീറ്ററിൽ താഴെ തലയുള്ള സബ്മെർസിബിൾ ഇലക്ട്രിക് പമ്പുകൾ ഹോസുകളും വയർ റോപ്പുകളും അല്ലെങ്കിൽ മറ്റ് ഹെംപ് റോപ്പുകളും ഉപയോഗിച്ച് കിണറ്റിലേക്ക് നേരിട്ട് ഉയർത്താം, ഇത് മുഴുവൻ മെഷീൻ്റെയും വാട്ടർ പൈപ്പുകളുടെയും പൈപ്പുകളിലെ വെള്ളത്തിൻ്റെയും മുഴുവൻ ഭാരവും വഹിക്കാൻ കഴിയും.
3. 30 മീറ്ററിൽ കൂടുതൽ തലയുള്ള പമ്പുകൾ സ്റ്റീൽ പൈപ്പുകൾ ഉപയോഗിക്കുന്നു, കൂടാതെ ഇൻസ്റ്റാളേഷൻ ക്രമം ഇപ്രകാരമാണ്:
①വാട്ടർ പമ്പ് ഭാഗത്തിൻ്റെ മുകൾഭാഗം മുറുകെ പിടിക്കാൻ ഒരു ക്ലാമ്പ് ഉപയോഗിക്കുക (ഇപ്പോൾ മോട്ടോറും വാട്ടർ പമ്പും ബന്ധിപ്പിച്ചിരിക്കുന്നു), ഒരു തൂക്കു ചെയിൻ ഉപയോഗിച്ച് ഉയർത്തി, കിണറ്റിൽ ക്ലാമ്പ് ഇട്ട് നീക്കം ചെയ്യുന്നതുവരെ പതുക്കെ കിണറ്റിൽ കെട്ടിയിടുക. തൂങ്ങിക്കിടക്കുന്ന ചങ്ങല.
② മറ്റൊരു ജോഡി ക്ലാമ്പുകൾ ഉപയോഗിച്ച് ഒരു പൈപ്പ് മുറുകെ പിടിക്കുക, ഫ്ലേഞ്ചിൽ നിന്ന് 15 സെൻ്റീമീറ്റർ അകലെ ഒരു തൂക്കു ചെയിൻ ഉപയോഗിച്ച് ഉയർത്തുക, സാവധാനം താഴ്ത്തുക. പൈപ്പ് ഫ്ലേഞ്ചിനും പമ്പ് ഫ്ലേഞ്ചിനും ഇടയിൽ റബ്ബർ പാഡ് സ്ഥാപിക്കുക, പൈപ്പ് മുറുക്കുക, ബോൾട്ടുകൾ, നട്ട്സ്, സ്പ്രിംഗ് വാഷറുകൾ എന്നിവ ഉപയോഗിച്ച് തുല്യമായി പമ്പ് ചെയ്യുക.
③ സബ്മെർസിബിൾ പമ്പ് ചെറുതായി ഉയർത്തുക, വാട്ടർ പമ്പിൻ്റെ മുകളിലെ അറ്റത്തുള്ള ക്ലാമ്പ് നീക്കം ചെയ്യുക, ഒരു പ്ലാസ്റ്റിക് ടേപ്പ് ഉപയോഗിച്ച് വാട്ടർ പൈപ്പിൽ കേബിൾ ദൃഡമായി ബന്ധിക്കുക, തുടർന്ന് വെൽഹെഡിൽ ക്ലാമ്പ് സ്ഥാപിക്കുന്നത് വരെ പതുക്കെ കെട്ടുക.
④എല്ലാ ജല പൈപ്പുകളും കിണറിലേക്ക് കെട്ടാൻ ഇതേ രീതി ഉപയോഗിക്കുക.
⑤ലെഡ്-ഔട്ട് കേബിൾ കൺട്രോൾ സ്വിച്ചിലേക്ക് ബന്ധിപ്പിച്ച ശേഷം, അത് ത്രീ-ഫേസ് പവർ സപ്ലൈയുമായി ബന്ധിപ്പിച്ചിരിക്കുന്നു.
(4) ഇൻസ്റ്റാളേഷൻ സമയത്ത് ശ്രദ്ധിക്കേണ്ട കാര്യങ്ങൾ:
1. പമ്പിംഗ് പ്രക്രിയയിൽ ഒരു ജാമിംഗ് പ്രതിഭാസം കണ്ടെത്തിയാൽ, ജാമിംഗ് പോയിൻ്റ് മറികടക്കാൻ വാട്ടർ പൈപ്പ് തിരിക്കുകയോ വലിക്കുകയോ ചെയ്യുക. വിവിധ നടപടികൾ ഇപ്പോഴും പ്രവർത്തിക്കുന്നില്ലെങ്കിൽ, സബ്മെർസിബിൾ ഇലക്ട്രിക് പമ്പിനും കിണറിനും കേടുപാടുകൾ സംഭവിക്കാതിരിക്കാൻ ദയവായി പമ്പ് താഴേക്ക് നിർബന്ധിക്കരുത്.
2. ഇൻസ്റ്റാളേഷൻ സമയത്ത്, ഓരോ പൈപ്പിൻ്റെയും ഫ്ലേഞ്ചിൽ ഒരു റബ്ബർ പാഡ് സ്ഥാപിക്കുകയും തുല്യമായി ശക്തമാക്കുകയും വേണം.
3. വെള്ളം പമ്പ് കിണറ്റിലേക്ക് താഴ്ത്തുമ്പോൾ, കിണറിൻ്റെ ഭിത്തിയിൽ പമ്പ് കൂടുതൽ നേരം പ്രവർത്തിക്കാതിരിക്കാൻ കിണർ പൈപ്പിൻ്റെ മധ്യഭാഗത്ത് സ്ഥാപിക്കണം, ഇത് പമ്പ് വൈബ്രേറ്റുചെയ്യാനും മോട്ടോർ തൂത്തുവാരി കത്താനും ഇടയാക്കും. .
4. കിണറിൻ്റെ ഒഴുകുന്ന മണൽ, ചെളി എന്നിവയുടെ അവസ്ഥ അനുസരിച്ച് കിണറിൻ്റെ അടിയിലേക്ക് വാട്ടർ പമ്പിൻ്റെ ആഴം നിർണ്ണയിക്കുക. പമ്പ് ചെളിയിൽ കുഴിച്ചിടരുത്. വാട്ടർ പമ്പിൽ നിന്ന് കിണറിൻ്റെ അടിയിലേക്കുള്ള ദൂരം സാധാരണയായി 3 മീറ്ററിൽ കുറയാത്തതാണ് (ചിത്രം 2 കാണുക).
5. വാട്ടർ പമ്പിൻ്റെ വാട്ടർ എൻട്രി ഡെപ്ത് ഡൈനാമിക് ജലനിരപ്പിൽ നിന്ന് വാട്ടർ ഇൻലെറ്റ് നോഡിലേക്ക് 1-1.5 മീറ്ററിൽ കുറയാത്തതായിരിക്കണം (ചിത്രം 2 കാണുക). അല്ലെങ്കിൽ, വാട്ടർ പമ്പ് ബെയറിംഗുകൾ എളുപ്പത്തിൽ കേടായേക്കാം.
6. വാട്ടർ പമ്പിൻ്റെ ലിഫ്റ്റ് വളരെ കുറവായിരിക്കരുത്. അല്ലെങ്കിൽ, വലിയ ഫ്ലോ റേറ്റ് കാരണം മോട്ടോർ ഓവർലോഡ് ചെയ്യപ്പെടാതിരിക്കാനും കത്തുന്നത് തടയാനും റേറ്റുചെയ്ത ഫ്ലോ പോയിൻ്റിലെ പമ്പ് ഫ്ലോ നിയന്ത്രിക്കുന്നതിന് വെൽഹെഡ് വാട്ടർ പൈപ്പ്ലൈനിൽ ഒരു ഗേറ്റ് വാൽവ് സ്ഥാപിക്കേണ്ടതുണ്ട്.
7. വാട്ടർ പമ്പ് പ്രവർത്തിക്കുമ്പോൾ, ജലത്തിൻ്റെ ഉൽപാദനം തുടർച്ചയായും തുല്യമായും, കറൻ്റ് സ്ഥിരതയുള്ളതായിരിക്കണം (റേറ്റുചെയ്ത ജോലി സാഹചര്യങ്ങളിൽ, സാധാരണയായി റേറ്റുചെയ്ത നിലവിലെ 10% ൽ കൂടുതലാകരുത്), വൈബ്രേഷനോ ശബ്ദമോ ഉണ്ടാകരുത്. എന്തെങ്കിലും അസ്വാഭാവികതയുണ്ടെങ്കിൽ, കാരണം കണ്ടെത്തി അത് ഇല്ലാതാക്കാൻ യന്ത്രം നിർത്തണം.
8. ഇൻസ്റ്റാൾ ചെയ്യുമ്പോൾ, മോട്ടോർ ഗ്രൗണ്ടിംഗ് വയർ ക്രമീകരണം ശ്രദ്ധിക്കുക (ചിത്രം 2 കാണുക). വെള്ളം പൈപ്പ് ഒരു ഉരുക്ക് പൈപ്പ് ആയിരിക്കുമ്പോൾ, അതിനെ വെൽഹെഡ് ക്ലാമ്പിൽ നിന്ന് നയിക്കുക; വാട്ടർ പൈപ്പ് ഒരു പ്ലാസ്റ്റിക് പൈപ്പ് ആയിരിക്കുമ്പോൾ, ഇലക്ട്രിക് പമ്പിൻ്റെ ഗ്രൗണ്ടിംഗ് മാർക്കിൽ നിന്ന് അതിനെ നയിക്കുക.
After installation of the underwater pump, it is necessary to recheck the insulation resistance and three-phase continuity of the switch, and check whether the connection between the instrument and the starting equipment is wrong. If there is no problem, you can start the test machine. After starting, observe whether the indication reading of each instrument is correct. If the rated voltage and current specified on the nameplate are exceeded, observe whether the pump has any noise or vibration. If everything is normal, it can be put into operation. Four hours after the first operation of the pump, it should be turned off and the thermal insulation resistance of the motor should be quickly tested, and its value should not be less than 0.5 megaohm. After stopping the pump, it should be restarted after an interval of five minutes to prevent the water column in the pipeline from completely reversing, resulting in the motor burning due to excessive current. After the pump is put into normal operation, in order to prolong its service life, it is necessary to check regularly whether the supply voltage, working current and insulation resistance are normal. If the following conditions are found, the machine should be stopped immediately to eliminate the fault:
1 the current exceeds 20% under the rated working condition.
2 the dynamic water level drops to the inlet section, resulting in intermittent drainage.
3 the underwater pump vibrates violently or emits huge noise.
4 the supply voltage is lower than 340 volts.
5 a fuse is burned.
6 the water pipe is damaged.
7 the thermal insulation resistance of the motor to the ground is less than 0.5 megaohm.
When disassembling the device, it is necessary to untie the cable bundle and remove the pipeline part and the line protection plate. Remove the drain bolt and exclude all water in the motor chamber. Remove the filter element and loosen the screw on the coupling fixed to the motor shaft. Unscrew the bolt connecting the water inlet section and the motor, and separate the pump and the motor (pay attention to placing the device horizontally when separating to prevent the bending of the pump shaft). The sequence of disassembling the pump is as follows: (see Figure 1) water inlet section, impeller, water inlet shell, impeller. Check the valve body, and use a special tool to loosen the cone sleeve fixed to the impeller when removing the impeller. In the process of disassembly, avoid bending the pump shaft and damaging various components. The disassembly process of the motor is as follows: (see Figure 1) put the motor on the platform, and remove the nuts on the screw (pull rod bolt), base, shaft head lock nut, thrust plate, key and lower guide rail - bearing seat, bolt, and then remove the rotor (be careful not to damage the wiring harness), and finally remove the connecting parts and upper guide bearing seat. Unit assembly: before assembly, the rust and dirt of each component should be cleaned, and the sealant should be coated on each mating surface and fastener, and then assembled in the opposite order of disassembly (the movement of the motor shaft after assembly is about one millimeter), after the assembly is completed, the coupling should be flexibly rotated, and then the filter element should be placed for testing. Each time the underwater electric pump has been used for one year, or less than one year but has been immersed for two years, it must be disassembled and inspected in accordance with Article 5 and replace the worn parts.
1, മോട്ടോർ അറയിൽ (പ്രത്യേകിച്ച് ശൈത്യകാലത്ത് മോട്ടോർ ഫ്രീസുചെയ്യുന്നത് തടയാൻ) വെള്ളം കെടുത്തുക, കേബിൾ നന്നായി കെട്ടുക.
2, store in an indoor room without corrosive substances and gases, with a temperature below 40 °C.
3, ദീർഘകാല ഉപയോഗം മുങ്ങിക്കാവുന്ന പമ്പുകളുടെ തുരുമ്പ് തടയുന്നതിന് ശ്രദ്ധിക്കണം.
- ഇംപെല്ലർ
- ഷാഫ്റ്റ് സ്ലീവ്
- റബ്ബർ ഷാഫ്റ്റ് സ്ലീവ്
-
സീലിംഗ് റിംഗ്
01 ആഴത്തിലുള്ള കിണർ വെള്ളം
02 ഉയർന്ന ജലവിതരണം
03 മലവെള്ള വിതരണം
04 ടവർ വെള്ളം
05 കാർഷിക ജലസേചനം
06 തോട്ടം ജലസേചനം
07 നദീജല ഉപഭോഗം
08 ഗാർഹിക വെള്ളം


