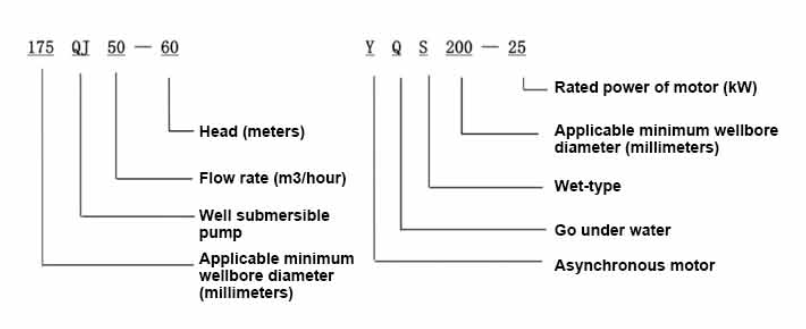
The variable frequency winding design ensures the motor's long-term smooth conversion operation between 1HZ-50HZ, energy saving and longer service life. This product stands out for its advanced technology and efficient performance, which can achieve energy-saving and environmentally friendly operation, while ensuring the stability and reliability of the motor for long-term use. Not only that, its design makes the product with a longer life, bringing more value to users. Whether in home applications or industrial fields, this motor can provide you with excellent performance to meet a variety of needs.
1,Power supply: three-phase AC 380V (tolerance + / - 5%), 50HZ (tolerance + / - 1%).
2، کیفیت آب:
(1) water temperature is not higher than 20 °C;
(2) محتوای ناخالصی جامد (نسبت جرم) بیشتر از 0.01٪ نیست.
(3) مقدار PH (pH) 6.5-8.5;
(4) محتوای سولفید هیدروژن بیشتر از 1.5 میلی گرم در لیتر نیست.
(5) محتوای یون کلرید بیشتر از 400 میلی گرم در لیتر نیست.
3, the motor is a closed or water-filled wet structure, before use the submersible motor cavity must be full of clean water, to prevent false full, and then tighten the water injection, air release bolts, otherwise not allowed to use
4, the submersible pump must be completely submerged in the water, the diving depth is not greater than 70m, the bottom of the submersible pump from the bottom of the well is not less than 3m.
5، جریان آب چاه باید بتواند خروجی آب پمپ شناور و عملکرد مداوم را برآورده کند، خروجی آب پمپ شناور باید در 0.7 - 1.2 برابر جریان نامی کنترل شود.
6، چاه باید مستقیم باشد، پمپ شناور را نمی توان استفاده کرد یا تخلیه کرد، فقط استفاده عمودی است.
7، پمپ شناور باید با کابل مطابق با الزامات و دستگاه محافظت از اضافه بار خارجی مطابقت داشته باشد.
8, the pump is strictly prohibited without water no-load test machine.

| مدل | جریان (m3/h) | سر (متر) |
سرعت چرخش (تغییر/نقطه) |
پمپ آب(٪) | پریز قطر (میلی متر) |
به خوبی قابل اجرا است قطر (میلی متر) |
دارای رتبه توان (KW) |
دارای رتبه ولتاژ (V) |
دارای رتبه جریان (A) |
راندمان حرکتی (%) | power factorcosφ | واحد اندازه حداکثر شعاعی (میلی متر) |
تذکر دهید | |||||||||
| 135QJ5-34 | 5 | 34 | 2850 | 40 | 135در بالا | 1.5 | 380 | 4.23 | 128 | |||||||||||||
| 135QJ5-51 | 51 | 2.2 | 6.03 | |||||||||||||||||||
| 135QJ5-68 | 68 | 3 | 8.01 | |||||||||||||||||||
| 135QJ5-85 | 85 | 4 | 10.53 | |||||||||||||||||||
| 135QJ5-102 | 102 | 5.5 | 14.1 | |||||||||||||||||||
| 135QJ5-119 | 119 | 5.5 | 14.1 | |||||||||||||||||||
| 135QJ5-240 | 240 | 11 | 26.28 | |||||||||||||||||||
| 135QJ5-280 | 5 | 280 | 2850 | 40 | 135در بالا | 13 | 380 | 30.87 | 128 | |||||||||||||
| 135QJ5-320 | 320 | 15 | 35.62 | |||||||||||||||||||
| 135QJ10-24 | 10 | 24 | 2850 | 50 | 135در بالا | 1.5 | 380 | 4.23 | 128 | |||||||||||||
| 135QJ10-32 | 32 | 2.2 | 6.03 | |||||||||||||||||||
| 135QJ10-48 | 48 | 3 | 8.01 | |||||||||||||||||||
| 135QJ10-56 | 56 | 4 | 10.53 | |||||||||||||||||||
| 135QJ10-72 | 72 | 5.5 | 14.1 | |||||||||||||||||||
| 135QJ10-80 | 80 | 5.5 | 14.1 | |||||||||||||||||||
| 135QJ10-104 | 104 | 7.5 | 19.0 | |||||||||||||||||||
| 135QJ10-120 | 120 | 7.5 | 19.0 | |||||||||||||||||||
| 135QJ10-136 | 136 | 9.2 | 22.7 | |||||||||||||||||||
| 135QJ10-180 | 180 | 11 | 26.28 | |||||||||||||||||||
| 135QJ10-210 | 210 | 13 | 30.87 | |||||||||||||||||||
| 135QJ10-240 | 240 | 15 | 35.62 | |||||||||||||||||||
| 135QJ10-300 | 300 | 18.5 | 43.12 | |||||||||||||||||||
| 135QJ15-36 | 15 | 36 | 2850 | 50 | 135در بالا | 2.2 | 380 | 6.03 | 128 | |||||||||||||
| 135QJ15-39 | 39 | 3 | 8.01 | |||||||||||||||||||
| 135QJ15-46 | 46 | 4 | 10.53 | |||||||||||||||||||
| 135QJ15-52 | 52 | 4 | 10.53 | |||||||||||||||||||
| 135QJ15-59 | 59 | 5.5 | 14.1 | |||||||||||||||||||
| 135QJ15-65 | 65 | 5.5 | 14.1 | |||||||||||||||||||
| 135QJ15-78 | 78 | 7.5 | 19.0 | |||||||||||||||||||
| 135QJ15-91 | 91 | 7.5 | 19.0 | |||||||||||||||||||
| 135QJ15-104 | 104 | 9.2 | 22.7 | |||||||||||||||||||
| 135QJ15-120 | 120 | 11 | 26.28 | |||||||||||||||||||
| 135QJ15-142 | 142 | 13 | 30.87 | |||||||||||||||||||
| 135QJ15-162 | 162 | 15 | 35.62 | |||||||||||||||||||
| 135QJ15-200 | 200 | 18.5 | 43.12 | |||||||||||||||||||
| 135QJ20-16 | 20 | 16 | 2850 | 50 | 135above | 2.2 | 380 | 6.03 | 128 | |||||||||||||
| 135QJ20-24 | 24 | 3 | 8.01 | |||||||||||||||||||
| 135QJ20-32 | 32 | 4 | 10.53 | |||||||||||||||||||
| 135QJ20-40 | 40 | 4 | 10.53 | |||||||||||||||||||
| 135QJ20-48 | 48 | 5.5 | 14.1 | |||||||||||||||||||
| 135QJ20-56 | 56 | 5.5 | 14.1 | |||||||||||||||||||
| 135QJ20-64 | 64 | 7.5 | 19.0 | |||||||||||||||||||
| 135QJ20-72 | 72 | 7.5 | 19.0 | |||||||||||||||||||
| 135QJ20-80135QJ20-100 | 80 | 9.2 | 22.7 | |||||||||||||||||||
| 100 | 11 | 26.28 | ||||||||||||||||||||
| 135QJ20-120 | 120 | 13 | 30.87 | |||||||||||||||||||
| 135QJ20-136 | 136 | 15 | 35.62 | |||||||||||||||||||
| 135QJ20-168135QJ25-12 | 168 | 18.5 | 43.12 | |||||||||||||||||||
| 25 | 12 | 2850 | 65 | 135در بالا | 2.2 | 380 | 6.03 | 128 | ||||||||||||||
| 135QJ25-18 | 18 | 3 | 8.01 | |||||||||||||||||||
| 135QJ25-24 | 24 | 4 | 10.53 | |||||||||||||||||||
| 135QJ25-30 | 30 | 4 | 10.53 | |||||||||||||||||||
| 135QJ25-36 | 36 | 5.5 | 14.1 | |||||||||||||||||||
| 135QJ25-48 | 48 | 7.5 | 19.0 | |||||||||||||||||||
| 135QJ25-60 | 60 | 9.2 | 22.7 | |||||||||||||||||||
| 135QJ25-82 | 82 | 11 | 26.28 | |||||||||||||||||||
| 135QJ25-97 | 97 | 13 | 30.87 | |||||||||||||||||||
| 135QJ25-110 | 110 | 15 | 35.62 | |||||||||||||||||||
| 135QJ25-130 | 130 | 18.5 | 43.12 | |||||||||||||||||||
| 135QJ32-24 | 32 | 24 | 2850 | 80 | 135در بالا | 4 | 380 | 10.53 | 128 | |||||||||||||
| 135QJ32-30 | 30 | 5.5 | 14.1 | |||||||||||||||||||
| 135QJ32-42 | 42 | 7.5 | 19.0 | |||||||||||||||||||
| 135QJ32-54 | 54 | 9.2 | 22.7 | |||||||||||||||||||
| 135QJ32-68 | 68 | 11 | 26.28 | |||||||||||||||||||
| 135QJ32-80 | 80 | 13 | 30.87 | |||||||||||||||||||
| 135QJ32-92 | 92 | 15 | 35.62 | |||||||||||||||||||
| 135QJ32-104 | 104 | 18.5 | 43.12 | |||||||||||||||||||
| 135QJ40-46 | 40 | 46 | 2850 | 80 | 135در بالا | 11 | 380 | 26.28 | 128 | |||||||||||||
| 135QJ40-54 | 54 | 13 | 30.87 | |||||||||||||||||||
| 135QJ40-62 | 62 | 15 | 35.62 | |||||||||||||||||||
| 135QJ40-84 | 84 | 18.5 | 43.12 | |||||||||||||||||||
1, well submersible pump for clean water pump, prohibit the new well, pumping sediment and muddy water,
2, well water pump voltage grade of 380/50HZ, the use of other voltage grades of submersible motors need to be customized. The underground cable must use waterproof cable, must be equipped with starting equipment, such as distribution box, start not ready should have commonly used motor comprehensive protection function, such as short circuit overload protection, phase protection, undervoltage protection, grounding protection, idling protection, in case of abnormal conditions, the protection device should be timely action trip.
3, the installation and use of the pump must be reliably grounded, prohibit the push and pull switch when the hands and feet are wet, the installation and maintenance of the pump must be cut off the power supply, the use of the pump place to set up "to prevent electric shock" obvious signs:
4, down the well or before installation, the motor cavity must be filled with distilled water or non-corrosive clean cold boiling water, tighten the / water bolt, the pump on the ground test run, must be to the pump chamber water lubrication rubber bearings, instant start not more than a second, see whether the steering is the same as the steering instructions. When the pump is upright, pay attention to safety, prevent overturning injury.
5، به شدت با توجه به مفاد بالابر پمپ، محدوده جریان استفاده، برای جلوگیری از جریان کم یا نیروی پمپاژ بالابر بالا، یاتاقان رانش و سایر قسمت های سایش، اضافه بار موتور سوخت 6، پس از پمپ پایین چاه، اندازه گیری موتور نسبت به مقاومت عایق زمین نباید کمتر از 100M باشد، پس از شروع برای مشاهده ولتاژ و جریان، عایق سیم پیچ موتور را بررسی کنید، آیا مطابق با الزامات است. دمای محل ذخیره سازی پمپ اگر کمتر از نقطه انجماد باشد، باید آب حفره موتور را خشک کند، از آسیب یخ آب حفره موتور ناشی از دمای پایین جلوگیری کند.
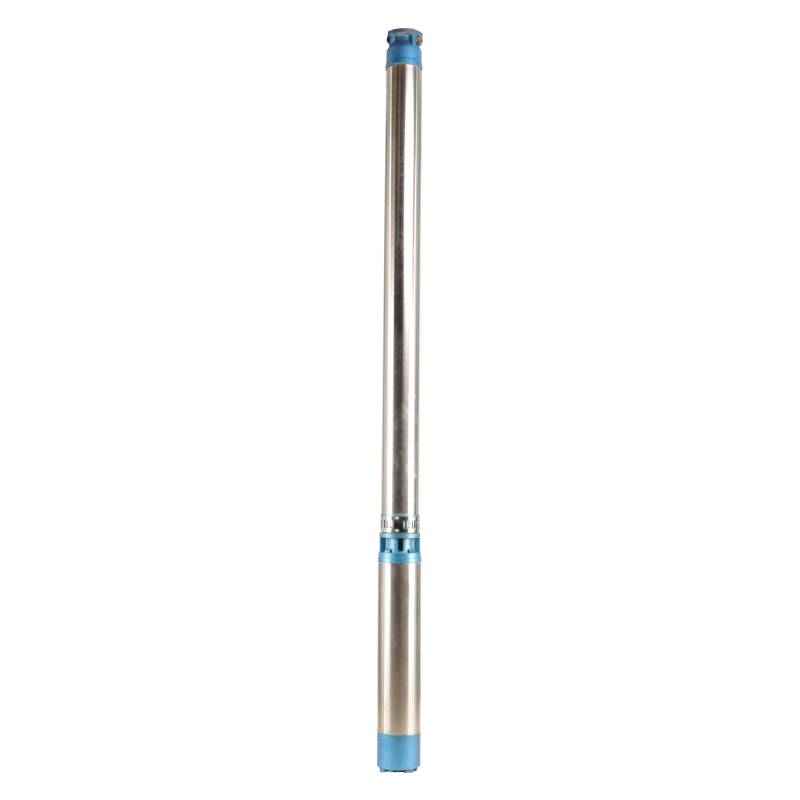
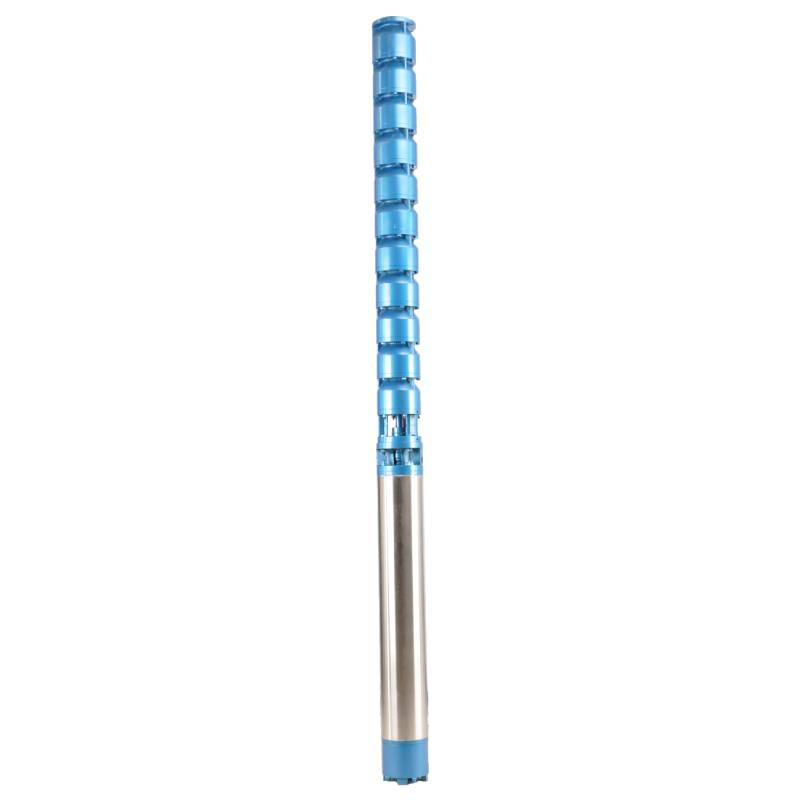
The pump parts are mainly composed of pump shaft, impeller, shunt shell, rubber bearing, check valve body (optional) and other components. The motor parts are mainly composed of base, pressure regulating diaphragm, thrust bearing, thrust plate, lower guide bearing seat, stator, rotor, upper guide bearing seat, sand discharging ring, water inlet section, and lead cable.
ویژگی های اصلی محصول عبارتند از:
The main characteristic of the product is that the pump is a water-immersed three-phase asynchronous motor, and the motor cavity is full of water for cooling the motor and lubricating the bearing. The pressure regulating diaphragm at the bottom of the motor is used to adjust the expansion-contraction pressure difference of the water inside the body caused by the change of temperature. At the same time, in order to prevent the sand particles in the well water from entering the motor, two oil seals are installed at the end of the motor shaft, and the sand discharging ring is installed to form a sand control structure. In order to prevent the pump shaft from beating when starting up, the pump shaft and the motor shaft are connected by a coupling, and the thrust bearing is installed at the bottom of the motor. In addition, the motor and the pump bearing are water-lubricated, and the stator winding of the motor uses high-quality submersible motor winding to ensure high insulation performance. The overall design is made of computer CAD, with simple structure and superior technical performance.

(1) آماده سازی قبل از نصب:
1. بررسی کنید که آیا پمپ شناور با شرایط استفاده و محدوده مشخص شده در دفترچه راهنما مطابقت دارد یا خیر.
2. با استفاده از یک شیء سنگین با قطری برابر با حداکثر قطر بیرونی پمپ شناور، اندازه گیری کنید که آیا قطر داخلی چاه می تواند با پمپ شناور مطابقت داشته باشد یا خیر، و اندازه گیری کنید که آیا عمق چاه با الزامات نصب مطابقت دارد یا خیر.
3. تمیز بودن چاه و کدر بودن آب چاه را بررسی کنید. هرگز از الکتروپمپ شناور برای شستشوی گل و لای پمپ ولوور و آب شن و ماسه استفاده نکنید تا از آسیب زودهنگام به الکتروپمپ شناور جلوگیری کنید.
4. بررسی کنید که آیا موقعیت گیره نصب جوشکار مناسب است و آیا می تواند کیفیت کل واحد را تحمل کند یا خیر.
5. بررسی کنید که آیا اجزای پمپ شناور به درستی مطابق با نمودار مونتاژ در دفترچه راهنما نصب شده اند، صفحه فیلتر را بردارید و کوپلینگ را بچرخانید تا ببینید آیا به طور انعطاف پذیر می چرخد یا خیر.
6. پیچ آب را باز کنید و حفره موتور را با آب تمیز و غیر خورنده پر کنید (توجه داشته باشید که آن را پر کنید)، سپس پیچ آب را ببندید. پس از 12 ساعت تزریق آب، مقاومت عایق موتور در هنگام اندازه گیری با میز لرزان 500 ولت نباید کمتر از 150M Q باشد.
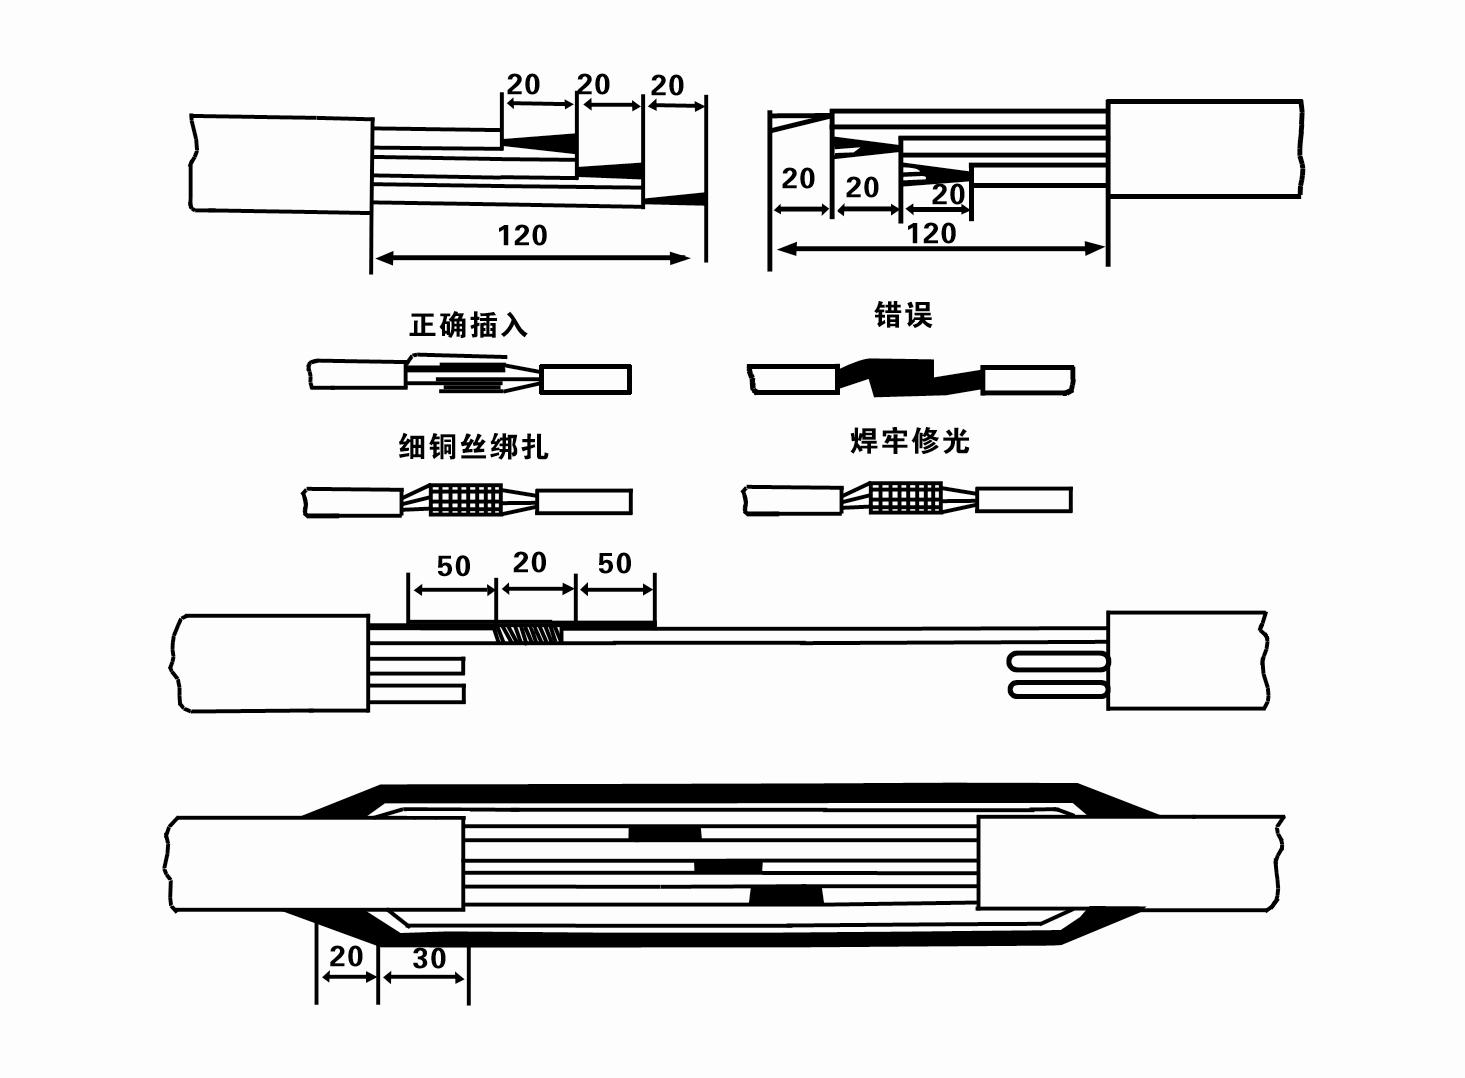
7. Cable joint, cut off a 120mm rubber sleeve from one end of the outgoing cable and the matching cable with an electrician's knifethen stagger the length of the three core wires in a stepped shape, peel off a 20mm copper core, scrape of the oxide layer on theoutside of the copper wire with a knife or sand cloth, and insert the two connected wire ends in palirs.After tying the layer tightly with fine copper wire, solder it thoroughly and firmly, and sand of any. burrs on the surface. Then, forthe three joints, use polyvester insulation tape to wrap them in a semi stacked manner for three lavers. Wrap the two ends of thewrapping layer tightywith nyion thread,and then use a semi stacked method to wrap the tape for three layers. Wrap the outellayer with high-pressure insulation tape for three layers. Finally, fold the threestrands together and repeatedly wrap them for fivelayers with high-pressure tape. Each layer must be tightly tied, and the interlayer joints must be tight and fimm to prevent water frompenetrating and damaging the insulation, After wrapping, soak in water at room temperature of 20 ’c for 12 hours, and measurethe insulation resistance with a shaking table, which should not be less than 100M Ω
نمودار فرآیند سیم کشی کابل پیوست شده به شرح زیر است:

8. از یک مولتی متر برای بررسی اینکه آیا سیم های سه فاز متصل هستند و آیا مقاومت DC تقریبا متعادل است یا خیر استفاده کنید.
9. بررسی کنید که آیا مدار و ظرفیت ترانسفورماتور اضافه بار شده است یا خیر، و سپس کلید حفاظت اضافه بار یا تجهیزات راه اندازی را وصل کنید. برای مدلهای خاص به جدول 2 مراجعه کنید، سپس یک سطل آب را از خروجی پمپ آب در پمپ آب بریزید تا یاتاقانهای لاستیکی پمپ روغن کاری شوند و سپس الکتروپمپ شناور را در حالت عمودی و ثابت قرار دهید. شروع کنید (بیش از یک ثانیه) و بررسی کنید که آیا جهت فرمان با علامت فرمان مطابقت دارد یا خیر. اگر نه، هر دو کانکتور کابل سه فاز را عوض کنید. سپس فیلتر را نصب کنید و برای پایین رفتن از چاه آماده شوید. در صورت استفاده در مواقع خاص (مانند گودال ها، خندق ها، رودخانه ها، حوضچه ها، حوضچه ها و غیره)، الکتروپمپ باید به طور مطمئن به زمین متصل شود.
(2) تجهیزات و ابزار نصب:
1. یک جفت زنجیر بالابر برای بیش از دو تن.
2. سه پایه با ارتفاع عمودی که کمتر از چهار متر نباشد.
3. دو طناب آویزان (طناب سیم) که تحمل وزن بیش از یک تن را دارند (می تواند وزن مجموعه کاملی از پمپ های آب را تحمل کند).
4. دو جفت گیره (آتل) نصب کنید.
5. آچار، چکش، پیچ گوشتی، ابزار و ابزار الکتریکی و غیره.
(3) نصب پمپ برقی:
1. نمودار نصب الکتروپمپ شناور در شکل 2 نشان داده شده است. ابعاد نصب خاص در جدول 3 "لیست ابعاد نصب پمپ الکتریکی شناور" نشان داده شده است.
2. الکتروپمپ های شناور با هد کمتر از 30 متر را می توان با استفاده از شیلنگ ها و سیم بکسل ها یا سایر طناب های کنفی که می تواند وزن کل دستگاه، لوله های آب و آب موجود در لوله ها را تحمل کند، مستقیماً به داخل چاه بالا برد.
3. پمپ های با هد بیش از 30 متر از لوله های فولادی استفاده می کنند و ترتیب نصب به شرح زیر است:
① با استفاده از گیره انتهای بالایی قسمت پمپ آب را ببندید (در حال حاضر موتور و پمپ آب وصل شده اند) آن را با زنجیر آویزان بلند کرده و به آرامی داخل چاه ببندید تا گیره را روی سر چاه قرار دهید و زنجیر آویزان
② از یک جفت گیره دیگر برای بستن لوله استفاده کنید، آن را با یک زنجیر آویزان در فاصله 15 سانتی متری از فلنج بلند کنید و به آرامی پایین بیاورید. بین فلنج لوله و فلنج پمپ پد لاستیکی را در جای خود قرار دهید و لوله را محکم کنید و با پیچ و مهره و واشر فنری به طور یکنواخت پمپ کنید.
③ پمپ شناور را کمی بلند کنید، گیره انتهای بالایی پمپ آب را بردارید، کابل را با یک نوار پلاستیکی محکم به لوله آب ببندید و به آرامی آن را ببندید تا گیره در دهانه چاه قرار گیرد.
④از همین روش برای بستن تمام لوله های آب به چاه استفاده کنید.
⑤پس از اتصال کابل خروجی به کلید کنترل، به برق سه فاز متصل می شود.
(4) مواردی که باید در هنگام نصب توجه داشته باشید:
1. اگر در طی فرآیند پمپاژ پدیده گیر یافت شد، لوله آب را بچرخانید یا بکشید تا بر نقطه گیر کردن غلبه کنید. اگر اقدامات مختلف هنوز جواب نداد، لطفاً پمپ را مجبور نکنید تا به پمپ الکتریکی شناور و چاه آسیب نرسد.
2. در هنگام نصب، یک پد لاستیکی باید در فلنج هر لوله قرار داده شود و به طور یکنواخت سفت شود.
3. هنگامی که پمپ آب به داخل چاه پایین می آید، باید آن را در وسط لوله چاه قرار داد تا از کارکرد طولانی پمپ به دیواره چاه جلوگیری شود و باعث لرزش پمپ و جارو و سوختن موتور شود. .
4. عمق پمپ آب تا کف چاه را با توجه به شرایط جاری شن و سیلت چاه تعیین کنید. پمپ را در گل دفن نکنید. فاصله پمپ آب تا کف چاه معمولاً کمتر از 3 متر نیست (شکل 2 را ببینید).
5. عمق ورودی آب پمپ آب نباید کمتر از 1-1.5 متر از سطح آب دینامیکی تا گره ورودی آب باشد (شکل 2 را ببینید). در غیر این صورت، بلبرینگ پمپ آب ممکن است به راحتی آسیب ببیند.
6. بالابر پمپ آب نمی تواند خیلی کم باشد. در غیر این صورت، باید یک شیر دروازه روی خط لوله آب سر چاه نصب شود تا جریان پمپ را در نقطه جریان نامی کنترل کند تا از بارگیری و سوختن موتور به دلیل دبی زیاد جلوگیری کند.
7. هنگامی که پمپ آب در حال کار است، خروجی آب باید پیوسته و یکنواخت باشد، جریان باید پایدار باشد (در شرایط کاری نامی، معمولا بیش از 10٪ جریان نامی)، و نباید لرزش یا نویز وجود داشته باشد. در صورت وجود هرگونه ناهنجاری، دستگاه باید متوقف شود تا علت آن مشخص شود و آن را از بین ببرید.
8. هنگام نصب، به تنظیم سیم اتصال زمین موتور توجه کنید (شکل 2 را ببینید). هنگامی که لوله آب یک لوله فولادی است، آن را از گیره سر چاه هدایت کنید. هنگامی که لوله آب یک لوله پلاستیکی است، آن را از علامت زمین پمپ الکتریکی هدایت کنید.
- 1.After the submersible pump is installed, check the insulation resistance and three-phase conduction from the switch again, check whether the instrument and the connection of the start equipment are wrong, if there is no problem, the trial machine can be started, and after the start, observe whether the indicator readings of the instrument exceed the rated voltage and current specified on the nameplate, observe whether the pump has noise and vibration phenomenon, and put into operation if everything is normal.
- 2. After the first operation of the pump for four hours, the motor should be stopped to test the thermal insulation resistance quickly, and its value should not be less than 0.5 megaohm.
- 3. After the pump is stopped, it should be started after five minutes to prevent the water column in the pipe from being completely reflowed and causing the motor to burn out due to excessive current.
- 4. Our pump is designed to provide efficient, reliable and lasting pumping solutions.After normal operation, in order to prolong the service life of the pump, it is necessary to check the power supply voltage, running current and insulation resistance regularly to ensure that they are normal.
- If the following conditions are found, the machine should be shut down immediately to eliminate the fault:
- - the current exceeds 20% under the rated working conditions;
- - the dynamic water level drops to the inlet section, resulting in intermittent drainage;
- - the submersible pump vibrates violently or emits noisy sounds;
- - the power supply voltage is lower than 340 volts;
- - one phase of a fuse is blown out;
- - the water pipe is damaged;
- - the thermal insulation resistance of the motor to the ground is less than 0.5 megaohm.
- The steps of disassembling the unit include unlocking the cable holder, taking off the pipe part, removing the line protection plate, rotating the drain screw and emptying all the water in the motor chamber, taking out the filter and loosening the screw of the coupling fixed to the motor shaft.Unscrew the bolt connecting the water inlet section and the motor, and separate the pump and the motor (note that the unit should be placed horizontally when separating to prevent the bending of the pump shaft).
- 5. The disassembly sequence of the pump includes: water inlet part, impeller, shunt shell, impeller, check valve body.When removing the impeller, use a special tool to loosen the cone sleeve fixing the impeller.During the disassembly process, avoid bending the pump shaft and damaging various parts.The disassembly process of the motor includes: placing the motor on the platform, and then removing the nuts on the studs, base, shaft head lock nut, thrust plate, key, lower guide rail, bearing seat and bolt from the bottom of the motor, then removing the rotor (be careful not to damage the winding), and finally removing the connecting parts and upper guide bearing seat. Before assembling the unit, it is necessary to clean the rust and dirt of each part, and apply sealant on each mating surface and fastener, and then assemble it in the opposite order of disassembly.After assembly, the coupling should be flexibly rotated, and then the filter should be put on to test the machine. Our pump products are designed to provide superior performance and reliability to meet your pumping needs.
- 6. Submersible pumps operating every year, or less than a year of operation but the submersible time has reached two years, should be taken out of the well according to the 5th dismantled maintenance, replacement of worn parts.
1، آب داخل حفره موتور را خارج کنید (مخصوصاً در زمستان برای جلوگیری از یخ زدن موتور) و کابل را به خوبی ببندید.
2, store in an indoor room without corrosive substances and gases, with a temperature below 40 °C.
3، استفاده طولانی مدت باید به جلوگیری از زنگ زدگی پمپ های شناور توجه شود.
- پروانه
- آستین شفت
- آستین شفت لاستیکی
- حلقه آب بندی
01 آب ورودی چاه عمیق
02 تامین آب مرتفع
03 آبرسانی کوهستان
آب برج 04
05 آبیاری کشاورزی
06 آبیاری باغ
07 آبگیری رودخانه
08 آب خانگی


