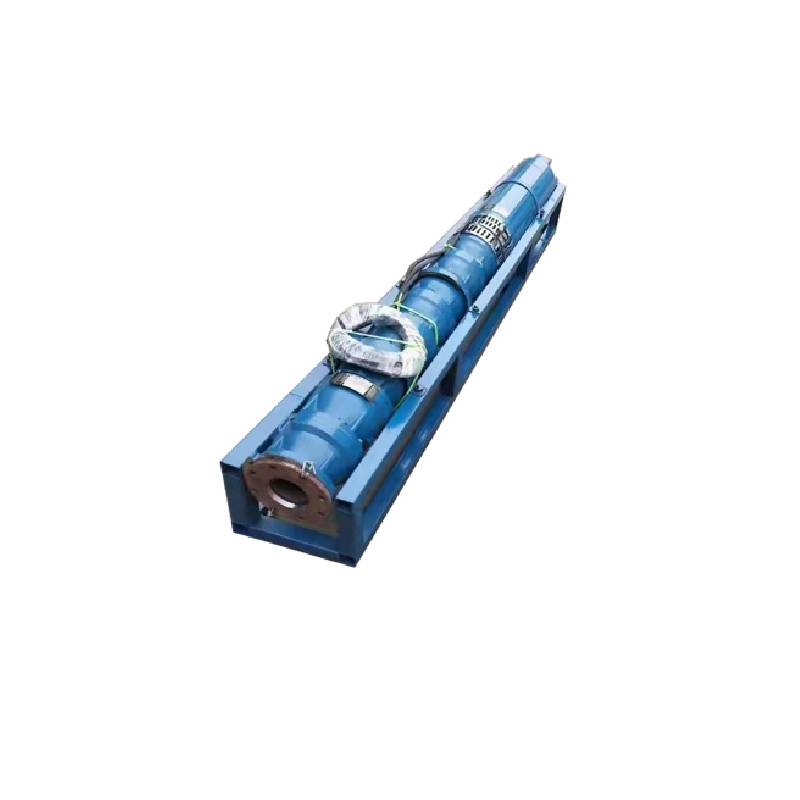
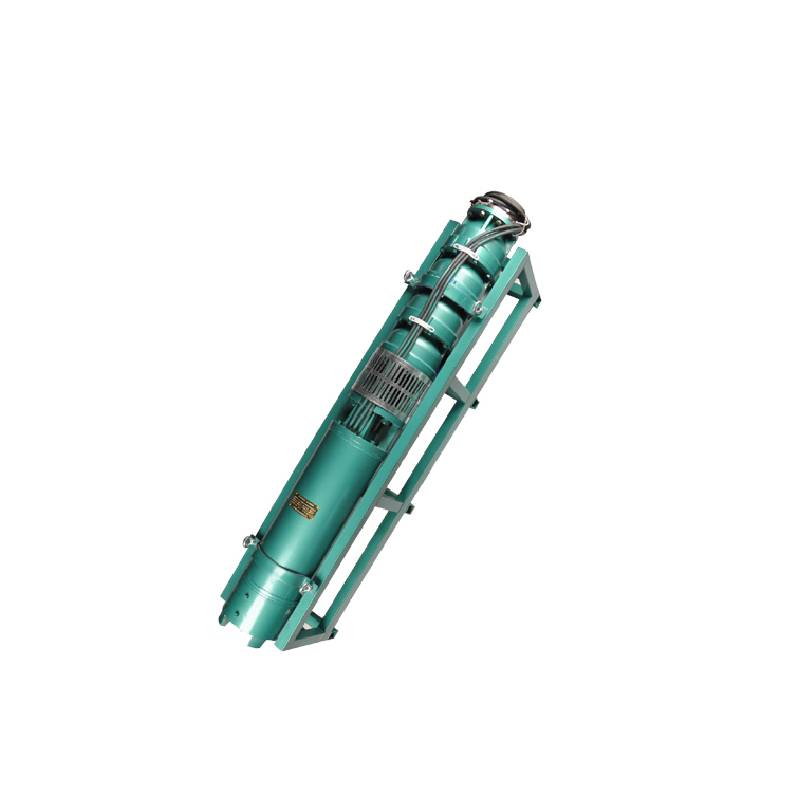
This series of fountain pump is a special fountain pump developed by our factory. The pump motor core is made of high quality cold rolled silicon steel, which makes the pump more efficient, has good magnetic conductivity, and does not produce heat when starting frequently. The two ends of the motor rotor are equipped with alloy copper sleeves with water as lubricant. Stainless steel bushings replace ball bearings, avoiding the problems of easy rust of ball bearings and burnout of motor due to lack of oil and wear. Most suitable for music fountain, all models can be used horizontally.
1, қуат көзі: үш фазалы айнымалы ток 380 В (толеранттылық + / - 5%), 50Гц (төзімділік + / - 1%).
2, су сапасы:
(1) water temperature is not higher than 20 °C;
(2) қатты қоспалардың құрамы (массалық қатынас) 0,01%-дан көп емес;
(3) РН мәні (рН) 6,5-8,5;
(4) күкіртсутегінің мөлшері 1,5 мг/л-ден көп емес;
(5) хлорид ионының мөлшері 400 мг/л артық емес.
3, қозғалтқыш жабық немесе су толтырылған дымқыл құрылым, қолданар алдында су асты моторының қуысы таза суға толы болуы керек, жалған толтыруды болдырмас үшін, содан кейін су бүрку, ауа шығаратын болттарды қатайтыңыз, әйтпесе пайдалануға рұқсат етілмейді.
4, су асты сорғы толығымен суға батырылған болуы керек, сүңгуір тереңдігі 70 м артық емес, ұңғыма түбінен суасты сорғының түбі 3 м кем емес.
5, ұңғыма суының шығыны суасты сорғысының су шығысына және үздіксіз жұмысына сәйкес болуы керек, суасты сорғысының су шығысы номиналды ағынның 0,7 - 1,2 еселенген деңгейінде бақылануы керек.
6, ұңғыма түзу болуы керек, суасты сорғыны қолдануға немесе төгуге болмайды, тек тік пайдалану.
7, суасты сорғы талаптарға сәйкес кабельмен және сыртқы жүктемеден қорғау құрылғысымен сәйкес келуі керек.
8, сорғыға су жүктемесіз сынақ машинасы жоқ қатаң тыйым салынады

| Үлгі | Ағым (м3/сағ) | Бас (м) |
Айналу жылдамдығы (өзгерту/нүкте) |
Су сорғысы(%) | Розетка диаметрі (мм) |
Жақсы қолданылады диаметрі (мм) |
Бағаланған power(KW) |
Бағаланған кернеу(V) |
Бағаланған ток (A) |
Мотор тиімділігі (%) | power factorcosφ | Бірлік Радиалды максималды өлшем (мм) |
Ескерту | |||||||||
| 250QJ50-40 | 50 | 40 | 2875 | 72 | 80 | 250жоғарыда | 9.2 | 380 | 21.7 | 78.5 | 0.82 | 233 | ||||||||||
| 250QJ50-60 | 60 | 13 | 30.1 | 80.0 | 0.82 | |||||||||||||||||
| 250QJ50-80 | 80 | 18.5 | 40.8 | 82.0 | 0.84 | |||||||||||||||||
| 250QJ50-100 | 100 | 22 | 47.9 | 83.0 | 0.84 | |||||||||||||||||
| 250QJ50-120 | 120 | 25 | 53.8 | 84.0 | 0.84 | |||||||||||||||||
| 250QJ50-140 | 140 | 30 | 64.2 | 84.5 | 0.84 | |||||||||||||||||
| 250QJ50-160 | 160 | 37 | 77.8 | 85.0 | 0.85 | |||||||||||||||||
| 250QJ50-200 | 200 | 45 | 94.1 | 85.5 | 0.85 | |||||||||||||||||
| 250QJ50-240 | 240 | 55 | 114.3 | 86.0 | 0.85 | |||||||||||||||||
| 250QJ50-280 | 280 | 63 | 131.0 | 86.0 | 0.85 | |||||||||||||||||
| 250QJ50-320 | 320 | 75 | 152.3 | 87.0 | 0.86 | |||||||||||||||||
| 250QJ50-400 | 400 | 90 | 182.8 | 87.0 | 0.86 | |||||||||||||||||
| 250QJ50-440 | 440 | 100 | 203.1 | 87.0 | 0.86 | |||||||||||||||||
| 250QJ63-40 | 63 | 40 | 2875 | 74 | 80 | 250жоғарыда | 11 | 380 | 25.8 | 79.0 | 0.82 | 233 | ||||||||||
| 250QJ63-60 | 60 | 18.5 | 40.8 | 82.0 | 0.84 | |||||||||||||||||
| 250QJ63-80 | 80 | 22 | 47.9 | 83.0 | 0.84 | |||||||||||||||||
| 250QJ63-100 | 100 | 30 | 64.2 | 84.5 | 0.84 | |||||||||||||||||
| 250QJ63-120 | 120 | 37 | 77.8 | 85.0 | 0.85 | |||||||||||||||||
| 250QJ63-160 | 160 | 45 | 94.1 | 85.5 | 0.85 | |||||||||||||||||
| 250QJ63-200 | 200 | 55 | 114.3 | 86.0 | 0.85 | |||||||||||||||||
| 250QJ63-220 | 220 | 63 | 131.0 | 86.0 | 0.85 | |||||||||||||||||
| 250QJ63-260 | 260 | 75 | 152.3 | 87.0 | 0.86 | |||||||||||||||||
| 250QJ63-300 | 300 | 90 | 182.8 | 87.0 | 0.86 | |||||||||||||||||
| 250QJ63-360 | 360 | 100 | 203.1 | 87.0 | 0.86 | |||||||||||||||||
| 250QJ80-20 | 80 | 20 | 2875 | 75 | 100 | 250жоғарыда | 7.5 | 380 | 18.0 | 78.0 | 0.81 | 233 | ||||||||||
| 250QJ80-40 | 40 | 15 | 33.9 | 81.0 | 0.83 | |||||||||||||||||
| 250QJ80-60 | 60 | 22 | 47.9 | 83.0 | 0.84 | |||||||||||||||||
| 250QJ80-80 | 80 | 30 | 64.2 | 84.5 | 0.84 | |||||||||||||||||
| 250QJ80-100 | 100 | 37 | 77.8 | 85.0 | 0.85 | |||||||||||||||||
| 250QJ80-120 | 120 | 45 | 94.1 | 85.5 | 0.85 | |||||||||||||||||
| 250QJ80-160 | 80 | 160 | 2875 | 75 | 100 | 250жоғарыда | 55 | 380 | 114.3 | 86.0 | 0.85 | 233 | ||||||||||
| 250QJ80-180 | 180 | 63 | 131.0 | 86.0 | 0.85 | |||||||||||||||||
| 250QJ80-200 | 200 | 75 | 152.3 | 87.0 | 0.86 | |||||||||||||||||
| 250QJ80-240 | 240 | 90 | 182.8 | 87.0 | 0.86 | |||||||||||||||||
| 250QJ80-280 | 280 | 100 | 203.1 | 87.0 | 0.86 | |||||||||||||||||
| 250QJ100-18 | 100 | 18 | 2875 | 75 | 100 | 250жоғарыда | 7.5 | 380 | 18.0 | 78.0 | 0.81 | 233 | ||||||||||
| 250QJ100-36 | 36 | 15 | 33.9 | 81.0 | 0.83 | |||||||||||||||||
| 250QJ100-54 | 54 | 25 | 53.8 | 84.0 | 0.84 | |||||||||||||||||
| 250QJ100-72 | 72 | 30 | 64.2 | 84.5 | 0.84 | |||||||||||||||||
| 250QJ100-90 | 90 | 37 | 77.8 | 85.0 | 0.85 | |||||||||||||||||
| 250QJ100-108 | 108 | 45 | 94.1 | 85.5 | 0.85 | |||||||||||||||||
| 250QJ100-126 | 126 | 55 | 114.3 | 86.0 | 0.85 | |||||||||||||||||
| 250QJ100-144 | 144 | 63 | 131.0 | 86.0 | 0.85 | |||||||||||||||||
| 250QJ100-162 | 162 | 75 | 152.3 | 87.0 | 0.86 | |||||||||||||||||
| 250QJ100-198 | 198 | 90 | 182.8 | 87.0 | 0.86 | |||||||||||||||||
| 250QJ100-216 | 216 | 100 | 203.1 | 87.0 | 0.86 | |||||||||||||||||
| 250QJ125-16 | 125 | 16 | 2875 | 76 | 125 | 250жоғарыда | 9.2 | 380 | 21.7 | 78.5 | 0.82 | 233 | ||||||||||
| 250QJ125-32 | 32 | 18.5 | 40.8 | 82.0 | 0.84 | |||||||||||||||||
| 250QJ125-48 | 48 | 25 | 53.8 | 84.0 | 0.84 | |||||||||||||||||
| 250QJ125-64 | 64 | 37 | 77.8 | 85.0 | 0.85 | |||||||||||||||||
| 250QJ125-80 | 80 | 45 | 94.1 | 85.5 | 0.85 | |||||||||||||||||
| 250QJ125-96 | 96 | 55 | 114.3 | 86.0 | 0.85 | |||||||||||||||||
| 250QJ125-112 | 112 | 63 | 131.0 | 86.0 | 0.85 | |||||||||||||||||
| 250QJ125-128 | 128 | 75 | 152.3 | 87.0 | 0.86 | |||||||||||||||||
| 250QJ125-160 | 160 | 90 | 182.8 | 87.0 | 0.86 | |||||||||||||||||
| 250QJ125-176 | 176 | 100 | 203.1 | 87.0 | 0.86 | |||||||||||||||||
| 250QJ125-192 | 192 | 110 | 219.6 | 87.5 | 0.87 | |||||||||||||||||
| 250QJ140-15 | 140 | 15 | 2875 | 76 | 125 | 250жоғарыда | 9.2 | 380 | 21.7 | 78.5 | 0.82 | 233 | ||||||||||
| 250QJ140-30 | 30 | 18.5 | 40.8 | 82.0 | 0.84 | |||||||||||||||||
| 250QJ140-45 | 45 | 30 | 64.2 | 84.5 | 0.84 | |||||||||||||||||
| 250QJ140-60 | 60 | 37 | 77.8 | 85.0 | 0.85 | |||||||||||||||||
| 250QJ140-75 | 45 | 45 | 94.1 | 85.5 | 0.85 | |||||||||||||||||
| 250QJ140-90 | 90 | 55 | 114.3 | 86.0 | 0.85 | |||||||||||||||||
| 250QJ140-105 | 140 | 105 | 2875 | 76 | 125 | 250жоғарыда | 63 | 380 | 131.0 | 86.0 | 0.85 | 233 | ||||||||||
| 250QJ140-120 | 120 | 75 | 152.3 | 87.0 | 0.86 | |||||||||||||||||
| 250QJ140-150 | 150 | 90 | 182.8 | 87.0 | 0.86 | |||||||||||||||||
| 250QJ140-165 | 165 | 100 | 203.1 | 87.0 | 0.86 | |||||||||||||||||
| 250QJ140-180 | 180 | 110 | 219.6 | 87.5 | 0.87 | |||||||||||||||||
| 250QJ200-20 | 200 | 20 | 2875 | 75 | 150 | 250жоғарыда | 18.5 | 380 | 40.8 | 82.0 | 0.84 | 233 | ||||||||||
| 250QJ200-40 | 40 | 37 | 77.8 | 85.0 | 0.85 | |||||||||||||||||
| 250QJ200-60 | 60 | 55 | 114.3 | 86.0 | 0.85 | |||||||||||||||||
| 250QJ200-80 | 80 | 75 | 152.3 | 87.0 | 0.86 | |||||||||||||||||
| 250QJ200-100 | 100 | 90 | 182.8 | 87.0 | 0.86 | |||||||||||||||||
| 250QJ200-120 | 120 | 100 | 203.1 | 87.0 | 0.86 | |||||||||||||||||
| 250QJ200-140 | 140 | 125 | 249.5 | 87.5 | 0.87 | |||||||||||||||||
1, well submersible pump for clean water pump, prohibit the new well, pumping sediment and muddy water,
2, well water pump voltage grade of 380/50HZ, the use of other voltage grades of submersible motors need to be customized. The underground cable must use waterproof cable, must be equipped with starting equipment, such as distribution box, start not ready should have commonly used motor comprehensive protection function, such as short circuit overload protection, phase protection, undervoltage protection, grounding protection, idling protection, in case of abnormal conditions, the protection device should be timely action trip.
3, the installation and use of the pump must be reliably grounded, prohibit the push and pull switch when the hands and feet are wet, the installation and maintenance of the pump must be cut off the power supply, the use of the pump place to set up "to prevent electric shock" obvious signs:
4, down the well or before installation, the motor cavity must be filled with distilled water or non-corrosive clean cold boiling water, tighten the / water bolt, the pump on the ground test run, must be to the pump chamber water lubrication rubber bearings, instant start not more than a second, see whether the steering is the same as the steering instructions. When the pump is upright, pay attention to safety, prevent overturning injury.
5, қатаң түрде сорғы көтеру ережелеріне сәйкес, пайдалану ағыны диапазоны, төмен ағынды немесе жоғары көтеру сорғы күшін, мойынтіректің және тозудың басқа бөліктерін болдырмау үшін, қозғалтқыштың шамадан тыс жүктелуі күйіп кетті.
6, after the pump down the well, the measurement of the motor to the ground insulation resistance should not be less than 100M, after the start to observe the voltage and current, check the motor winding insulation, whether in line with the requirements; pump storage location temperature if less than freezing point, should be dry the motor cavity water, prevent the motor cavity water ice damage caused by low temperature.
The introduction and structure of this pump product mainly include pump shaft, impeller, shunt shell, rubber bearing, check valve body (optional) and other components. The motor part is mainly composed of base, pressure regulating diaphragm, thrust bearing, thrust plate, lower guide bearing seat, stator, rotor, upper guide bearing seat, sand ring, water inlet section, lead cable and other components. The main characteristics of this pump product include the use of water-cooled wet submersible three-phase asynchronous motor, the motor cavity is filled with clean water to cool the motor and lubricate the bearing, the pressure regulating diaphragm at the bottom is used to adjust the expansion and contraction pressure difference of the internal water caused by the change of the temperature rise of the motor. In order to prevent the sand particles in the well water from entering the motor, two oil seals are installed on the upper end of the motor shaft extension, and the sand ring is installed to form a sand prevention structure. In order to avoid the pump shaft jumping at startup, the pump shaft and the motor shaft are connected together through the coupling, and the thrust bearing is installed at the lower part of the motor. The motor and pump bearing lubrication adopts water lubrication. The stator winding of the motor adopts high quality submersible motor winding, with high insulation performance. The pump adopts computer CAD design, simple structure and superior technical performance.

(1) Орнату алдында дайындық:
1. Суасты сорғының нұсқаулықта көрсетілген пайдалану шарттары мен көлеміне сәйкес келетінін тексеріңіз.
2. Диаметрі суасты сорғының сыртқы диаметріне тең ауыр объектіні пайдаланып, ұңғыма оқпанының ішкі диаметрі суасты сорғысына сәйкес келетінін өлшеңіз және ұңғыма тереңдігінің орнату талаптарына сәйкес келетінін өлшеңіз.
3. Ұңғыма оқпанының тазалығын және ұңғыма суының лайлы екенін тексеріңіз. Сүңгуір электр сорғыны мерзімінен бұрын зақымдап алмас үшін, суасты сорғысын лай мен құм суын жуу үшін ешқашан суасты электр сорғысын пайдаланбаңыз.
4. Ұңғыма сағасын орнату қапсырмасының орны сәйкес келетінін және оның бүкіл қондырғының сапасына төтеп бере алатынын тексеріңіз.
5. Нұсқаулықтағы құрастыру схемасына сәйкес суасты сорғы бөліктерінің толық және дұрыс орнатылғанын тексеріңіз Сүзгі экранын алып тастаңыз және муфтаның икемді айналатынын көру үшін бұраңыз.
6. Су бұрандасын бұрап алыңыз да, мотор қуысын таза, коррозияға ұшырамайтын сумен толтырыңыз (ескертпе. толтыруды ұмытпаңыз), содан кейін су бұрандасын қатайтыңыз. 12 сағат су бүркуден кейін қозғалтқыштың оқшаулау кедергісі 500В шайқау үстелімен өлшенгенде 150M Q кем болмауы керек.
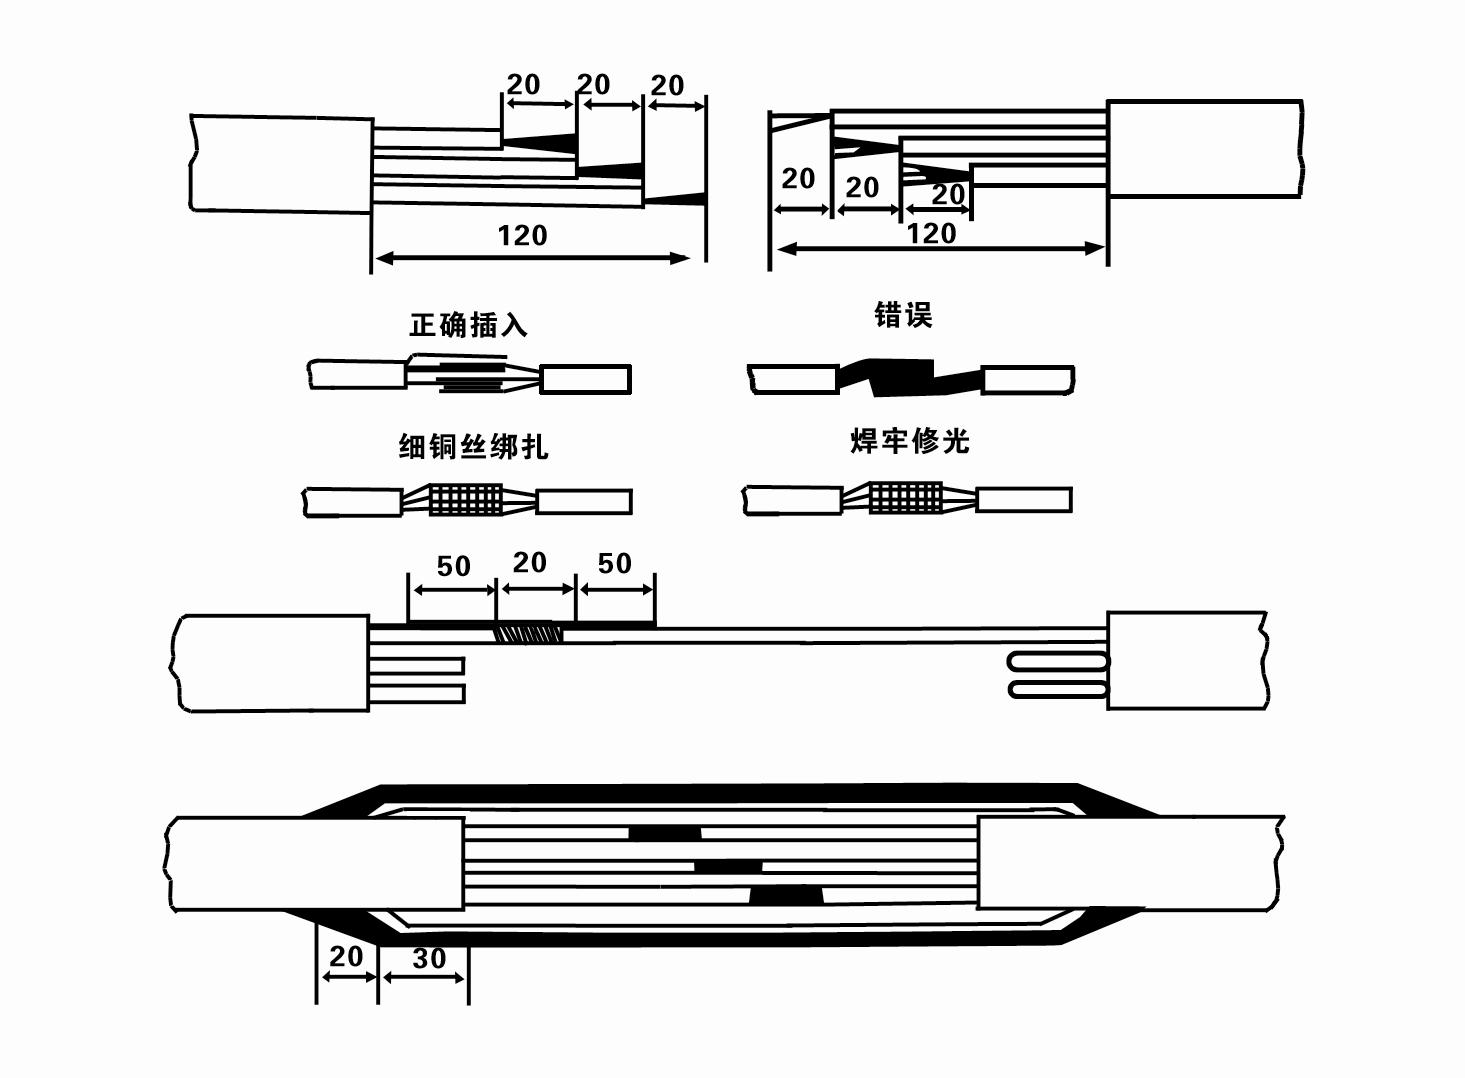
7. Cable joint, cut off a 120mm rubber sleeve from one end of the outgoing cable and the matching cable with an electrician's knifethen stagger the length of the three core wires in a stepped shape, peel off a 20mm copper core, scrape of the oxide layer on theoutside of the copper wire with a knife or sand cloth, and insert the two connected wire ends in palirs.After tying the layer tightly with fine copper wire, solder it thoroughly and firmly, and sand of any. burrs on the surface. Then, forthe three joints, use polyvester insulation tape to wrap them in a semi stacked manner for three lavers. Wrap the two ends of thewrapping layer tightywith nyion thread,and then use a semi stacked method to wrap the tape for three layers. Wrap the outellayer with high-pressure insulation tape for three layers. Finally, fold the threestrands together and repeatedly wrap them for fivelayers with high-pressure tape. Each layer must be tightly tied, and the interlayer joints must be tight and fimm to prevent water frompenetrating and damaging the insulation, After wrapping, soak in water at room temperature of 20 ’c for 12 hours, and measurethe insulation resistance with a shaking table, which should not be less than 100M Ω
Қосылған кабельді қосу процесінің схемасы келесідей:
8. Үш фазалы сымдардың жалғанғанын және тұрақты тұрақты ток кедергісінің шамамен теңестірілгенін тексеру үшін мультиметрді пайдаланыңыз.
9. Тізбек пен трансформатор сыйымдылығының шамадан тыс жүктелгенін тексеріңіз, содан кейін артық жүктемеден қорғау қосқышын немесе іске қосу жабдығын қосыңыз. Арнайы үлгілер үшін 2-кестені қараңыз, содан кейін сорғыдағы резеңке мойынтіректерді майлау үшін су сорғысының розеткасынан су сорғысына бір шелек су құйыңыз, содан кейін суасты электр сорғысын тік және тұрақты орналастырыңыз. Іске қосу (бір секундтан артық емес) және руль бағыты рульдік белгімен сәйкес келетінін тексеріңіз. Олай болмаса, үш фазалы кабельдің кез келген екі қосқышын ауыстырыңыз. Содан кейін сүзгіні орнатып, ұңғымаға түсуге дайындалыңыз. Ерекше жағдайларда (мысалы, арықтар, арықтар, өзендер, тоғандар, тоғандар және т.б.) пайдаланылса, электр сорғы сенімді түрде жерге тұйықталуы керек.
(2) Орнату жабдықтары мен құралдары:
1. Екі тоннадан асатын бір жұп көтеру шынжырлары.
2. Тік биіктігі төрт метрден кем емес штатив.
3. Бір тоннадан астам салмақты көтере алатын (су сорғыларының толық жиынтығының салмағын көтере алатын) екі аспа арқан (сым арқан).
4. Екі жұп қысқышты (шпинттерді) орнатыңыз.
5. Кілттер, балғалар, бұрағыштар, электр құралдары мен аспаптары және т.б.
(3) Электр сорғыны орнату:
1. Сүңгуір электр сорғының орнату схемасы 2-суретте көрсетілген. Орнатудың нақты өлшемдері 3-кестеде «Сүңгуір электр сорғының орнату өлшемдерінің тізімі» көрсетілген.
2. Басы 30 метрден аспайтын суасты электр сорғыларын шлангтарды және сым арқандарды немесе бүкіл машинаның, су құбырларының және құбырлардағы судың толық салмағын көтере алатын басқа кендір арқандарды пайдаланып, тікелей ұңғымаға көтеруге болады.
3. Басын 30 метрден асатын сорғыларда болат құбырлар пайдаланылады, орнату реті келесідей:
①Су сорғы бөлігінің үстіңгі ұшын (қозғалтқыш пен су сорғысы осы уақытта қосылған) қысу үшін қысқышты пайдаланыңыз, оны ілулі шынжырмен көтеріп, қысқышты ұңғыма сағасына орнатып, оны алып тастағанша ұңғымаға баяу байлаңыз. ілулі тізбек.
② Құбырды қысу үшін басқа қысқыштарды пайдаланыңыз, оны фланецтен 15 см қашықтықта ілулі шынжырмен көтеріп, баяу түсіріңіз. Құбыр фланеці мен сорғы фланецінің арасы Резеңке төсемді орнына қойып, құбырды және сорғыны болттар, гайкалар және серіппелі шайбалармен біркелкі қатайтыңыз.
③ Суасты сорғыны сәл көтеріңіз, су сорғышының үстіңгі жағындағы қысқышты алыңыз, кабельді су құбырына пластик таспамен мықтап байлаңыз және қысқыш ұңғыма сағасына қойылғанша баяу байлаңыз.
④Барлық су құбырларын ұңғымаға байлау үшін бірдей әдісті қолданыңыз.
⑤Шығару кабелі басқару қосқышына қосылғаннан кейін ол үш фазалы қуат көзіне қосылады.
(4) Орнату кезінде ескеретін жайттар:
1. Егер сору процесінде кептелу құбылысы анықталса, кептелу нүктесін жеңу үшін су құбырын бұраңыз немесе тартыңыз. Егер әртүрлі шаралар әлі де жұмыс істемесе, суасты электр сорғы мен ұңғымаға зақым келтірмеу үшін сорғыны күштеп түсірмеңіз.
2. Орнату кезінде әрбір құбырдың фланеціне резеңке төсеніш салынып, біркелкі тартылуы керек.
3. Су сорғыны ұңғымаға түсіргенде, сорғы ұзақ уақыт бойы ұңғыма қабырғасына қарсы жұмыс істеп, сораптың дірілдеуіне және қозғалтқыштың сыпырылуына және жануына жол бермеу үшін оны ұңғыма құбырының ортасына қою керек. .
4. Ұңғыманың ағып жатқан құм және тұнба жағдайына сәйкес су сорғышының ұңғыма түбіне дейінгі тереңдігін анықтаңыз. Сорғыны балшыққа көмуге болмайды. Су сорғышынан ұңғыма түбіне дейінгі қашықтық әдетте 3 метрден кем емес (2-суретті қараңыз).
5. Су сорғышының судың кіру тереңдігі судың динамикалық деңгейінен су құятын торапқа дейін 1-1,5 метрден кем болмауы керек (2-суретті қараңыз). Әйтпесе, су сорғысының мойынтіректері оңай зақымдалуы мүмкін.
6. Су сорғышының көтергіштігі тым төмен болмауы керек. Әйтпесе, қозғалтқыштың шамадан тыс жүктелуін және үлкен дебиттің салдарынан жанып кетуін болдырмау үшін номиналды дебит нүктесінде сорғы шығынын бақылау үшін ұңғыма сағасының су құбырына қақпақ клапанын орнату қажет.
7. Су сорғы жұмыс істеп тұрған кезде судың шығуы үздіксіз және біркелкі болуы керек, ток тұрақты болуы керек (номиналды жұмыс жағдайында, әдетте номиналды токтың 10% -нан аспауы керек), діріл немесе шу болмауы керек. Қандай да бір ауытқулар болса, себебін анықтау және оны жою үшін машинаны тоқтату керек.
8. Орнатқан кезде қозғалтқышты жерге қосу сымының параметріне назар аударыңыз (2-суретті қараңыз). Су құбыры болат құбыр болса, оны ұңғыманың қысқышынан жүргізеді; су құбыры пластикалық құбыр болса, оны электр сорғысының жерге қосу белгісінен өткізіңіз.
After the installation of the underwater pump, the insulation resistance and three-phase continuity of the switch face should be rechecked, and the connection between the instrument and the start device should be checked for any errors. If there is no problem, you can start to test the machine. After the start, observe whether the indication readings of each instrument are correct. If the rated voltage and current specified on the nameplate are exceeded, observe whether the pump has noise or vibration. If everything is normal, it can be put into operation. After the first operation of the pump for four hours, the motor should be shut down and tested for thermal insulation resistance quickly. Its value should not be less than 0.5 megaohm. After stopping the pump, it should be restarted after an interval of five minutes to prevent the water column in the pipeline from completely reversing and causing the motor to burn out due to excessive current. After the pump is put into normal operation, in order to prolong its service life, it is necessary to check regularly whether the supply voltage, running current and insulation resistance are normal. If the following conditions are found, the machine should be shut down immediately to eliminate the fault: the current exceeds 20% under rated working conditions; the dynamic water level drops to the inlet section, resulting in intermittent drainage; the underwater pump becomes violently vibrating or making noise; the supply voltage is lower than 340 volts; a fuse is blown out; the water pipe is damaged; the motor's thermal insulation resistance to the earth is less than 0.5 megaohm. The sequence of disassembly is: untie the cable fastening, remove the pipeline part, remove the line protection plate, screw down the water discharge bolt and discharge all the water in the motor chamber, remove the filter and loosen the coupling fixing screw of the motor shaft. The sequence of disassembly of the pump is: (see Figure 1) inlet section, impeller, guide housing, impeller, check the valve body. When removing the impeller, use special tools to loosen the taper sleeve of the impeller. Avoid bending the pump shaft and damaging the components throughout the process. The disassembly process of the motor is: (see Figure 1) put the motor on the platform, and remove the bolts, base, shaft head lock nut, thrust plate, key, lower guide plate (transverse bolt), bearing seat, screw knife seat from the bottom of the motor in order (take care not to damage the winding), and finally remove the connecting part and the upper guide bearing seat. Before assembling the unit, the rust and dirt of each part should be cleaned, and the sealant should be applied to each mating surface and fastener, and then assembled in reverse order of disassembly (the movement of the motor shaft after assembly is about one millimeter). After assembly, the coupling should be rotated flexibly and put on the filter for test. Once a year, or if less than a year of operation but has been immersed for two years, the underwater electric pump must be disassembled for maintenance in accordance with Article 5 and replace worn parts to ensure the normal operation and durability of the pump.
1, мотор қуысындағы суды сөндіріңіз (әсіресе қыста қозғалтқыш қатып қалмас үшін) және кабельді жақсылап байлаңыз.
2, store in an indoor room without corrosive substances and gases, with a temperature below 40 °C.
3, ұзақ мерзімді пайдалану суасты сорғыларының тоттануына назар аудару керек.
- Доңғалақ
- Білік жеңі
- Резеңке білік жеңі
-
Тығыздау сақинасы
01 Терең ұңғыма суын алу
02 Көп қабатты су құбыры
03 тау сумен жабдықтау
04 мұнара суы
05 Ауыл шаруашылық суару
06 бақшаны суару
07 өзен суын алу
08 тұрмыстық су


