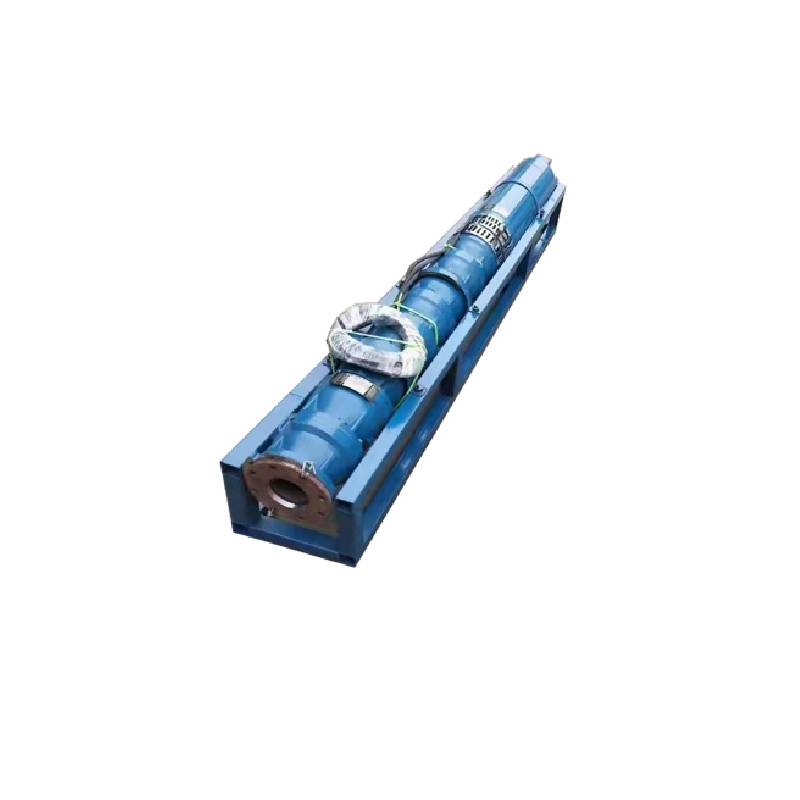
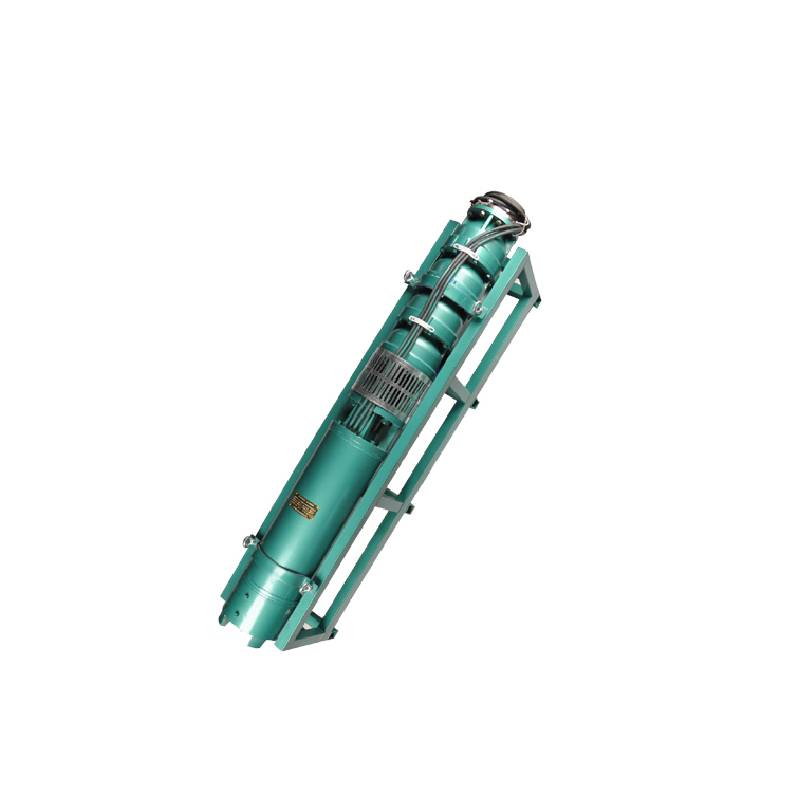
This series of fountain pump is a special fountain pump developed by our factory. The pump motor core is made of high quality cold rolled silicon steel, which makes the pump more efficient, has good magnetic conductivity, and does not produce heat when starting frequently. The two ends of the motor rotor are equipped with alloy copper sleeves with water as lubricant. Stainless steel bushings replace ball bearings, avoiding the problems of easy rust of ball bearings and burnout of motor due to lack of oil and wear. Most suitable for music fountain, all models can be used horizontally.
1, napájanie: trojfázové AC 380V (tolerancia + / - 5%), 50HZ (tolerancia + / - 1%).
2, kvalita vody:
(1) water temperature is not higher than 20 °C;
(2) obsah pevných nečistôt (hmotnostný pomer) nie je väčší ako 0,01 %;
(3) hodnota PH (pH) 6,5-8,5;
(4) obsah sírovodíka nie je väčší ako 1,5 mg/l;
(5) obsah chloridových iónov nie je väčší ako 400 mg/l.
3, motor je uzavretá alebo mokrá konštrukcia naplnená vodou, pred použitím musí byť dutina ponorného motora plná čistej vody, aby sa zabránilo falošnému naplneniu, a potom dotiahnite vstrekovanie vody, skrutky na uvoľnenie vzduchu, inak sa nesmie používať
4, ponorné čerpadlo musí byť úplne ponorené do vody, hĺbka ponoru nie je väčšia ako 70 m, dno ponorného čerpadla od dna studne nie je menšie ako 3 m.
5, prietok vody zo studne by mal byť schopný uspokojiť výstup vody ponorného čerpadla a nepretržitú prevádzku, výstup vody ponorného čerpadla by mal byť riadený na 0,7 - 1,2 násobok menovitého prietoku.
6, studňa by mala byť rovná, ponorné čerpadlo nemožno použiť ani vysypať, iba vertikálne použitie.
7, ponorné čerpadlo musí byť prispôsobené káblu podľa požiadaviek a externému ochrannému zariadeniu proti preťaženiu.
8, čerpadlo je prísne zakázané bez vodného skúšobného stroja bez zaťaženia

| Model | Prietok (m3/h) | Hlava (m) |
Rýchlosť otáčania (zmena/bod) |
Vodné čerpadlo(%) | Outlet priemer (mm) |
Dobre aplikovateľné priemer (mm) |
Ohodnotené power(KW) |
Ohodnotené napätie (V) |
Ohodnotené prúd (A) |
Motorová účinnosť (%) | power factorcosφ | Jednotka Radiálna maximálna veľkosť (mm) |
Poznámka | |||||||||
| 250QJ50-40 | 50 | 40 | 2875 | 72 | 80 | 250vyššie | 9.2 | 380 | 21.7 | 78.5 | 0.82 | 233 | ||||||||||
| 250QJ50-60 | 60 | 13 | 30.1 | 80.0 | 0.82 | |||||||||||||||||
| 250QJ50-80 | 80 | 18.5 | 40.8 | 82.0 | 0.84 | |||||||||||||||||
| 250QJ50-100 | 100 | 22 | 47.9 | 83.0 | 0.84 | |||||||||||||||||
| 250QJ50-120 | 120 | 25 | 53.8 | 84.0 | 0.84 | |||||||||||||||||
| 250QJ50-140 | 140 | 30 | 64.2 | 84.5 | 0.84 | |||||||||||||||||
| 250QJ50-160 | 160 | 37 | 77.8 | 85.0 | 0.85 | |||||||||||||||||
| 250QJ50-200 | 200 | 45 | 94.1 | 85.5 | 0.85 | |||||||||||||||||
| 250QJ50-240 | 240 | 55 | 114.3 | 86.0 | 0.85 | |||||||||||||||||
| 250QJ50-280 | 280 | 63 | 131.0 | 86.0 | 0.85 | |||||||||||||||||
| 250QJ50-320 | 320 | 75 | 152.3 | 87.0 | 0.86 | |||||||||||||||||
| 250QJ50-400 | 400 | 90 | 182.8 | 87.0 | 0.86 | |||||||||||||||||
| 250QJ50-440 | 440 | 100 | 203.1 | 87.0 | 0.86 | |||||||||||||||||
| 250QJ63-40 | 63 | 40 | 2875 | 74 | 80 | 250vyššie | 11 | 380 | 25.8 | 79.0 | 0.82 | 233 | ||||||||||
| 250QJ63-60 | 60 | 18.5 | 40.8 | 82.0 | 0.84 | |||||||||||||||||
| 250QJ63-80 | 80 | 22 | 47.9 | 83.0 | 0.84 | |||||||||||||||||
| 250QJ63-100 | 100 | 30 | 64.2 | 84.5 | 0.84 | |||||||||||||||||
| 250QJ63-120 | 120 | 37 | 77.8 | 85.0 | 0.85 | |||||||||||||||||
| 250QJ63-160 | 160 | 45 | 94.1 | 85.5 | 0.85 | |||||||||||||||||
| 250QJ63-200 | 200 | 55 | 114.3 | 86.0 | 0.85 | |||||||||||||||||
| 250QJ63-220 | 220 | 63 | 131.0 | 86.0 | 0.85 | |||||||||||||||||
| 250QJ63-260 | 260 | 75 | 152.3 | 87.0 | 0.86 | |||||||||||||||||
| 250QJ63-300 | 300 | 90 | 182.8 | 87.0 | 0.86 | |||||||||||||||||
| 250QJ63-360 | 360 | 100 | 203.1 | 87.0 | 0.86 | |||||||||||||||||
| 250QJ80-20 | 80 | 20 | 2875 | 75 | 100 | 250vyššie | 7.5 | 380 | 18.0 | 78.0 | 0.81 | 233 | ||||||||||
| 250QJ80-40 | 40 | 15 | 33.9 | 81.0 | 0.83 | |||||||||||||||||
| 250QJ80-60 | 60 | 22 | 47.9 | 83.0 | 0.84 | |||||||||||||||||
| 250QJ80-80 | 80 | 30 | 64.2 | 84.5 | 0.84 | |||||||||||||||||
| 250QJ80-100 | 100 | 37 | 77.8 | 85.0 | 0.85 | |||||||||||||||||
| 250QJ80-120 | 120 | 45 | 94.1 | 85.5 | 0.85 | |||||||||||||||||
| 250QJ80-160 | 80 | 160 | 2875 | 75 | 100 | 250vyššie | 55 | 380 | 114.3 | 86.0 | 0.85 | 233 | ||||||||||
| 250QJ80-180 | 180 | 63 | 131.0 | 86.0 | 0.85 | |||||||||||||||||
| 250QJ80-200 | 200 | 75 | 152.3 | 87.0 | 0.86 | |||||||||||||||||
| 250QJ80-240 | 240 | 90 | 182.8 | 87.0 | 0.86 | |||||||||||||||||
| 250QJ80-280 | 280 | 100 | 203.1 | 87.0 | 0.86 | |||||||||||||||||
| 250QJ100-18 | 100 | 18 | 2875 | 75 | 100 | 250vyššie | 7.5 | 380 | 18.0 | 78.0 | 0.81 | 233 | ||||||||||
| 250QJ100-36 | 36 | 15 | 33.9 | 81.0 | 0.83 | |||||||||||||||||
| 250QJ100-54 | 54 | 25 | 53.8 | 84.0 | 0.84 | |||||||||||||||||
| 250QJ100-72 | 72 | 30 | 64.2 | 84.5 | 0.84 | |||||||||||||||||
| 250QJ100-90 | 90 | 37 | 77.8 | 85.0 | 0.85 | |||||||||||||||||
| 250QJ100-108 | 108 | 45 | 94.1 | 85.5 | 0.85 | |||||||||||||||||
| 250QJ100-126 | 126 | 55 | 114.3 | 86.0 | 0.85 | |||||||||||||||||
| 250QJ100-144 | 144 | 63 | 131.0 | 86.0 | 0.85 | |||||||||||||||||
| 250QJ100-162 | 162 | 75 | 152.3 | 87.0 | 0.86 | |||||||||||||||||
| 250QJ100-198 | 198 | 90 | 182.8 | 87.0 | 0.86 | |||||||||||||||||
| 250QJ100-216 | 216 | 100 | 203.1 | 87.0 | 0.86 | |||||||||||||||||
| 250QJ125-16 | 125 | 16 | 2875 | 76 | 125 | 250vyššie | 9.2 | 380 | 21.7 | 78.5 | 0.82 | 233 | ||||||||||
| 250QJ125-32 | 32 | 18.5 | 40.8 | 82.0 | 0.84 | |||||||||||||||||
| 250QJ125-48 | 48 | 25 | 53.8 | 84.0 | 0.84 | |||||||||||||||||
| 250QJ125-64 | 64 | 37 | 77.8 | 85.0 | 0.85 | |||||||||||||||||
| 250QJ125-80 | 80 | 45 | 94.1 | 85.5 | 0.85 | |||||||||||||||||
| 250QJ125-96 | 96 | 55 | 114.3 | 86.0 | 0.85 | |||||||||||||||||
| 250QJ125-112 | 112 | 63 | 131.0 | 86.0 | 0.85 | |||||||||||||||||
| 250QJ125-128 | 128 | 75 | 152.3 | 87.0 | 0.86 | |||||||||||||||||
| 250QJ125-160 | 160 | 90 | 182.8 | 87.0 | 0.86 | |||||||||||||||||
| 250QJ125-176 | 176 | 100 | 203.1 | 87.0 | 0.86 | |||||||||||||||||
| 250QJ125-192 | 192 | 110 | 219.6 | 87.5 | 0.87 | |||||||||||||||||
| 250QJ140-15 | 140 | 15 | 2875 | 76 | 125 | 250vyššie | 9.2 | 380 | 21.7 | 78.5 | 0.82 | 233 | ||||||||||
| 250QJ140-30 | 30 | 18.5 | 40.8 | 82.0 | 0.84 | |||||||||||||||||
| 250QJ140-45 | 45 | 30 | 64.2 | 84.5 | 0.84 | |||||||||||||||||
| 250QJ140-60 | 60 | 37 | 77.8 | 85.0 | 0.85 | |||||||||||||||||
| 250QJ140-75 | 45 | 45 | 94.1 | 85.5 | 0.85 | |||||||||||||||||
| 250QJ140-90 | 90 | 55 | 114.3 | 86.0 | 0.85 | |||||||||||||||||
| 250QJ140-105 | 140 | 105 | 2875 | 76 | 125 | 250vyššie | 63 | 380 | 131.0 | 86.0 | 0.85 | 233 | ||||||||||
| 250QJ140-120 | 120 | 75 | 152.3 | 87.0 | 0.86 | |||||||||||||||||
| 250QJ140-150 | 150 | 90 | 182.8 | 87.0 | 0.86 | |||||||||||||||||
| 250QJ140-165 | 165 | 100 | 203.1 | 87.0 | 0.86 | |||||||||||||||||
| 250QJ140-180 | 180 | 110 | 219.6 | 87.5 | 0.87 | |||||||||||||||||
| 250QJ200-20 | 200 | 20 | 2875 | 75 | 150 | 250vyššie | 18.5 | 380 | 40.8 | 82.0 | 0.84 | 233 | ||||||||||
| 250QJ200-40 | 40 | 37 | 77.8 | 85.0 | 0.85 | |||||||||||||||||
| 250QJ200-60 | 60 | 55 | 114.3 | 86.0 | 0.85 | |||||||||||||||||
| 250QJ200-80 | 80 | 75 | 152.3 | 87.0 | 0.86 | |||||||||||||||||
| 250QJ200-100 | 100 | 90 | 182.8 | 87.0 | 0.86 | |||||||||||||||||
| 250QJ200-120 | 120 | 100 | 203.1 | 87.0 | 0.86 | |||||||||||||||||
| 250QJ200-140 | 140 | 125 | 249.5 | 87.5 | 0.87 | |||||||||||||||||
1, well submersible pump for clean water pump, prohibit the new well, pumping sediment and muddy water,
2, well water pump voltage grade of 380/50HZ, the use of other voltage grades of submersible motors need to be customized. The underground cable must use waterproof cable, must be equipped with starting equipment, such as distribution box, start not ready should have commonly used motor comprehensive protection function, such as short circuit overload protection, phase protection, undervoltage protection, grounding protection, idling protection, in case of abnormal conditions, the protection device should be timely action trip.
3, the installation and use of the pump must be reliably grounded, prohibit the push and pull switch when the hands and feet are wet, the installation and maintenance of the pump must be cut off the power supply, the use of the pump place to set up "to prevent electric shock" obvious signs:
4, down the well or before installation, the motor cavity must be filled with distilled water or non-corrosive clean cold boiling water, tighten the / water bolt, the pump on the ground test run, must be to the pump chamber water lubrication rubber bearings, instant start not more than a second, see whether the steering is the same as the steering instructions. When the pump is upright, pay attention to safety, prevent overturning injury.
5, presne podľa ustanovení o zdvihu čerpadla, rozsahu použitia, aby sa zabránilo nízkemu prietoku alebo vysokému zdvihu čerpacej sily, axiálnemu ložisku a iným častiam opotrebovania, preťaženiu motora spálenému
6, after the pump down the well, the measurement of the motor to the ground insulation resistance should not be less than 100M, after the start to observe the voltage and current, check the motor winding insulation, whether in line with the requirements; pump storage location temperature if less than freezing point, should be dry the motor cavity water, prevent the motor cavity water ice damage caused by low temperature.
The introduction and structure of this pump product mainly include pump shaft, impeller, shunt shell, rubber bearing, check valve body (optional) and other components. The motor part is mainly composed of base, pressure regulating diaphragm, thrust bearing, thrust plate, lower guide bearing seat, stator, rotor, upper guide bearing seat, sand ring, water inlet section, lead cable and other components. The main characteristics of this pump product include the use of water-cooled wet submersible three-phase asynchronous motor, the motor cavity is filled with clean water to cool the motor and lubricate the bearing, the pressure regulating diaphragm at the bottom is used to adjust the expansion and contraction pressure difference of the internal water caused by the change of the temperature rise of the motor. In order to prevent the sand particles in the well water from entering the motor, two oil seals are installed on the upper end of the motor shaft extension, and the sand ring is installed to form a sand prevention structure. In order to avoid the pump shaft jumping at startup, the pump shaft and the motor shaft are connected together through the coupling, and the thrust bearing is installed at the lower part of the motor. The motor and pump bearing lubrication adopts water lubrication. The stator winding of the motor adopts high quality submersible motor winding, with high insulation performance. The pump adopts computer CAD design, simple structure and superior technical performance.

(1) Príprava pred inštaláciou:
1. Skontrolujte, či ponorné čerpadlo spĺňa podmienky používania a rozsah špecifikovaný v príručke.
2. Pomocou ťažkého predmetu s priemerom rovnajúcim sa maximálnemu vonkajšiemu priemeru ponorného čerpadla zmerajte, či sa vnútorný priemer vrtu zmestí na ponorné čerpadlo a zmerajte, či hĺbka vrtu spĺňa požiadavky na inštaláciu.
3. Skontrolujte, či je vrt čistý a či nie je voda v studni zakalená. Nikdy nepoužívajte ponorné elektrické čerpadlo na umývanie bahna a pieskovej vody z čerpadla welor, aby ste predišli predčasnému poškodeniu ponorného elektrického čerpadla.
4. Skontrolujte, či je poloha montážnej svorky čapu vhodná a či znesie kvalitu celej jednotky
5. Skontrolujte, či sú komponenty ponorného čerpadla kompletné a správne nainštalované podľa montážnej schémy v návode Odstráňte filtračné sito a otočte spojku, aby ste zistili, či sa pružne otáča
6. Odskrutkujte vodnú skrutku a naplňte dutinu motora čistou, nekorozívnou vodou (poznámka: nezabudnite ju naplniť), potom vodnú skrutku utiahnite. Po 12 hodinách vstrekovania vody by izolačný odpor motora nemal byť menší ako 150M Q pri meraní pomocou 500V trepacieho stola.
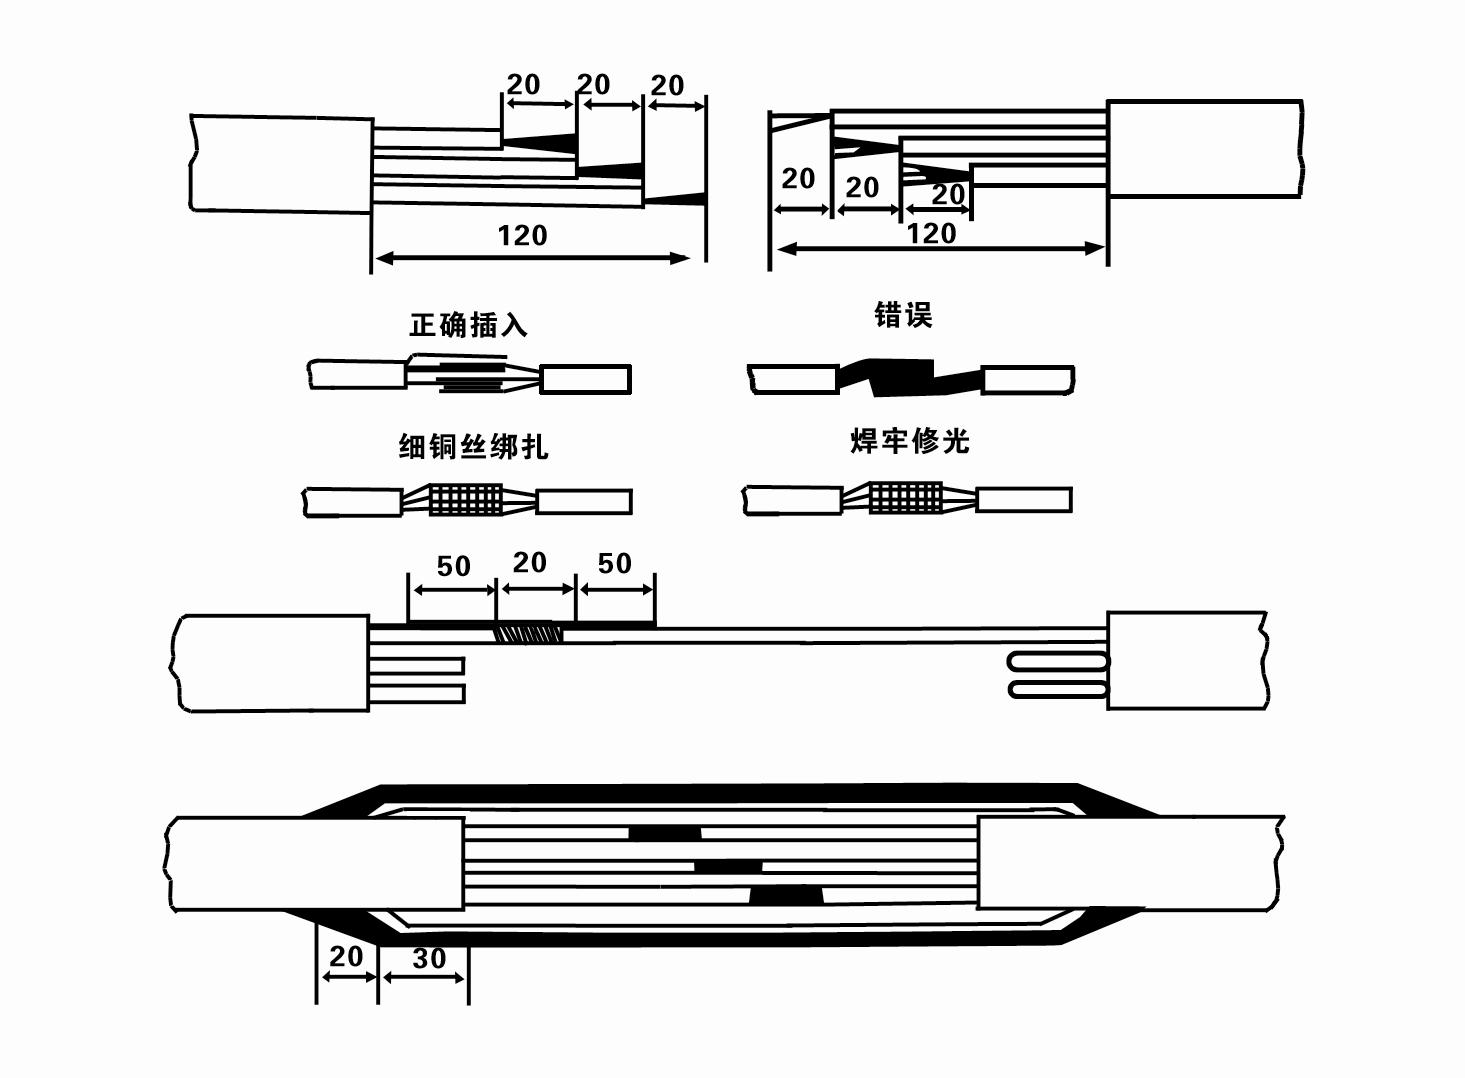
7. Cable joint, cut off a 120mm rubber sleeve from one end of the outgoing cable and the matching cable with an electrician's knifethen stagger the length of the three core wires in a stepped shape, peel off a 20mm copper core, scrape of the oxide layer on theoutside of the copper wire with a knife or sand cloth, and insert the two connected wire ends in palirs.After tying the layer tightly with fine copper wire, solder it thoroughly and firmly, and sand of any. burrs on the surface. Then, forthe three joints, use polyvester insulation tape to wrap them in a semi stacked manner for three lavers. Wrap the two ends of thewrapping layer tightywith nyion thread,and then use a semi stacked method to wrap the tape for three layers. Wrap the outellayer with high-pressure insulation tape for three layers. Finally, fold the threestrands together and repeatedly wrap them for fivelayers with high-pressure tape. Each layer must be tightly tied, and the interlayer joints must be tight and fimm to prevent water frompenetrating and damaging the insulation, After wrapping, soak in water at room temperature of 20 ’c for 12 hours, and measurethe insulation resistance with a shaking table, which should not be less than 100M Ω
Priložená schéma zapojenia káblov je nasledovná:
8. Pomocou multimetra skontrolujte, či sú zapojené trojfázové vodiče a či je jednosmerný odpor približne vyrovnaný.
9. Skontrolujte, či obvod a kapacita transformátora nie sú preťažené, a potom pripojte ochranný spínač proti preťaženiu alebo štartovacie zariadenie. Pozrite si tabuľku 2 pre konkrétne modely a potom nalejte vedro vody do vodného čerpadla z výstupu vodného čerpadla, aby ste namazali gumové ložiská v čerpadle, a potom postavte ponorné elektrické čerpadlo vzpriamene a stabilne. Spustite (nie viac ako jednu sekundu) a skontrolujte, či je smer riadenia v súlade so znakom riadenia. Ak nie, vymeňte ľubovoľné dva konektory trojfázového kábla. Potom nainštalujte filter a pripravte sa na prechod do studne. Pri použití pri zvláštnych príležitostiach (ako sú priekopy, priekopy, rieky, rybníky, rybníky atď.) musí byť elektrické čerpadlo spoľahlivo uzemnené.
(2) Inštalačné vybavenie a nástroje:
1. Jeden pár zdvíhacích reťazí na viac ako dve tony.
2. Statív s vertikálnou výškou nie menšou ako štyri metre.
3. Dve závesné laná (drôtené laná), ktoré unesú hmotnosť viac ako jednu tonu (unesú hmotnosť kompletnej sady vodných čerpadiel).
4. Nainštalujte dva páry svoriek (dlahy).
5. Kľúče, kladivá, skrutkovače, elektrické náradie a nástroje atď.
(3) Inštalácia elektrického čerpadla:
1. Schéma inštalácie ponorného elektrického čerpadla je znázornená na obrázku 2. Konkrétne rozmery inštalácie sú uvedené v tabuľke 3 „Zoznam inštalačných rozmerov ponorného elektrického čerpadla“.
2. Ponorné elektrické čerpadlá s dopravnou výškou menšou ako 30 metrov je možné zdvíhať priamo do studne pomocou hadíc a oceľových lán alebo iných konopných lán, ktoré unesú celú hmotnosť celého stroja, vodovodných potrubí a vody v potrubí.
3. Čerpadlá s dopravnou výškou viac ako 30 metrov používajú oceľové rúry a postupnosť inštalácie je nasledovná:
①Pomocou svorky upevnite horný koniec časti vodného čerpadla (motor a vodné čerpadlo sú momentálne pripojené), zdvihnite ho pomocou závesnej reťaze a pomaly ho priviažte k studni, kým nasaďte svorku na hlavu studne a odstráňte závesná reťaz.
② Pomocou ďalšieho páru svoriek upnite potrubie, zdvihnite ho pomocou závesnej reťaze 15 cm od príruby a pomaly spustite. Medzi prírubu potrubia a prírubu čerpadla Vložte gumenú podložku na miesto a rovnomerne utiahnite potrubie a čerpadlo pomocou skrutiek, matíc a pružných podložiek.
③ Ponorné čerpadlo mierne nadvihnite, odstráňte svorku na hornom konci vodného čerpadla, kábel pevne priviažte k vodovodnému potrubiu plastovou páskou a pomaly ho priviažte, kým nebude svorka umiestnená na ústí vrtu.
④Použite rovnakú metódu na pripojenie všetkých vodovodných potrubí do studne.
⑤Po pripojení vývodového kábla k ovládaciemu spínaču sa pripojí k trojfázovému napájaniu.
(4) Na čo si dať pozor pri inštalácii:
1. Ak počas procesu čerpania zistíte zaseknutie, otočte alebo potiahnite vodovodné potrubie, aby ste prekonali bod zasekávania. Ak rôzne opatrenia stále nefungujú, netlačte čerpadlo nasilu, aby ste predišli poškodeniu ponorného elektrického čerpadla a studne.
2. Počas inštalácie by mala byť na prírubu každej rúrky umiestnená gumená podložka a rovnomerne utiahnutá.
3. Keď je vodná pumpa spustená do studne, mala by byť umiestnená v strede studňovej rúry, aby sa zabránilo tomu, že čerpadlo beží po dlhú dobu proti stene studne, čo spôsobí, že čerpadlo bude vibrovať a motor bude zametať a horieť .
4. Určte hĺbku vodného čerpadla na dno studne podľa podmienok prúdiaceho piesku a bahna v studni. Čerpadlo nezahrabávajte do bahna. Vzdialenosť medzi vodným čerpadlom a dnom studne nie je vo všeobecnosti menšia ako 3 metre (pozri obrázok 2).
5. Hĺbka vstupu vody do vodného čerpadla by nemala byť menšia ako 1-1,5 metra od dynamickej hladiny vody po uzol prívodu vody (pozri obrázok 2). V opačnom prípade sa môžu ložiská vodného čerpadla ľahko poškodiť.
6. Zdvih vodného čerpadla nesmie byť príliš nízky. V opačnom prípade je potrebné nainštalovať uzatvárací ventil na vodovodnom potrubí vrtu na reguláciu prietoku čerpadla v menovitom bode prietoku, aby sa zabránilo preťaženiu a vyhoreniu motora v dôsledku veľkých prietokov.
7. Keď vodné čerpadlo beží, výstup vody by mal byť nepretržitý a rovnomerný, prúd by mal byť stabilný (pri menovitých pracovných podmienkach spravidla nie viac ako 10 % menovitého prúdu) a nemali by sa vyskytovať žiadne vibrácie ani hluk. Ak sa vyskytne nejaká abnormalita, stroj by sa mal zastaviť, aby sa zistila príčina a odstránila sa.
8. Pri inštalácii dávajte pozor na nastavenie uzemňovacieho vodiča motora (pozri obrázok 2). Keď je vodovodné potrubie oceľové, veďte ho zo svorky ústia studne; ak je vodovodné potrubie plastové, veďte ho od uzemňovacej značky elektrického čerpadla.
After the installation of the underwater pump, the insulation resistance and three-phase continuity of the switch face should be rechecked, and the connection between the instrument and the start device should be checked for any errors. If there is no problem, you can start to test the machine. After the start, observe whether the indication readings of each instrument are correct. If the rated voltage and current specified on the nameplate are exceeded, observe whether the pump has noise or vibration. If everything is normal, it can be put into operation. After the first operation of the pump for four hours, the motor should be shut down and tested for thermal insulation resistance quickly. Its value should not be less than 0.5 megaohm. After stopping the pump, it should be restarted after an interval of five minutes to prevent the water column in the pipeline from completely reversing and causing the motor to burn out due to excessive current. After the pump is put into normal operation, in order to prolong its service life, it is necessary to check regularly whether the supply voltage, running current and insulation resistance are normal. If the following conditions are found, the machine should be shut down immediately to eliminate the fault: the current exceeds 20% under rated working conditions; the dynamic water level drops to the inlet section, resulting in intermittent drainage; the underwater pump becomes violently vibrating or making noise; the supply voltage is lower than 340 volts; a fuse is blown out; the water pipe is damaged; the motor's thermal insulation resistance to the earth is less than 0.5 megaohm. The sequence of disassembly is: untie the cable fastening, remove the pipeline part, remove the line protection plate, screw down the water discharge bolt and discharge all the water in the motor chamber, remove the filter and loosen the coupling fixing screw of the motor shaft. The sequence of disassembly of the pump is: (see Figure 1) inlet section, impeller, guide housing, impeller, check the valve body. When removing the impeller, use special tools to loosen the taper sleeve of the impeller. Avoid bending the pump shaft and damaging the components throughout the process. The disassembly process of the motor is: (see Figure 1) put the motor on the platform, and remove the bolts, base, shaft head lock nut, thrust plate, key, lower guide plate (transverse bolt), bearing seat, screw knife seat from the bottom of the motor in order (take care not to damage the winding), and finally remove the connecting part and the upper guide bearing seat. Before assembling the unit, the rust and dirt of each part should be cleaned, and the sealant should be applied to each mating surface and fastener, and then assembled in reverse order of disassembly (the movement of the motor shaft after assembly is about one millimeter). After assembly, the coupling should be rotated flexibly and put on the filter for test. Once a year, or if less than a year of operation but has been immersed for two years, the underwater electric pump must be disassembled for maintenance in accordance with Article 5 and replace worn parts to ensure the normal operation and durability of the pump.
1, vypustite vodu z dutiny motora (najmä v zime, aby motor nezamrzol) a kábel dobre uviažte.
2, store in an indoor room without corrosive substances and gases, with a temperature below 40 °C.
3, pri dlhodobom používaní by sa mala venovať pozornosť ochrane proti hrdzi ponorných čerpadiel.
- Obežné koleso
- Objímka hriadeľa
- Gumové puzdro hriadeľa
-
Tesniaci krúžok
01 Príjem vody z hlbokej studne
02 Výškové zásobovanie vodou
03 horský vodovod
04 vežová voda
05 Poľnohospodárske zavlažovanie
06 zavlažovanie záhrady
07 odber riečnej vody
08 úžitková voda


