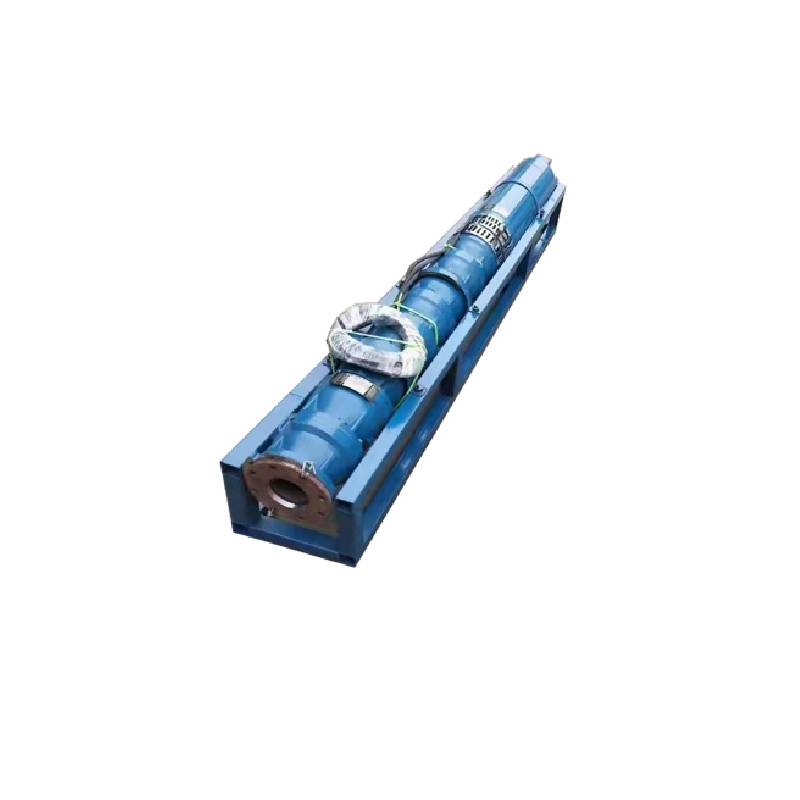
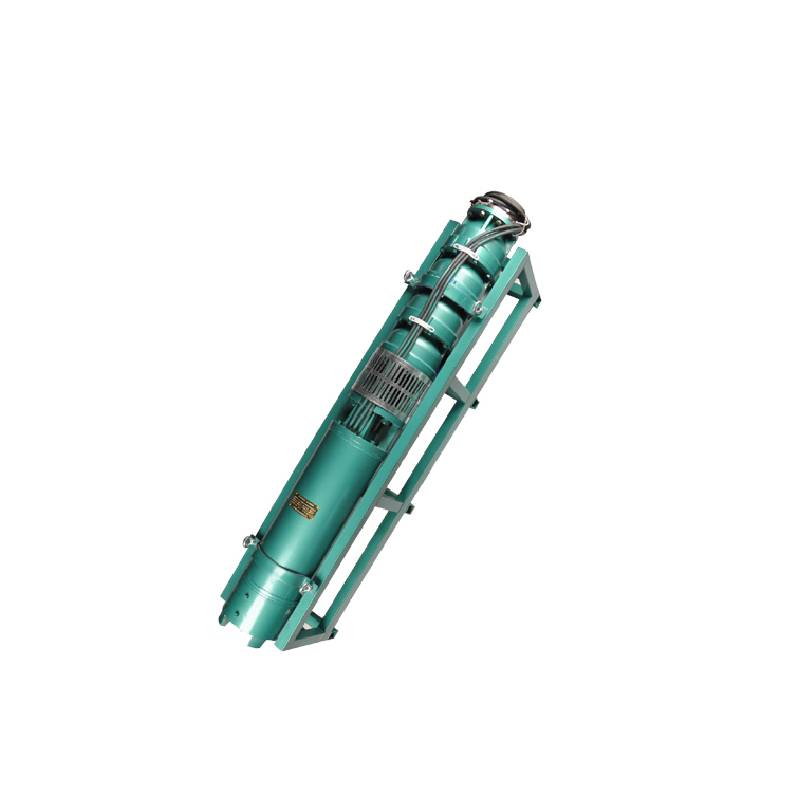
This series of fountain pump is a special fountain pump developed by our factory. The pump motor core is made of high quality cold rolled silicon steel, which makes the pump more efficient, has good magnetic conductivity, and does not produce heat when starting frequently. The two ends of the motor rotor are equipped with alloy copper sleeves with water as lubricant. Stainless steel bushings replace ball bearings, avoiding the problems of easy rust of ball bearings and burnout of motor due to lack of oil and wear. Most suitable for music fountain, all models can be used horizontally.
1, enerji təchizatı: üç fazalı AC 380V (tolerantlıq + / - 5%), 50HZ (tolerantlıq + / - 1%).
2, suyun keyfiyyəti:
(1) water temperature is not higher than 20 °C;
(2) bərk çirklərin miqdarı (kütləvi nisbət) 0,01%-dən çox deyil;
(3) PH dəyəri (pH) 6,5-8,5;
(4) hidrogen sulfid tərkibi 1,5 mq/L-dən çox deyil;
(5) xlorid ionunun tərkibi 400mg/L-dən çox deyil.
3, motor qapalı və ya su ilə dolu nəm strukturdur, istifadə etməzdən əvvəl sualtı mühərrik boşluğu təmiz su ilə dolu olmalıdır, yalanın qarşısını almaq və sonra su enjeksiyonunu, hava buraxma boltlarını sıxın, əks halda istifadəyə icazə verilmir.
4, sualtı nasos tamamilə suya batırılmalıdır, dalğıc dərinliyi 70 m-dən çox deyil, quyunun dibindən sualtı nasosun dibi 3 m-dən az olmamalıdır.
5, quyu suyunun axını sualtı nasosun su çıxışına və davamlı işləməsinə cavab verməli olmalıdır, sualtı nasos suyunun çıxışı nominal axının 0,7 - 1,2 qatında idarə edilməlidir.
6, quyu düz olmalıdır, sualtı nasosdan istifadə etmək və ya boşaltmaq olmaz, yalnız şaquli istifadə.
7, sualtı nasos tələblərə uyğun olaraq kabel və xarici həddindən artıq yüklənmədən qorunma cihazı ilə uyğunlaşdırılmalıdır.
8, nasos su yüksüz sınaq maşını olmadan qəti qadağandır

| Model | Axın (m3/saat) | Baş (m) |
Fırlanma sürəti (dəyişiklik/nöqtə) |
Su nasosu(%) | Çıxış Diametr (mm) |
Yaxşı tətbiq olunur diametri (mm) |
Qiymətləndirildi power(KW) |
Qiymətləndirildi gərginlik(V) |
Qiymətləndirildi cari (A) |
Motor səmərəliliyi (%) | power factorcosφ | Vahid Radial Maksimum ölçü (mm) |
Qeyd | |||||||||
| 250QJ50-40 | 50 | 40 | 2875 | 72 | 80 | 250yuxarıda | 9.2 | 380 | 21.7 | 78.5 | 0.82 | 233 | ||||||||||
| 250QJ50-60 | 60 | 13 | 30.1 | 80.0 | 0.82 | |||||||||||||||||
| 250QJ50-80 | 80 | 18.5 | 40.8 | 82.0 | 0.84 | |||||||||||||||||
| 250QJ50-100 | 100 | 22 | 47.9 | 83.0 | 0.84 | |||||||||||||||||
| 250QJ50-120 | 120 | 25 | 53.8 | 84.0 | 0.84 | |||||||||||||||||
| 250QJ50-140 | 140 | 30 | 64.2 | 84.5 | 0.84 | |||||||||||||||||
| 250QJ50-160 | 160 | 37 | 77.8 | 85.0 | 0.85 | |||||||||||||||||
| 250QJ50-200 | 200 | 45 | 94.1 | 85.5 | 0.85 | |||||||||||||||||
| 250QJ50-240 | 240 | 55 | 114.3 | 86.0 | 0.85 | |||||||||||||||||
| 250QJ50-280 | 280 | 63 | 131.0 | 86.0 | 0.85 | |||||||||||||||||
| 250QJ50-320 | 320 | 75 | 152.3 | 87.0 | 0.86 | |||||||||||||||||
| 250QJ50-400 | 400 | 90 | 182.8 | 87.0 | 0.86 | |||||||||||||||||
| 250QJ50-440 | 440 | 100 | 203.1 | 87.0 | 0.86 | |||||||||||||||||
| 250QJ63-40 | 63 | 40 | 2875 | 74 | 80 | 250yuxarıda | 11 | 380 | 25.8 | 79.0 | 0.82 | 233 | ||||||||||
| 250QJ63-60 | 60 | 18.5 | 40.8 | 82.0 | 0.84 | |||||||||||||||||
| 250QJ63-80 | 80 | 22 | 47.9 | 83.0 | 0.84 | |||||||||||||||||
| 250QJ63-100 | 100 | 30 | 64.2 | 84.5 | 0.84 | |||||||||||||||||
| 250QJ63-120 | 120 | 37 | 77.8 | 85.0 | 0.85 | |||||||||||||||||
| 250QJ63-160 | 160 | 45 | 94.1 | 85.5 | 0.85 | |||||||||||||||||
| 250QJ63-200 | 200 | 55 | 114.3 | 86.0 | 0.85 | |||||||||||||||||
| 250QJ63-220 | 220 | 63 | 131.0 | 86.0 | 0.85 | |||||||||||||||||
| 250QJ63-260 | 260 | 75 | 152.3 | 87.0 | 0.86 | |||||||||||||||||
| 250QJ63-300 | 300 | 90 | 182.8 | 87.0 | 0.86 | |||||||||||||||||
| 250QJ63-360 | 360 | 100 | 203.1 | 87.0 | 0.86 | |||||||||||||||||
| 250QJ80-20 | 80 | 20 | 2875 | 75 | 100 | 250yuxarıda | 7.5 | 380 | 18.0 | 78.0 | 0.81 | 233 | ||||||||||
| 250QJ80-40 | 40 | 15 | 33.9 | 81.0 | 0.83 | |||||||||||||||||
| 250QJ80-60 | 60 | 22 | 47.9 | 83.0 | 0.84 | |||||||||||||||||
| 250QJ80-80 | 80 | 30 | 64.2 | 84.5 | 0.84 | |||||||||||||||||
| 250QJ80-100 | 100 | 37 | 77.8 | 85.0 | 0.85 | |||||||||||||||||
| 250QJ80-120 | 120 | 45 | 94.1 | 85.5 | 0.85 | |||||||||||||||||
| 250QJ80-160 | 80 | 160 | 2875 | 75 | 100 | 250yuxarıda | 55 | 380 | 114.3 | 86.0 | 0.85 | 233 | ||||||||||
| 250QJ80-180 | 180 | 63 | 131.0 | 86.0 | 0.85 | |||||||||||||||||
| 250QJ80-200 | 200 | 75 | 152.3 | 87.0 | 0.86 | |||||||||||||||||
| 250QJ80-240 | 240 | 90 | 182.8 | 87.0 | 0.86 | |||||||||||||||||
| 250QJ80-280 | 280 | 100 | 203.1 | 87.0 | 0.86 | |||||||||||||||||
| 250QJ100-18 | 100 | 18 | 2875 | 75 | 100 | 250yuxarıda | 7.5 | 380 | 18.0 | 78.0 | 0.81 | 233 | ||||||||||
| 250QJ100-36 | 36 | 15 | 33.9 | 81.0 | 0.83 | |||||||||||||||||
| 250QJ100-54 | 54 | 25 | 53.8 | 84.0 | 0.84 | |||||||||||||||||
| 250QJ100-72 | 72 | 30 | 64.2 | 84.5 | 0.84 | |||||||||||||||||
| 250QJ100-90 | 90 | 37 | 77.8 | 85.0 | 0.85 | |||||||||||||||||
| 250QJ100-108 | 108 | 45 | 94.1 | 85.5 | 0.85 | |||||||||||||||||
| 250QJ100-126 | 126 | 55 | 114.3 | 86.0 | 0.85 | |||||||||||||||||
| 250QJ100-144 | 144 | 63 | 131.0 | 86.0 | 0.85 | |||||||||||||||||
| 250QJ100-162 | 162 | 75 | 152.3 | 87.0 | 0.86 | |||||||||||||||||
| 250QJ100-198 | 198 | 90 | 182.8 | 87.0 | 0.86 | |||||||||||||||||
| 250QJ100-216 | 216 | 100 | 203.1 | 87.0 | 0.86 | |||||||||||||||||
| 250QJ125-16 | 125 | 16 | 2875 | 76 | 125 | 250yuxarıda | 9.2 | 380 | 21.7 | 78.5 | 0.82 | 233 | ||||||||||
| 250QJ125-32 | 32 | 18.5 | 40.8 | 82.0 | 0.84 | |||||||||||||||||
| 250QJ125-48 | 48 | 25 | 53.8 | 84.0 | 0.84 | |||||||||||||||||
| 250QJ125-64 | 64 | 37 | 77.8 | 85.0 | 0.85 | |||||||||||||||||
| 250QJ125-80 | 80 | 45 | 94.1 | 85.5 | 0.85 | |||||||||||||||||
| 250QJ125-96 | 96 | 55 | 114.3 | 86.0 | 0.85 | |||||||||||||||||
| 250QJ125-112 | 112 | 63 | 131.0 | 86.0 | 0.85 | |||||||||||||||||
| 250QJ125-128 | 128 | 75 | 152.3 | 87.0 | 0.86 | |||||||||||||||||
| 250QJ125-160 | 160 | 90 | 182.8 | 87.0 | 0.86 | |||||||||||||||||
| 250QJ125-176 | 176 | 100 | 203.1 | 87.0 | 0.86 | |||||||||||||||||
| 250QJ125-192 | 192 | 110 | 219.6 | 87.5 | 0.87 | |||||||||||||||||
| 250QJ140-15 | 140 | 15 | 2875 | 76 | 125 | 250yuxarıda | 9.2 | 380 | 21.7 | 78.5 | 0.82 | 233 | ||||||||||
| 250QJ140-30 | 30 | 18.5 | 40.8 | 82.0 | 0.84 | |||||||||||||||||
| 250QJ140-45 | 45 | 30 | 64.2 | 84.5 | 0.84 | |||||||||||||||||
| 250QJ140-60 | 60 | 37 | 77.8 | 85.0 | 0.85 | |||||||||||||||||
| 250QJ140-75 | 45 | 45 | 94.1 | 85.5 | 0.85 | |||||||||||||||||
| 250QJ140-90 | 90 | 55 | 114.3 | 86.0 | 0.85 | |||||||||||||||||
| 250QJ140-105 | 140 | 105 | 2875 | 76 | 125 | 250yuxarıda | 63 | 380 | 131.0 | 86.0 | 0.85 | 233 | ||||||||||
| 250QJ140-120 | 120 | 75 | 152.3 | 87.0 | 0.86 | |||||||||||||||||
| 250QJ140-150 | 150 | 90 | 182.8 | 87.0 | 0.86 | |||||||||||||||||
| 250QJ140-165 | 165 | 100 | 203.1 | 87.0 | 0.86 | |||||||||||||||||
| 250QJ140-180 | 180 | 110 | 219.6 | 87.5 | 0.87 | |||||||||||||||||
| 250QJ200-20 | 200 | 20 | 2875 | 75 | 150 | 250yuxarıda | 18.5 | 380 | 40.8 | 82.0 | 0.84 | 233 | ||||||||||
| 250QJ200-40 | 40 | 37 | 77.8 | 85.0 | 0.85 | |||||||||||||||||
| 250QJ200-60 | 60 | 55 | 114.3 | 86.0 | 0.85 | |||||||||||||||||
| 250QJ200-80 | 80 | 75 | 152.3 | 87.0 | 0.86 | |||||||||||||||||
| 250QJ200-100 | 100 | 90 | 182.8 | 87.0 | 0.86 | |||||||||||||||||
| 250QJ200-120 | 120 | 100 | 203.1 | 87.0 | 0.86 | |||||||||||||||||
| 250QJ200-140 | 140 | 125 | 249.5 | 87.5 | 0.87 | |||||||||||||||||
1, well submersible pump for clean water pump, prohibit the new well, pumping sediment and muddy water,
2, well water pump voltage grade of 380/50HZ, the use of other voltage grades of submersible motors need to be customized. The underground cable must use waterproof cable, must be equipped with starting equipment, such as distribution box, start not ready should have commonly used motor comprehensive protection function, such as short circuit overload protection, phase protection, undervoltage protection, grounding protection, idling protection, in case of abnormal conditions, the protection device should be timely action trip.
3, the installation and use of the pump must be reliably grounded, prohibit the push and pull switch when the hands and feet are wet, the installation and maintenance of the pump must be cut off the power supply, the use of the pump place to set up "to prevent electric shock" obvious signs:
4, down the well or before installation, the motor cavity must be filled with distilled water or non-corrosive clean cold boiling water, tighten the / water bolt, the pump on the ground test run, must be to the pump chamber water lubrication rubber bearings, instant start not more than a second, see whether the steering is the same as the steering instructions. When the pump is upright, pay attention to safety, prevent overturning injury.
5, ciddi şəkildə nasos qaldırıcısının müddəalarına, istifadə axını diapazonuna uyğun olaraq, aşağı axın və ya yüksək qaldırıcı nasos gücünün qarşısını almaq üçün, rulman yatağı və aşınmanın digər hissələri, motorun həddindən artıq yüklənməsi yandı.
6, after the pump down the well, the measurement of the motor to the ground insulation resistance should not be less than 100M, after the start to observe the voltage and current, check the motor winding insulation, whether in line with the requirements; pump storage location temperature if less than freezing point, should be dry the motor cavity water, prevent the motor cavity water ice damage caused by low temperature.
The introduction and structure of this pump product mainly include pump shaft, impeller, shunt shell, rubber bearing, check valve body (optional) and other components. The motor part is mainly composed of base, pressure regulating diaphragm, thrust bearing, thrust plate, lower guide bearing seat, stator, rotor, upper guide bearing seat, sand ring, water inlet section, lead cable and other components. The main characteristics of this pump product include the use of water-cooled wet submersible three-phase asynchronous motor, the motor cavity is filled with clean water to cool the motor and lubricate the bearing, the pressure regulating diaphragm at the bottom is used to adjust the expansion and contraction pressure difference of the internal water caused by the change of the temperature rise of the motor. In order to prevent the sand particles in the well water from entering the motor, two oil seals are installed on the upper end of the motor shaft extension, and the sand ring is installed to form a sand prevention structure. In order to avoid the pump shaft jumping at startup, the pump shaft and the motor shaft are connected together through the coupling, and the thrust bearing is installed at the lower part of the motor. The motor and pump bearing lubrication adopts water lubrication. The stator winding of the motor adopts high quality submersible motor winding, with high insulation performance. The pump adopts computer CAD design, simple structure and superior technical performance.

(1) Quraşdırmadan əvvəl hazırlıq:
1. Sualtı nasosun təlimatda göstərilən istifadə şərtlərinə və əhatə dairəsinə uyğun olub olmadığını yoxlayın.
2. Diametri sualtı nasosun maksimum xarici diametrinə bərabər olan ağır obyektdən istifadə edərək, quyunun daxili diametrinin sualtı nasosa uyğun olub-olmadığını ölçün və quyu dərinliyinin quraşdırma tələblərinə cavab verib-vermədiyini ölçün.
3. Quyu lüləsinin təmiz olub-olmadığını və quyu suyunun bulanıq olub olmadığını yoxlayın. Dalgıç elektrik nasosunun vaxtından əvvəl zədələnməsinin qarşısını almaq üçün heç vaxt sualtı nasosdan palçıq və qum suyunu yumaq üçün sualtı elektrik nasosundan istifadə etməyin.
4. Quyu başı quraşdırma qısqacının mövqeyinin uyğun olub olmadığını və onun bütün qurğunun keyfiyyətinə tab gətirə biləcəyini yoxlayın.
5. Sualtı nasos komponentlərinin tam olub olmadığını və təlimatdakı montaj diaqramına uyğun olaraq düzgün quraşdırılıb-quraşdırılmadığını yoxlayın. Filtr ekranını çıxarın və muftanın çevik şəkildə fırlandığını görmək üçün fırladın.
6. Su vintini açın və mühərrik boşluğunu təmiz, aşındırıcı olmayan su ilə doldurun (qeyd edin. doldurmağınızdan əmin olun), sonra su vintini sıxın. 12 saatlıq su vurulduqdan sonra, 500V silkələnmə masası ilə ölçüldükdə mühərrikin izolyasiya müqaviməti 150M Q-dan az olmamalıdır.
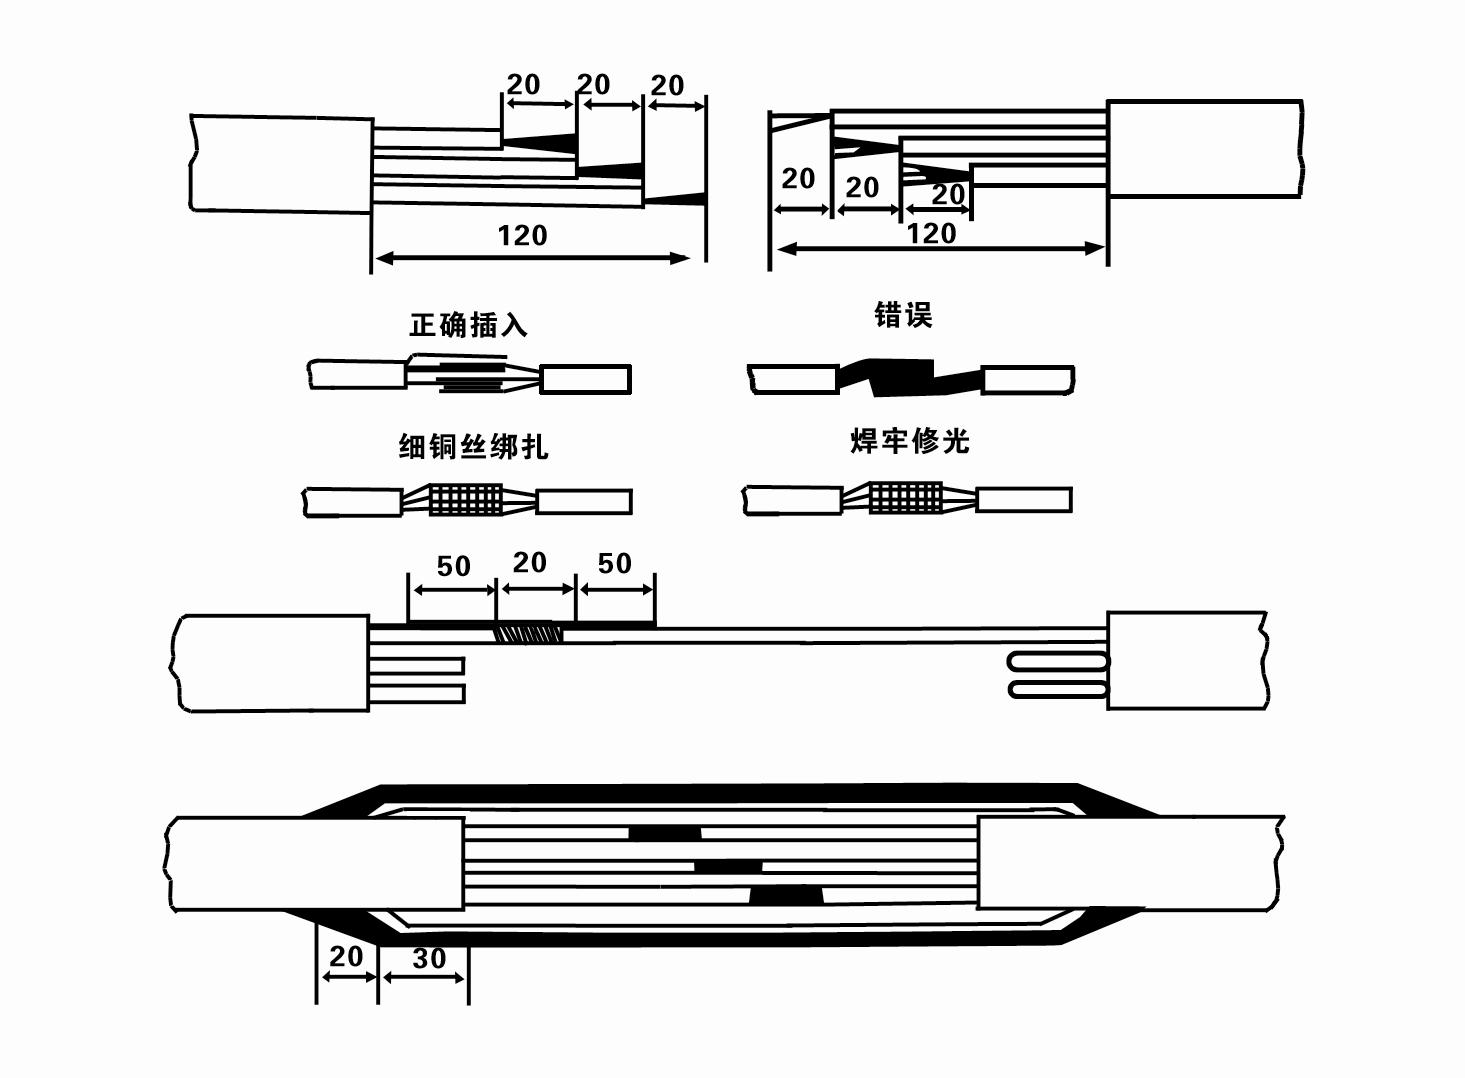
7. Cable joint, cut off a 120mm rubber sleeve from one end of the outgoing cable and the matching cable with an electrician's knifethen stagger the length of the three core wires in a stepped shape, peel off a 20mm copper core, scrape of the oxide layer on theoutside of the copper wire with a knife or sand cloth, and insert the two connected wire ends in palirs.After tying the layer tightly with fine copper wire, solder it thoroughly and firmly, and sand of any. burrs on the surface. Then, forthe three joints, use polyvester insulation tape to wrap them in a semi stacked manner for three lavers. Wrap the two ends of thewrapping layer tightywith nyion thread,and then use a semi stacked method to wrap the tape for three layers. Wrap the outellayer with high-pressure insulation tape for three layers. Finally, fold the threestrands together and repeatedly wrap them for fivelayers with high-pressure tape. Each layer must be tightly tied, and the interlayer joints must be tight and fimm to prevent water frompenetrating and damaging the insulation, After wrapping, soak in water at room temperature of 20 ’c for 12 hours, and measurethe insulation resistance with a shaking table, which should not be less than 100M Ω
Əlavə edilmiş kabel naqillərinin diaqramı aşağıdakı kimidir:
8. Üç fazalı naqillərin qoşulub-qoşulmadığını və DC müqavimətinin təxminən balanslaşdırılmış olub olmadığını yoxlamaq üçün multimetrdən istifadə edin.
9. Dövrə və transformator tutumunun həddən artıq yüklənməsini yoxlayın və sonra həddindən artıq yükdən qorunma açarını və ya işə salma avadanlığını birləşdirin. Xüsusi modellər üçün Cədvəl 2-ə baxın, sonra nasosun çıxışından su nasosuna bir vedrə su tökün və nasosdakı rezin podşipnikləri yağlayın və sonra sualtı elektrik nasosunu dik və sabit şəkildə yerləşdirin. Başlayın (bir saniyədən çox olmayaraq) və sükan istiqamətinin sükan işarəsi ilə uyğun olub olmadığını yoxlayın. Əgər belə deyilsə, üç fazalı kabelin hər hansı iki birləşdiricisini dəyişdirin. Sonra filtri quraşdırın və quyuya enməyə hazır olun. Xüsusi hallarda (məsələn, arxlar, arxlar, çaylar, gölməçələr, gölməçələr və s.) istifadə edilərsə, elektrik nasosu etibarlı şəkildə torpaqlanmalıdır.
(2) Quraşdırma avadanlığı və alətləri:
1. İki tondan artıq yük üçün bir cüt qaldırıcı zəncir.
2. Şaquli hündürlüyü dörd metrdən az olmayan ştativ.
3. Bir tondan artıq çəkiyə tab gətirə bilən (su nasoslarının tam dəstinin ağırlığını daşıya bilən) iki asma kəndir (məftil).
4. İki cüt sıxac (spints) quraşdırın.
5. Açarlar, çəkiclər, tornavidalar, elektrik alətləri və alətləri və s.
(3) Elektrik nasosunun quraşdırılması:
1. Sualtı elektrik nasosunun quraşdırma diaqramı Şəkil 2-də göstərilmişdir. Xüsusi quraşdırma ölçüləri Cədvəl 3-də "Sualtı elektrik nasosunun quraşdırma ölçülərinin siyahısı" göstərilmişdir.
2. Başlığı 30 metrdən az olan sualtı elektrik nasosları bütün maşının, su borularının və borulardakı suyun tam çəkisini daşıya bilən şlanqlar və məftil kanatlardan və ya digər çətənə kəndirlərindən istifadə etməklə birbaşa quyuya qaldırıla bilər.
3. Başlığı 30 metrdən çox olan nasoslarda polad borulardan istifadə olunur və quraşdırma ardıcıllığı aşağıdakı kimidir:
①Su nasosu hissəsinin yuxarı ucunu sıxmaq üçün sıxacdan istifadə edin (motor və su nasosu bu zaman birləşdirilib), onu asma zəncirlə qaldırın və sıxacı quyunun ağzına taxana qədər yavaş-yavaş quyuya bağlayın. asma zəncir.
② Boru sıxmaq üçün başqa bir cüt sıxacdan istifadə edin, onu asma zəncirlə flanşdan 15 sm uzaqda qaldırın və yavaş-yavaş endirin. Boru flanşı ilə nasos flanşı arasında Rezin yastığı yerinə qoyun və boruyu sıxın və boltlar, qoz-fındıq və yay yuyucuları ilə bərabər şəkildə pompalayın.
③ Sualtı nasosu yüngülcə qaldırın, su nasosunun yuxarı ucundakı qısqacını çıxarın, kabeli plastik lentlə su borusuna möhkəm bağlayın və sıxac quyu ağzına yerləşdirilənə qədər yavaş-yavaş bağlayın.
④Bütün su borularını quyuya bağlamaq üçün eyni üsuldan istifadə edin.
⑤Çıxış kabeli idarəetmə açarına qoşulduqdan sonra o, üç fazalı enerji təchizatına qoşulur.
(4) Quraşdırma zamanı nəzərə alınmalı olanlar:
1. Nasos prosesi zamanı tıxanma hadisəsi aşkar edilərsə, tıxanma nöqtəsini aradan qaldırmaq üçün su borusunu döndərin və ya çəkin. Əgər müxtəlif tədbirlər hələ də nəticə vermirsə, sualtı elektrik nasosuna və quyuya zərər verməmək üçün nasosu məcbur etməyin.
2. Quraşdırma zamanı hər bir borunun flanşına rezin yastıq qoyulmalı və bərabər şəkildə sıxılmalıdır.
3. Su nasosu quyuya endirildikdə, nasosun uzun müddət quyu divarına qarşı işləməsinin, nasosun titrəməsinə və mühərrikin süpürülməsinə və yanmasına səbəb olmasının qarşısını almaq üçün onu quyu borusunun ortasına qoymaq lazımdır. .
4. Quyunun axan qum və lil şəraitinə uyğun olaraq su nasosunun quyunun dibinə qədər dərinliyini təyin edin. Pompanı palçığa basdırmayın. Su nasosundan quyunun dibinə qədər olan məsafə ümumiyyətlə 3 metrdən az deyil (Şəkil 2-ə baxın).
5. Su nasosunun suyun daxil olma dərinliyi dinamik su səviyyəsindən su giriş qovşağına qədər 1-1,5 metrdən az olmamalıdır (bax Şəkil 2). Əks halda, su nasosunun rulmanları asanlıqla zədələnə bilər.
6. Su nasosunun qaldırıcısı çox aşağı ola bilməz. Əks halda, böyük axın sürətlərinə görə mühərrikin həddindən artıq yüklənməsinin və yanmasının qarşısını almaq üçün nominal axın nöqtəsində nasos axınına nəzarət etmək üçün quyu ağzı su boru kəmərində qapı klapanının quraşdırılması lazımdır.
7. Su nasosu işləyərkən su çıxışı davamlı və bərabər olmalı, cərəyan sabit olmalıdır (nominal iş şəraitində, ümumiyyətlə nominal cərəyanın 10%-dən çox olmamalıdır), vibrasiya və səs-küy olmamalıdır. Hər hansı bir anormallıq varsa, səbəbi tapmaq və aradan qaldırmaq üçün maşın dayandırılmalıdır.
8. Quraşdırarkən, mühərrikin torpaqlama naqilinin quraşdırılmasına diqqət yetirin (Şəkil 2-ə baxın). Su borusu polad boru olduqda, onu quyu ağzı sıxacından aparın; su borusu plastik boru olduqda, onu elektrik nasosunun torpaqlama işarəsindən aparın.
After the installation of the underwater pump, the insulation resistance and three-phase continuity of the switch face should be rechecked, and the connection between the instrument and the start device should be checked for any errors. If there is no problem, you can start to test the machine. After the start, observe whether the indication readings of each instrument are correct. If the rated voltage and current specified on the nameplate are exceeded, observe whether the pump has noise or vibration. If everything is normal, it can be put into operation. After the first operation of the pump for four hours, the motor should be shut down and tested for thermal insulation resistance quickly. Its value should not be less than 0.5 megaohm. After stopping the pump, it should be restarted after an interval of five minutes to prevent the water column in the pipeline from completely reversing and causing the motor to burn out due to excessive current. After the pump is put into normal operation, in order to prolong its service life, it is necessary to check regularly whether the supply voltage, running current and insulation resistance are normal. If the following conditions are found, the machine should be shut down immediately to eliminate the fault: the current exceeds 20% under rated working conditions; the dynamic water level drops to the inlet section, resulting in intermittent drainage; the underwater pump becomes violently vibrating or making noise; the supply voltage is lower than 340 volts; a fuse is blown out; the water pipe is damaged; the motor's thermal insulation resistance to the earth is less than 0.5 megaohm. The sequence of disassembly is: untie the cable fastening, remove the pipeline part, remove the line protection plate, screw down the water discharge bolt and discharge all the water in the motor chamber, remove the filter and loosen the coupling fixing screw of the motor shaft. The sequence of disassembly of the pump is: (see Figure 1) inlet section, impeller, guide housing, impeller, check the valve body. When removing the impeller, use special tools to loosen the taper sleeve of the impeller. Avoid bending the pump shaft and damaging the components throughout the process. The disassembly process of the motor is: (see Figure 1) put the motor on the platform, and remove the bolts, base, shaft head lock nut, thrust plate, key, lower guide plate (transverse bolt), bearing seat, screw knife seat from the bottom of the motor in order (take care not to damage the winding), and finally remove the connecting part and the upper guide bearing seat. Before assembling the unit, the rust and dirt of each part should be cleaned, and the sealant should be applied to each mating surface and fastener, and then assembled in reverse order of disassembly (the movement of the motor shaft after assembly is about one millimeter). After assembly, the coupling should be rotated flexibly and put on the filter for test. Once a year, or if less than a year of operation but has been immersed for two years, the underwater electric pump must be disassembled for maintenance in accordance with Article 5 and replace worn parts to ensure the normal operation and durability of the pump.
1, motor boşluğundakı suyu söndürün (xüsusilə qışda motorun donmasının qarşısını almaq üçün) və kabeli yaxşı bağlayın.
2, store in an indoor room without corrosive substances and gases, with a temperature below 40 °C.
3, uzunmüddətli istifadə dalgıç nasosların pas qarşısının alınmasına diqqət yetirməlidir.
- Pervane
- Mil qolu
- Rezin şaft qolu
-
Sızdırmazlıq halqası
01 Dərin quyu suyunun qəbulu
02 Hündür mərtəbəli su təchizatı
03 dağ su təchizatı
04 qüllə suyu
05 Kənd təsərrüfatının suvarılması
06 bağçanın suvarılması
07 çay suqəbuledici
08 məişət suyu


