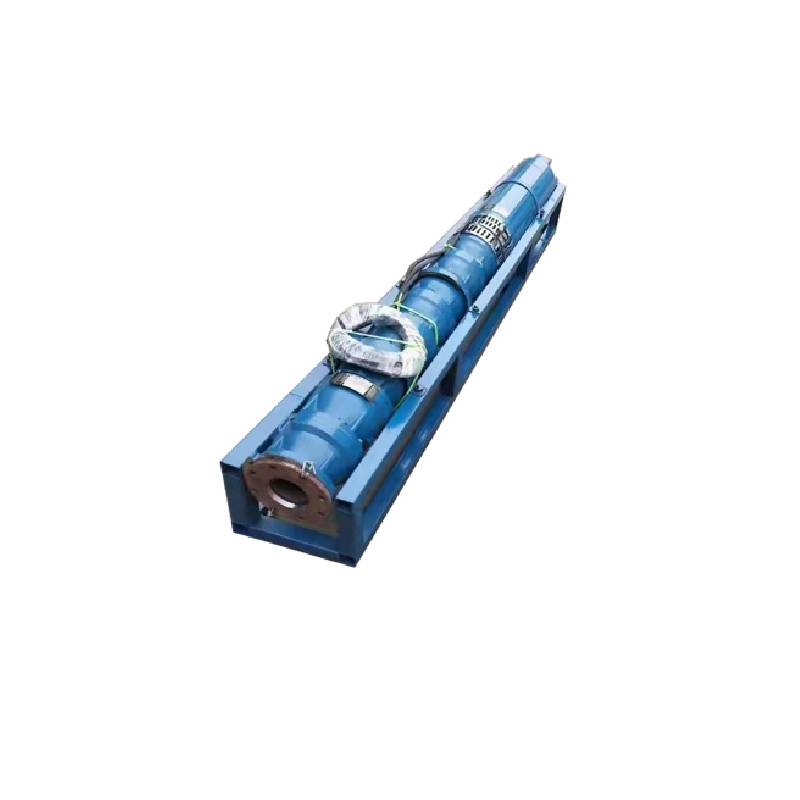
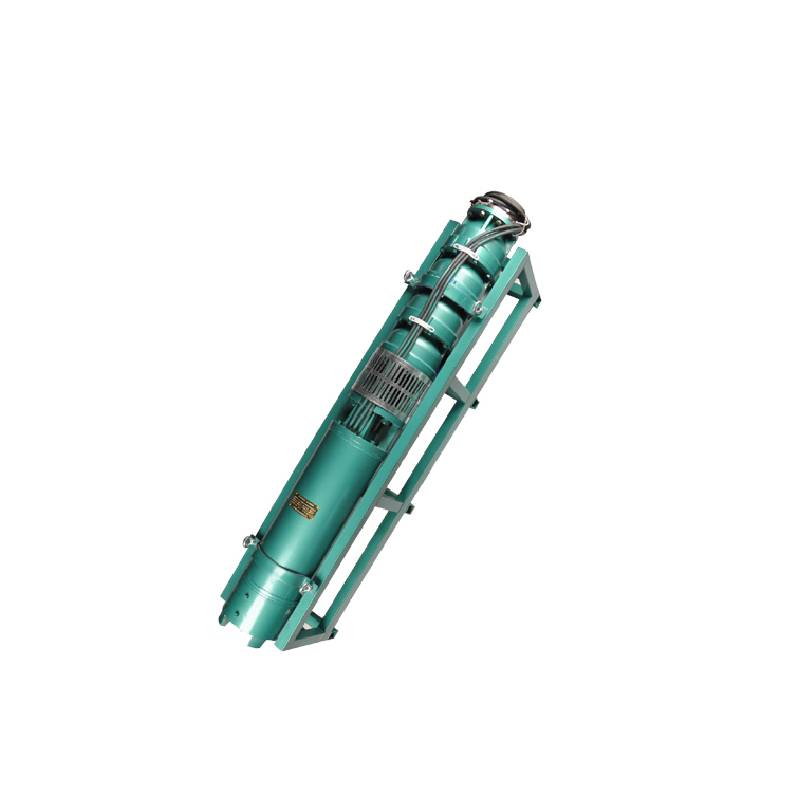
This series of fountain pump is a special fountain pump developed by our factory. The pump motor core is made of high quality cold rolled silicon steel, which makes the pump more efficient, has good magnetic conductivity, and does not produce heat when starting frequently. The two ends of the motor rotor are equipped with alloy copper sleeves with water as lubricant. Stainless steel bushings replace ball bearings, avoiding the problems of easy rust of ball bearings and burnout of motor due to lack of oil and wear. Most suitable for music fountain, all models can be used horizontally.
1, toide: kolmefaasiline AC 380V (tolerants + / - 5%), 50 HZ (tolerants + / - 1%).
2, vee kvaliteet:
(1) water temperature is not higher than 20 °C;
(2) tahkete lisandite sisaldus (massi suhe) ei ole suurem kui 0,01%;
(3) PH väärtus (pH) 6,5-8,5;
(4) vesiniksulfiidi sisaldus ei ole suurem kui 1,5 mg/l;
(5) kloriidioonide sisaldus ei ole suurem kui 400 mg/l.
3, mootor on suletud või veega täidetud märgkonstruktsioon, enne kasutamist peab sukelmootori õõnsus olema täis puhast vett, et vältida valetäit, ja seejärel pingutage vee sissepritse, õhuvabastuspolte, muidu pole lubatud kasutada
4, sukelpump peab olema täielikult vette sukeldatud, sukeldumissügavus ei tohi olla suurem kui 70 m, sukelpumba põhi kaevu põhjast on vähemalt 3 m.
5, peaks kaevu veevool vastama sukelpumba veevõimsusele ja pidevale tööle, sukelpumba vee väljundit tuleks reguleerida 0,7–1,2-kordse nimivooluga.
6, kaev peaks olema sirge, sukelpumpa ei saa kasutada ega visata, see on ainult vertikaalne.
7, peab sukelpump olema vastavuses kaabliga vastavalt nõuetele ja välisele ülekoormuskaitseseadmele.
8, pump on rangelt keelatud ilma veeta koormuseta katsemasinata

| Mudel | Vooluhulk (m3/h) | Pea (m) |
Pöörlemiskiirus (muutus/punkt) |
Veepump(%) | Väljalaskeava läbimõõt (mm) |
Hästi rakendatav läbimõõt (mm) |
Hinnatud power(KW) |
Hinnatud pinge (V) |
Hinnatud vool (A) |
Mootori efektiivsus (%) | power factorcosφ | Üksus Radiaalne maksimaalne suurus (mm) |
Märkus | |||||||||
| 250QJ50-40 | 50 | 40 | 2875 | 72 | 80 | 250eespool | 9.2 | 380 | 21.7 | 78.5 | 0.82 | 233 | ||||||||||
| 250QJ50-60 | 60 | 13 | 30.1 | 80.0 | 0.82 | |||||||||||||||||
| 250QJ50-80 | 80 | 18.5 | 40.8 | 82.0 | 0.84 | |||||||||||||||||
| 250QJ50-100 | 100 | 22 | 47.9 | 83.0 | 0.84 | |||||||||||||||||
| 250QJ50-120 | 120 | 25 | 53.8 | 84.0 | 0.84 | |||||||||||||||||
| 250QJ50-140 | 140 | 30 | 64.2 | 84.5 | 0.84 | |||||||||||||||||
| 250QJ50-160 | 160 | 37 | 77.8 | 85.0 | 0.85 | |||||||||||||||||
| 250QJ50-200 | 200 | 45 | 94.1 | 85.5 | 0.85 | |||||||||||||||||
| 250QJ50-240 | 240 | 55 | 114.3 | 86.0 | 0.85 | |||||||||||||||||
| 250QJ50-280 | 280 | 63 | 131.0 | 86.0 | 0.85 | |||||||||||||||||
| 250QJ50-320 | 320 | 75 | 152.3 | 87.0 | 0.86 | |||||||||||||||||
| 250QJ50-400 | 400 | 90 | 182.8 | 87.0 | 0.86 | |||||||||||||||||
| 250QJ50-440 | 440 | 100 | 203.1 | 87.0 | 0.86 | |||||||||||||||||
| 250QJ63-40 | 63 | 40 | 2875 | 74 | 80 | 250eespool | 11 | 380 | 25.8 | 79.0 | 0.82 | 233 | ||||||||||
| 250QJ63-60 | 60 | 18.5 | 40.8 | 82.0 | 0.84 | |||||||||||||||||
| 250QJ63-80 | 80 | 22 | 47.9 | 83.0 | 0.84 | |||||||||||||||||
| 250QJ63-100 | 100 | 30 | 64.2 | 84.5 | 0.84 | |||||||||||||||||
| 250QJ63-120 | 120 | 37 | 77.8 | 85.0 | 0.85 | |||||||||||||||||
| 250QJ63-160 | 160 | 45 | 94.1 | 85.5 | 0.85 | |||||||||||||||||
| 250QJ63-200 | 200 | 55 | 114.3 | 86.0 | 0.85 | |||||||||||||||||
| 250QJ63-220 | 220 | 63 | 131.0 | 86.0 | 0.85 | |||||||||||||||||
| 250QJ63-260 | 260 | 75 | 152.3 | 87.0 | 0.86 | |||||||||||||||||
| 250QJ63-300 | 300 | 90 | 182.8 | 87.0 | 0.86 | |||||||||||||||||
| 250QJ63-360 | 360 | 100 | 203.1 | 87.0 | 0.86 | |||||||||||||||||
| 250QJ80-20 | 80 | 20 | 2875 | 75 | 100 | 250eespool | 7.5 | 380 | 18.0 | 78.0 | 0.81 | 233 | ||||||||||
| 250QJ80-40 | 40 | 15 | 33.9 | 81.0 | 0.83 | |||||||||||||||||
| 250QJ80-60 | 60 | 22 | 47.9 | 83.0 | 0.84 | |||||||||||||||||
| 250QJ80-80 | 80 | 30 | 64.2 | 84.5 | 0.84 | |||||||||||||||||
| 250QJ80-100 | 100 | 37 | 77.8 | 85.0 | 0.85 | |||||||||||||||||
| 250QJ80-120 | 120 | 45 | 94.1 | 85.5 | 0.85 | |||||||||||||||||
| 250QJ80-160 | 80 | 160 | 2875 | 75 | 100 | 250eespool | 55 | 380 | 114.3 | 86.0 | 0.85 | 233 | ||||||||||
| 250QJ80-180 | 180 | 63 | 131.0 | 86.0 | 0.85 | |||||||||||||||||
| 250QJ80-200 | 200 | 75 | 152.3 | 87.0 | 0.86 | |||||||||||||||||
| 250QJ80-240 | 240 | 90 | 182.8 | 87.0 | 0.86 | |||||||||||||||||
| 250QJ80-280 | 280 | 100 | 203.1 | 87.0 | 0.86 | |||||||||||||||||
| 250QJ100-18 | 100 | 18 | 2875 | 75 | 100 | 250eespool | 7.5 | 380 | 18.0 | 78.0 | 0.81 | 233 | ||||||||||
| 250QJ100-36 | 36 | 15 | 33.9 | 81.0 | 0.83 | |||||||||||||||||
| 250QJ100-54 | 54 | 25 | 53.8 | 84.0 | 0.84 | |||||||||||||||||
| 250QJ100-72 | 72 | 30 | 64.2 | 84.5 | 0.84 | |||||||||||||||||
| 250QJ100-90 | 90 | 37 | 77.8 | 85.0 | 0.85 | |||||||||||||||||
| 250QJ100-108 | 108 | 45 | 94.1 | 85.5 | 0.85 | |||||||||||||||||
| 250QJ100-126 | 126 | 55 | 114.3 | 86.0 | 0.85 | |||||||||||||||||
| 250QJ100-144 | 144 | 63 | 131.0 | 86.0 | 0.85 | |||||||||||||||||
| 250QJ100-162 | 162 | 75 | 152.3 | 87.0 | 0.86 | |||||||||||||||||
| 250QJ100-198 | 198 | 90 | 182.8 | 87.0 | 0.86 | |||||||||||||||||
| 250QJ100-216 | 216 | 100 | 203.1 | 87.0 | 0.86 | |||||||||||||||||
| 250QJ125-16 | 125 | 16 | 2875 | 76 | 125 | 250eespool | 9.2 | 380 | 21.7 | 78.5 | 0.82 | 233 | ||||||||||
| 250QJ125-32 | 32 | 18.5 | 40.8 | 82.0 | 0.84 | |||||||||||||||||
| 250QJ125-48 | 48 | 25 | 53.8 | 84.0 | 0.84 | |||||||||||||||||
| 250QJ125-64 | 64 | 37 | 77.8 | 85.0 | 0.85 | |||||||||||||||||
| 250QJ125-80 | 80 | 45 | 94.1 | 85.5 | 0.85 | |||||||||||||||||
| 250QJ125-96 | 96 | 55 | 114.3 | 86.0 | 0.85 | |||||||||||||||||
| 250QJ125-112 | 112 | 63 | 131.0 | 86.0 | 0.85 | |||||||||||||||||
| 250QJ125-128 | 128 | 75 | 152.3 | 87.0 | 0.86 | |||||||||||||||||
| 250QJ125-160 | 160 | 90 | 182.8 | 87.0 | 0.86 | |||||||||||||||||
| 250QJ125-176 | 176 | 100 | 203.1 | 87.0 | 0.86 | |||||||||||||||||
| 250QJ125-192 | 192 | 110 | 219.6 | 87.5 | 0.87 | |||||||||||||||||
| 250QJ140-15 | 140 | 15 | 2875 | 76 | 125 | 250eespool | 9.2 | 380 | 21.7 | 78.5 | 0.82 | 233 | ||||||||||
| 250QJ140-30 | 30 | 18.5 | 40.8 | 82.0 | 0.84 | |||||||||||||||||
| 250QJ140-45 | 45 | 30 | 64.2 | 84.5 | 0.84 | |||||||||||||||||
| 250QJ140-60 | 60 | 37 | 77.8 | 85.0 | 0.85 | |||||||||||||||||
| 250QJ140-75 | 45 | 45 | 94.1 | 85.5 | 0.85 | |||||||||||||||||
| 250QJ140-90 | 90 | 55 | 114.3 | 86.0 | 0.85 | |||||||||||||||||
| 250QJ140-105 | 140 | 105 | 2875 | 76 | 125 | 250eespool | 63 | 380 | 131.0 | 86.0 | 0.85 | 233 | ||||||||||
| 250QJ140-120 | 120 | 75 | 152.3 | 87.0 | 0.86 | |||||||||||||||||
| 250QJ140-150 | 150 | 90 | 182.8 | 87.0 | 0.86 | |||||||||||||||||
| 250QJ140-165 | 165 | 100 | 203.1 | 87.0 | 0.86 | |||||||||||||||||
| 250QJ140-180 | 180 | 110 | 219.6 | 87.5 | 0.87 | |||||||||||||||||
| 250QJ200-20 | 200 | 20 | 2875 | 75 | 150 | 250eespool | 18.5 | 380 | 40.8 | 82.0 | 0.84 | 233 | ||||||||||
| 250QJ200-40 | 40 | 37 | 77.8 | 85.0 | 0.85 | |||||||||||||||||
| 250QJ200-60 | 60 | 55 | 114.3 | 86.0 | 0.85 | |||||||||||||||||
| 250QJ200-80 | 80 | 75 | 152.3 | 87.0 | 0.86 | |||||||||||||||||
| 250QJ200-100 | 100 | 90 | 182.8 | 87.0 | 0.86 | |||||||||||||||||
| 250QJ200-120 | 120 | 100 | 203.1 | 87.0 | 0.86 | |||||||||||||||||
| 250QJ200-140 | 140 | 125 | 249.5 | 87.5 | 0.87 | |||||||||||||||||
1, well submersible pump for clean water pump, prohibit the new well, pumping sediment and muddy water,
2, well water pump voltage grade of 380/50HZ, the use of other voltage grades of submersible motors need to be customized. The underground cable must use waterproof cable, must be equipped with starting equipment, such as distribution box, start not ready should have commonly used motor comprehensive protection function, such as short circuit overload protection, phase protection, undervoltage protection, grounding protection, idling protection, in case of abnormal conditions, the protection device should be timely action trip.
3, the installation and use of the pump must be reliably grounded, prohibit the push and pull switch when the hands and feet are wet, the installation and maintenance of the pump must be cut off the power supply, the use of the pump place to set up "to prevent electric shock" obvious signs:
4, down the well or before installation, the motor cavity must be filled with distilled water or non-corrosive clean cold boiling water, tighten the / water bolt, the pump on the ground test run, must be to the pump chamber water lubrication rubber bearings, instant start not more than a second, see whether the steering is the same as the steering instructions. When the pump is upright, pay attention to safety, prevent overturning injury.
5, rangelt vastavalt pumba tõste, vooluhulga kasutusala sätetele, et vältida väikese voolu või suure tõstejõu pumpamisjõudu, tõukelaagrit ja muid kulumise osi, mootori ülekoormust põles.
6, after the pump down the well, the measurement of the motor to the ground insulation resistance should not be less than 100M, after the start to observe the voltage and current, check the motor winding insulation, whether in line with the requirements; pump storage location temperature if less than freezing point, should be dry the motor cavity water, prevent the motor cavity water ice damage caused by low temperature.
The introduction and structure of this pump product mainly include pump shaft, impeller, shunt shell, rubber bearing, check valve body (optional) and other components. The motor part is mainly composed of base, pressure regulating diaphragm, thrust bearing, thrust plate, lower guide bearing seat, stator, rotor, upper guide bearing seat, sand ring, water inlet section, lead cable and other components. The main characteristics of this pump product include the use of water-cooled wet submersible three-phase asynchronous motor, the motor cavity is filled with clean water to cool the motor and lubricate the bearing, the pressure regulating diaphragm at the bottom is used to adjust the expansion and contraction pressure difference of the internal water caused by the change of the temperature rise of the motor. In order to prevent the sand particles in the well water from entering the motor, two oil seals are installed on the upper end of the motor shaft extension, and the sand ring is installed to form a sand prevention structure. In order to avoid the pump shaft jumping at startup, the pump shaft and the motor shaft are connected together through the coupling, and the thrust bearing is installed at the lower part of the motor. The motor and pump bearing lubrication adopts water lubrication. The stator winding of the motor adopts high quality submersible motor winding, with high insulation performance. The pump adopts computer CAD design, simple structure and superior technical performance.

(1) Ettevalmistus enne paigaldamist:
1. Kontrollige, kas sukelpump vastab juhendis toodud kasutustingimustele ja ulatusele.
2. Mõõtke sukelpumba maksimaalse välisläbimõõduga võrdväärse läbimõõduga rasket objekti kasutades, kas puuraugu siseläbimõõt sobib sukelpumbale, ja mõõtke, kas kaevu sügavus vastab paigaldusnõuetele.
3. Kontrollige, kas puurkaev on puhas ja kas kaevu vesi on hägune. Ärge kunagi kasutage sukelduspumba muda ja liivavee pesemiseks elektrilist sukelpumpa, et vältida sukelaparaadi elektripumba enneaegset kahjustamist.
4. Kontrollige, kas keevispea paigaldusklambri asend on sobiv ja kas see peab vastu kogu seadme kvaliteedile
5. Kontrollige, kas sukelpumba komponendid on komplekteeritud ja õigesti paigaldatud vastavalt juhendis olevale montaažiskeemile. Eemaldage filtriekraan ja pöörake sidurit, et näha, kas see pöörleb paindlikult.
6. Keerake lahti veekruvi ja täitke mootori õõnsus puhta, mittesöövitava veega (märkus. täitke see kindlasti üles), seejärel pingutage veekruvi. Pärast 12-tunnist vee sissepritsemist ei tohiks mootori isolatsioonitakistus olla väiksem kui 150 M Q, mõõdetuna 500 V raputuslauaga.
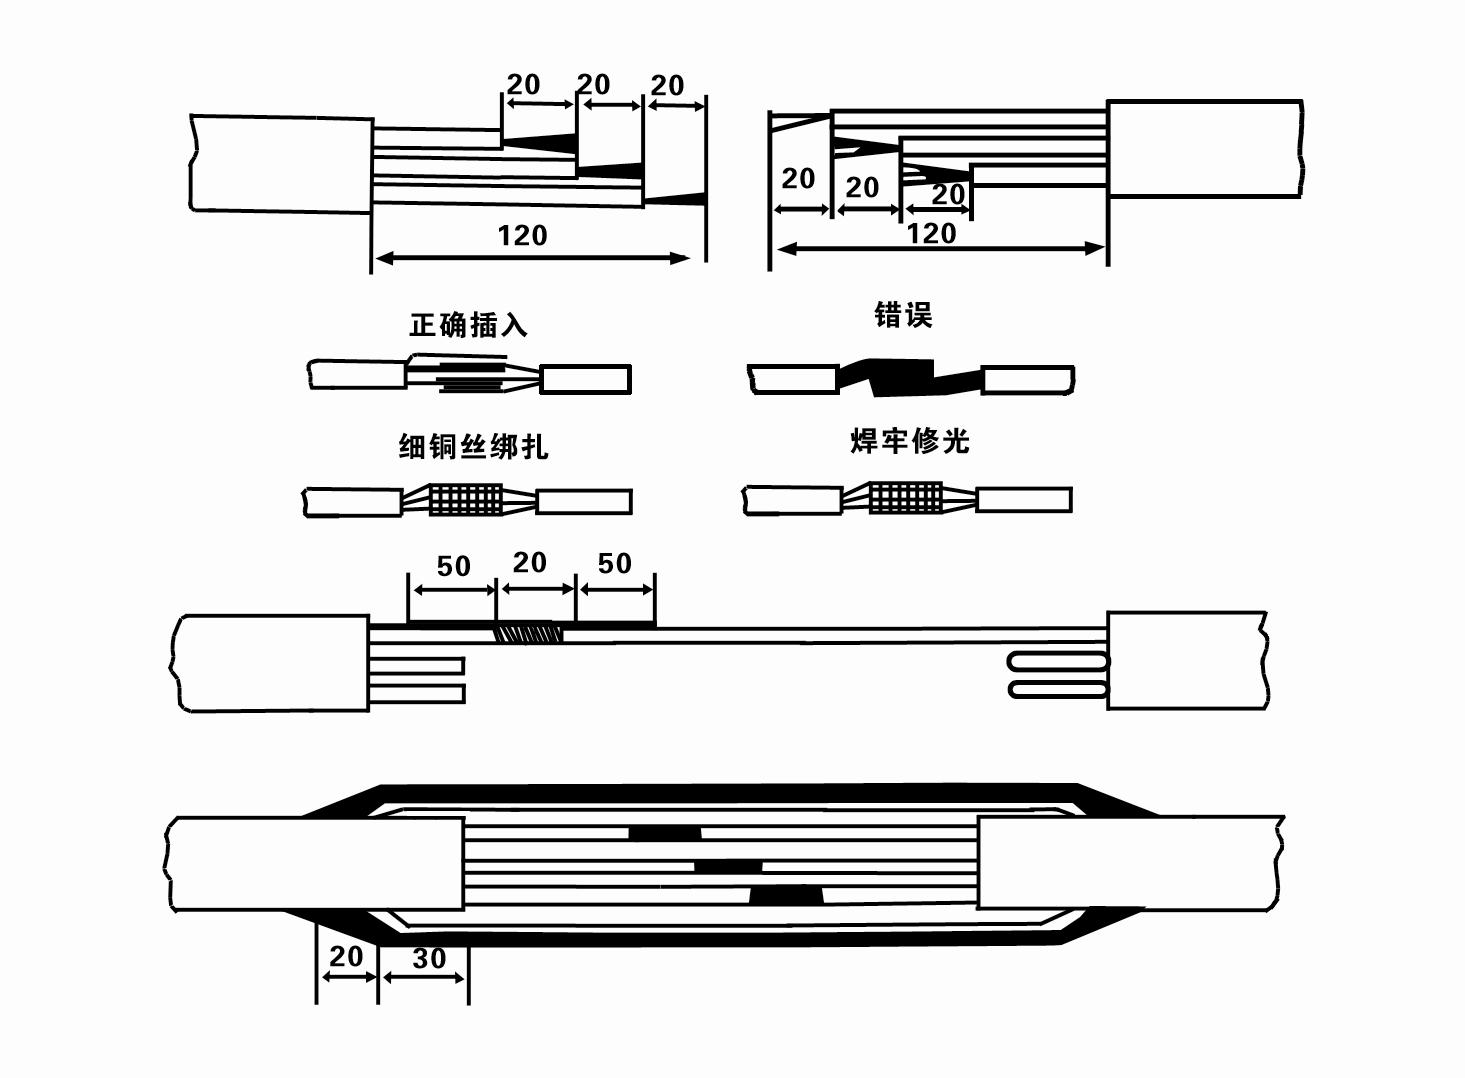
7. Cable joint, cut off a 120mm rubber sleeve from one end of the outgoing cable and the matching cable with an electrician's knifethen stagger the length of the three core wires in a stepped shape, peel off a 20mm copper core, scrape of the oxide layer on theoutside of the copper wire with a knife or sand cloth, and insert the two connected wire ends in palirs.After tying the layer tightly with fine copper wire, solder it thoroughly and firmly, and sand of any. burrs on the surface. Then, forthe three joints, use polyvester insulation tape to wrap them in a semi stacked manner for three lavers. Wrap the two ends of thewrapping layer tightywith nyion thread,and then use a semi stacked method to wrap the tape for three layers. Wrap the outellayer with high-pressure insulation tape for three layers. Finally, fold the threestrands together and repeatedly wrap them for fivelayers with high-pressure tape. Each layer must be tightly tied, and the interlayer joints must be tight and fimm to prevent water frompenetrating and damaging the insulation, After wrapping, soak in water at room temperature of 20 ’c for 12 hours, and measurethe insulation resistance with a shaking table, which should not be less than 100M Ω
Lisatud kaabli juhtmestiku protsessiskeem on järgmine:
8. Kontrollige multimeetriga, kas kolmefaasilised juhtmed on ühendatud ja kas alalisvoolu takistus on ligikaudu tasakaalustatud.
9. Kontrollige, kas vooluahel ja trafo võimsus on ülekoormatud, ja seejärel ühendage ülekoormuskaitse lüliti või käivitusseade. Konkreetsete mudelite kohta vaadake tabelist 2 ja seejärel valage veepumba väljalaskeavast ämber vett, et määrida pumba kummilaagrid, ja asetage sukelelektripump püsti ja kindlalt. Käivitage (mitte rohkem kui üks sekund) ja kontrollige, kas roolimissuund on kooskõlas roolimärgiga. Kui ei, siis vahetage kolmefaasilise kaabli kaks pistikut. Seejärel paigaldage filter ja valmistuge kaevu laskumiseks. Erijuhtudel (nt kraavid, kraavid, jõed, tiigid, tiigid jne) kasutamisel peab elektripump olema usaldusväärselt maandatud.
(2) Paigaldusseadmed ja tööriistad:
1. Üks paar tõstekette rohkem kui kahe tonni jaoks.
2. Statiiv vertikaalse kõrgusega vähemalt neli meetrit.
3. Kaks riputustrossi (traattrossi), mis taluvad rohkem kui ühe tonni raskust (kannavad veepumpade komplekti raskust).
4. Paigaldage kaks paari klambreid (lahasid).
5. Mutrivõtmed, vasarad, kruvikeerajad, elektrilised tööriistad ja instrumendid jne.
(3) Elektripumba paigaldamine:
1. Sukelduva elektripumba paigaldusskeem on näidatud joonisel 2. Konkreetsed paigaldusmõõtmed on näidatud tabelis 3 "Sukelaparaadi elektripumba paigaldusmõõtmete loend".
2. Alla 30-meetrise kõrgusega sukelelektripumbad saab tõsta otse kaevu voolikute ja terastrosside või muude kanepitrosside abil, mis kannavad kogu masina, veetorude ja torudes oleva vee täismassi.
3. Pumbad, mille kõrgus on üle 30 meetri, kasutavad terastorusid ja paigaldusjärjestus on järgmine:
① Kasutage klambrit, et kinnitada veepumba osa ülemine ots (mootor ja veepump on sel ajal ühendatud), tõstke see rippuva ketiga üles ja siduge aeglaselt kaevu, kuni pange klamber kaevupea külge ja eemaldage rippuv kett.
② Kasutage toru kinnitamiseks teist paari klambreid, tõstke see rippketiga äärikust 15 cm kaugusele ja langetage aeglaselt. Toruääriku ja pumba ääriku vahele Asetage kummipadi paika ning pingutage toru ja pump ühtlaselt poltide, mutrite ja vedruseibidega.
③ Tõstke sukelpumpa veidi üles, eemaldage veepumba ülemise otsa klamber, siduge kaabel plastlindiga kindlalt veetoru külge ja kinnitage see aeglaselt alla, kuni klamber asetatakse kaevupea külge.
④ Kasutage sama meetodit kõigi veetorude ühendamiseks kaevu.
⑤Pärast väljundkaabli ühendamist juhtlülitiga ühendatakse see kolmefaasilise toiteallikaga.
(4) Asjad, mida paigaldamise ajal tähele panna:
1. Kui pumpamise ajal avastatakse kinnikiilumine, keerake või tõmmake veetoru, et ummistuspunktist üle saada. Kui erinevad meetmed ikka ei tööta, ärge suruge pumpa jõuga alla, et vältida sukelduspumba ja kaevu kahjustamist.
2. Paigaldamise ajal tuleb iga toru ääriku juurde asetada kummist padi ja see ühtlaselt pingutada.
3. Kui veepump on langetatud kaevu, tuleb see asetada kaevu toru keskele, et pump ei töötaks pikka aega vastu kaevu seina, põhjustades pumba vibratsiooni ja mootori pühkima ja põlema. .
4. Määrake veepumba sügavus kaevu põhjani vastavalt kaevu voolava liiva ja muda tingimustele. Ärge matke pumpa muda sisse. Kaugus veepumbast kaevu põhjani ei ole üldjuhul väiksem kui 3 meetrit (vt joonis 2).
5. Veepumba vee sisenemise sügavus ei tohiks olla väiksem kui 1-1,5 meetrit dünaamilise veetasemest vee sisselaskesõlmeni (vt joonis 2). Vastasel juhul võivad veepumba laagrid kergesti kahjustada saada.
6. Veepumba tõstejõud ei tohi olla liiga madal. Vastasel juhul tuleb kaevupea veetorustikule paigaldada tõukeventiil, mis juhib pumba voolu nimivoolupunktis, et vältida mootori ülekoormamist ja läbipõlemist suurte vooluhulkade tõttu.
7. Kui veepump töötab, peab vee väljund olema pidev ja ühtlane, vool peab olema stabiilne (nimitöötingimustes, üldjuhul mitte rohkem kui 10% nimivoolust) ning ei tohiks olla vibratsiooni ega müra. Kui esineb kõrvalekaldeid, tuleb masin peatada, et põhjus välja selgitada ja see kõrvaldada.
8. Paigaldamisel pöörake tähelepanu mootori maandusjuhtme seadistusele (vt joonis 2). Kui veetoru on terastoru, viige see kaevupea klambrist; kui veetoru on plasttoru, juhtige see elektripumba maandusmärgist.
After the installation of the underwater pump, the insulation resistance and three-phase continuity of the switch face should be rechecked, and the connection between the instrument and the start device should be checked for any errors. If there is no problem, you can start to test the machine. After the start, observe whether the indication readings of each instrument are correct. If the rated voltage and current specified on the nameplate are exceeded, observe whether the pump has noise or vibration. If everything is normal, it can be put into operation. After the first operation of the pump for four hours, the motor should be shut down and tested for thermal insulation resistance quickly. Its value should not be less than 0.5 megaohm. After stopping the pump, it should be restarted after an interval of five minutes to prevent the water column in the pipeline from completely reversing and causing the motor to burn out due to excessive current. After the pump is put into normal operation, in order to prolong its service life, it is necessary to check regularly whether the supply voltage, running current and insulation resistance are normal. If the following conditions are found, the machine should be shut down immediately to eliminate the fault: the current exceeds 20% under rated working conditions; the dynamic water level drops to the inlet section, resulting in intermittent drainage; the underwater pump becomes violently vibrating or making noise; the supply voltage is lower than 340 volts; a fuse is blown out; the water pipe is damaged; the motor's thermal insulation resistance to the earth is less than 0.5 megaohm. The sequence of disassembly is: untie the cable fastening, remove the pipeline part, remove the line protection plate, screw down the water discharge bolt and discharge all the water in the motor chamber, remove the filter and loosen the coupling fixing screw of the motor shaft. The sequence of disassembly of the pump is: (see Figure 1) inlet section, impeller, guide housing, impeller, check the valve body. When removing the impeller, use special tools to loosen the taper sleeve of the impeller. Avoid bending the pump shaft and damaging the components throughout the process. The disassembly process of the motor is: (see Figure 1) put the motor on the platform, and remove the bolts, base, shaft head lock nut, thrust plate, key, lower guide plate (transverse bolt), bearing seat, screw knife seat from the bottom of the motor in order (take care not to damage the winding), and finally remove the connecting part and the upper guide bearing seat. Before assembling the unit, the rust and dirt of each part should be cleaned, and the sealant should be applied to each mating surface and fastener, and then assembled in reverse order of disassembly (the movement of the motor shaft after assembly is about one millimeter). After assembly, the coupling should be rotated flexibly and put on the filter for test. Once a year, or if less than a year of operation but has been immersed for two years, the underwater electric pump must be disassembled for maintenance in accordance with Article 5 and replace worn parts to ensure the normal operation and durability of the pump.
1, kustutage vesi mootori õõnsusest (eriti talvel, et mootor ei külmuks) ja ühendage kaabel hästi.
2, store in an indoor room without corrosive substances and gases, with a temperature below 40 °C.
3, pikaajaline kasutamine peaks pöörama tähelepanu sukelpumpade roostetõrjele.
- Tööratas
- Võlli varrukas
- Kummist võlli varrukas
-
Tihendusrõngas
01 Süvakaevu veevõtt
02 Kõrghoone veevarustus
03 mäe veevarustus
04 torni vesi
05 Põllumajanduslik niisutus
06 aia kastmine
07 jõe veevõtukoht
08 tarbevesi


